Raised Relief Maps
What is a Raised Relief Map?
We build 3D Raised Relief Maps
Table of Contents
Raised Relief Maps
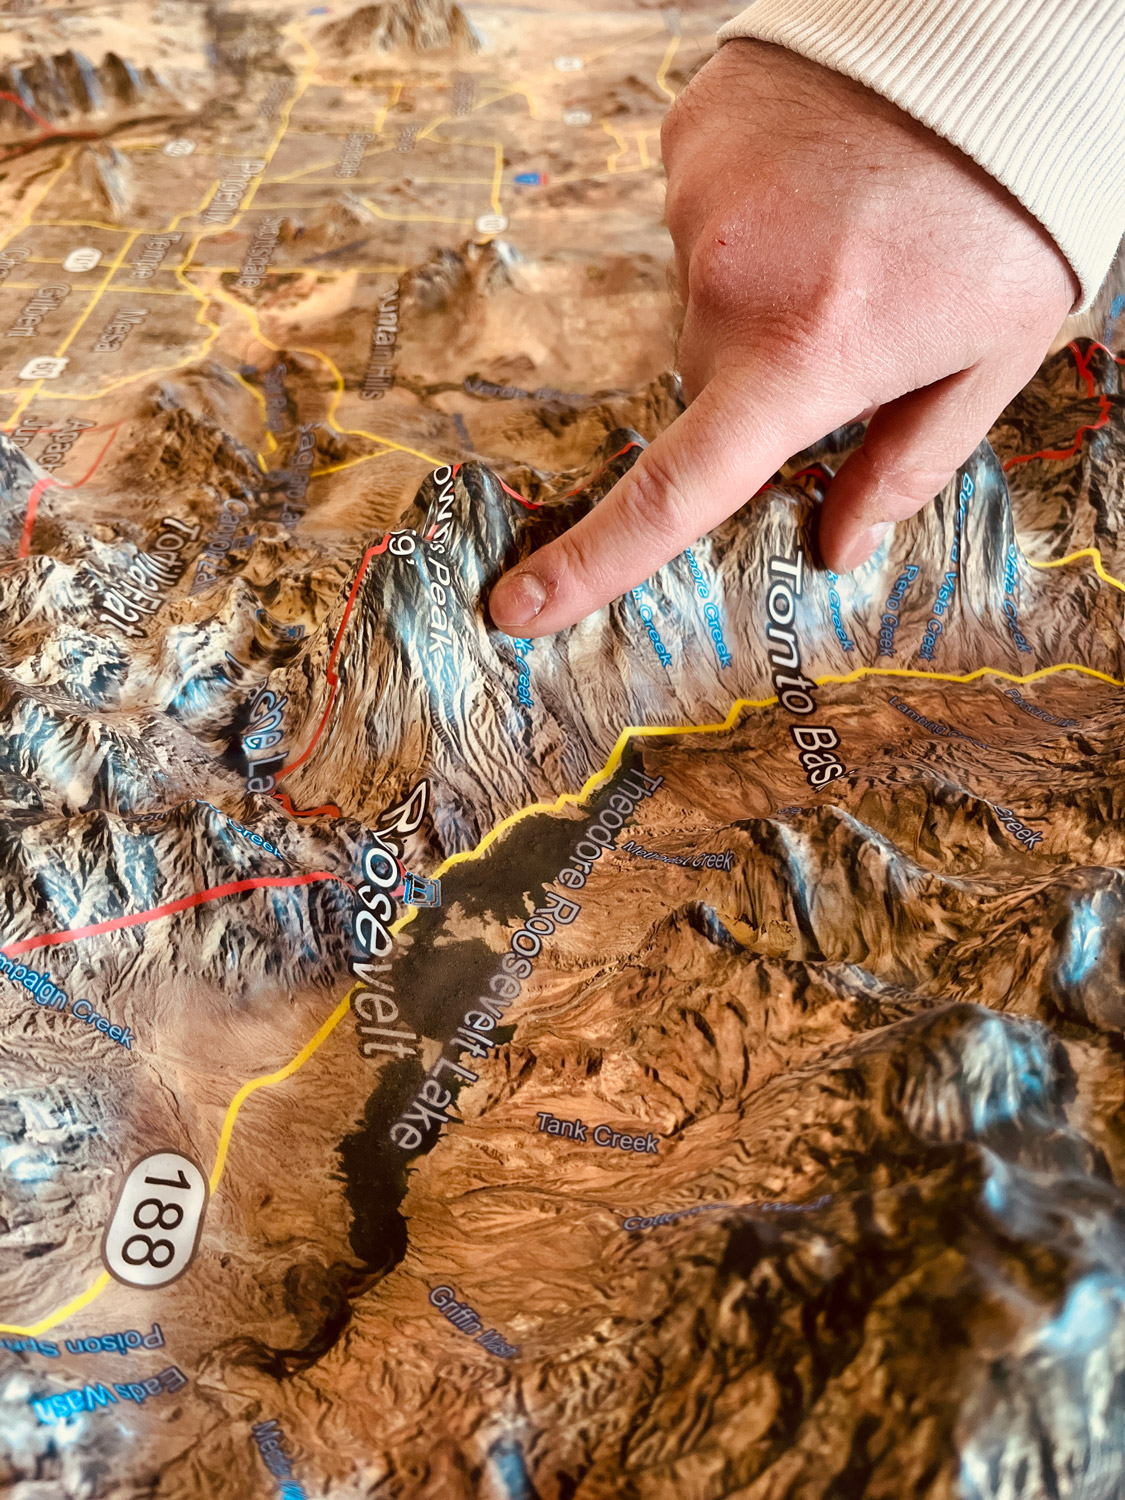
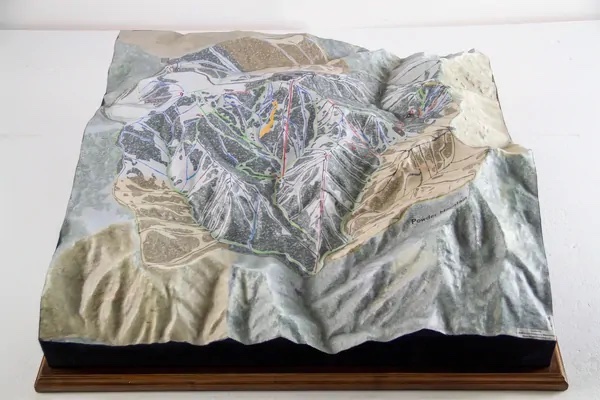
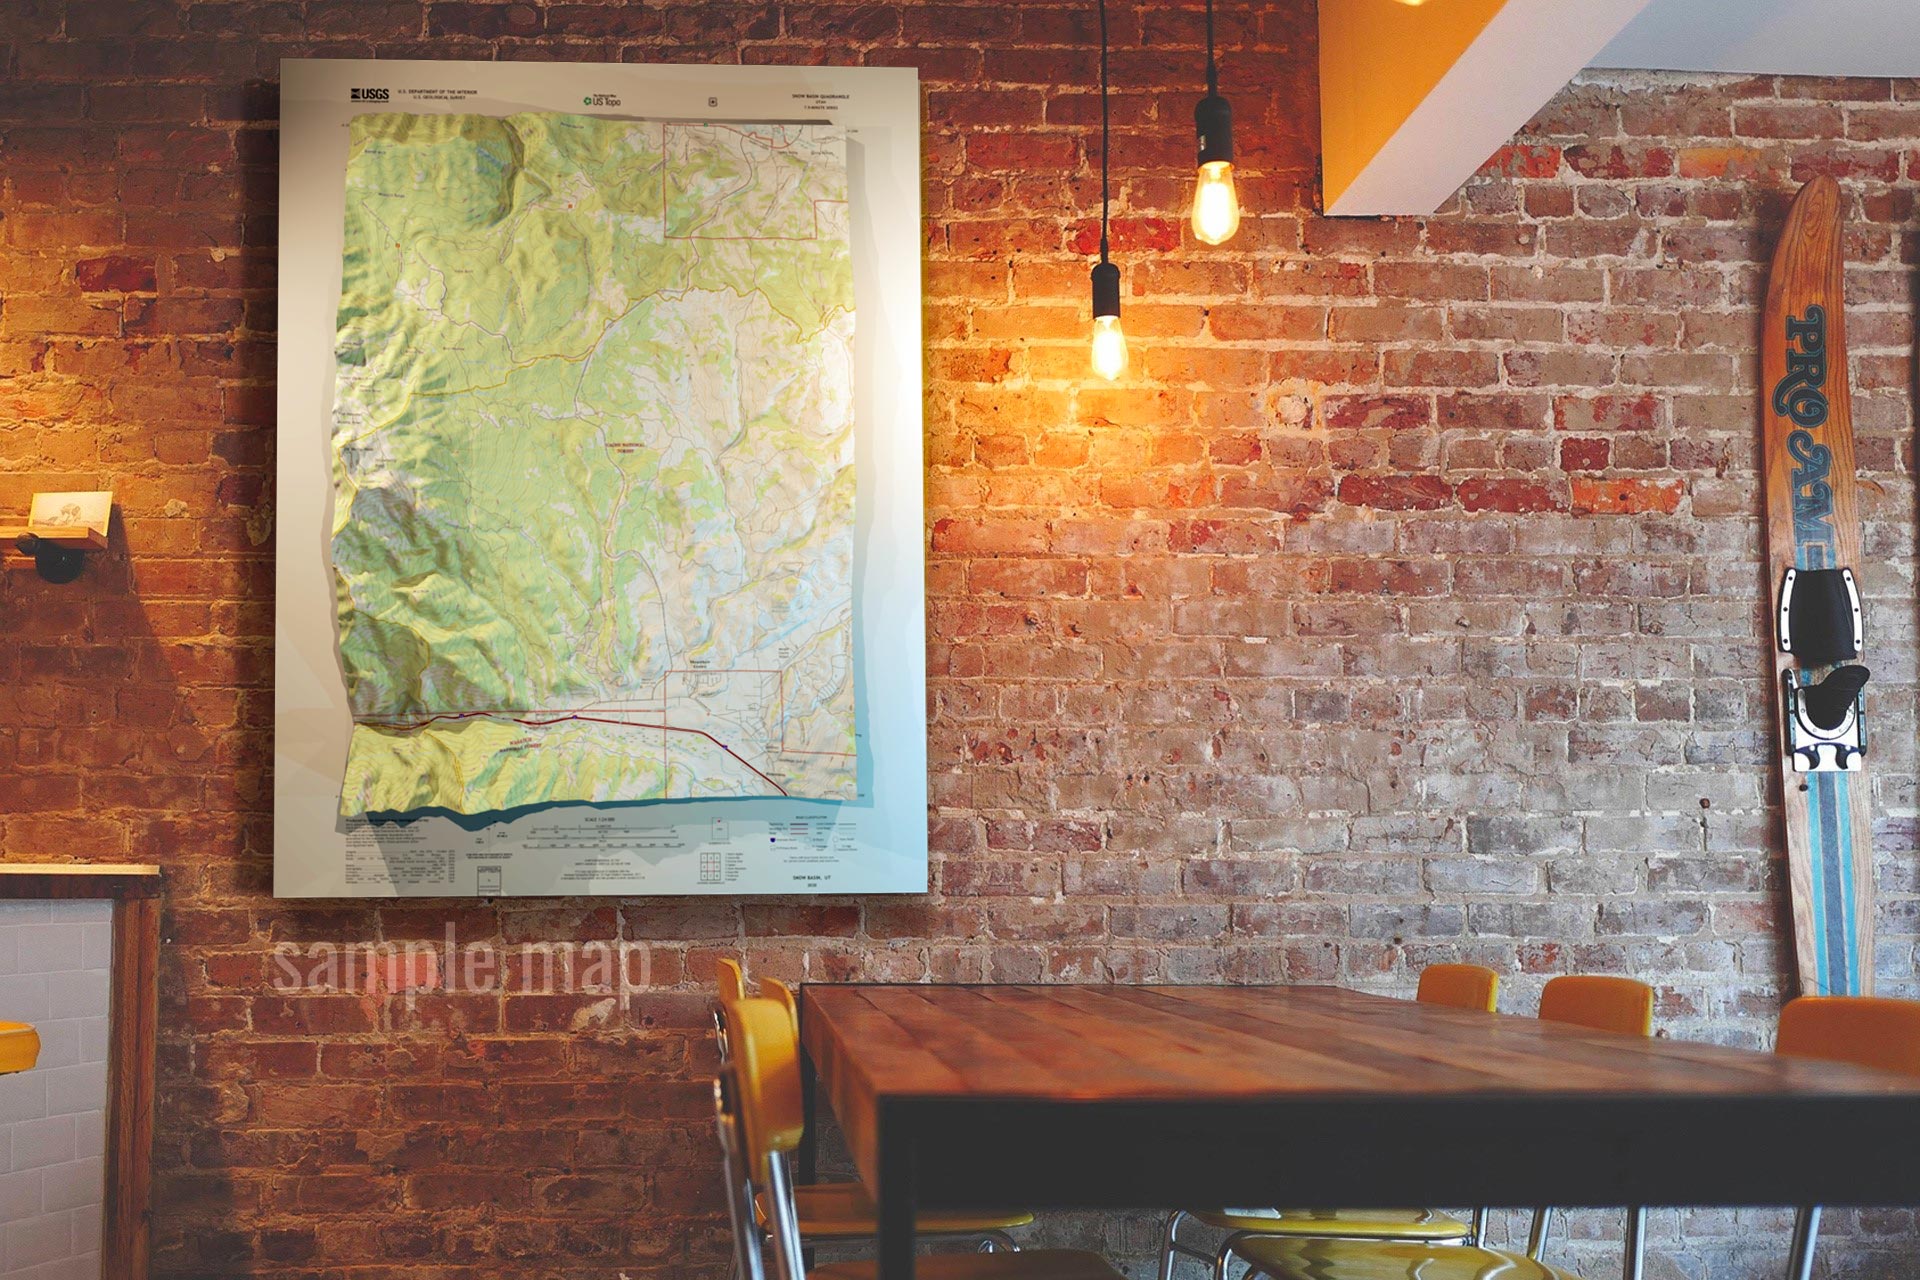
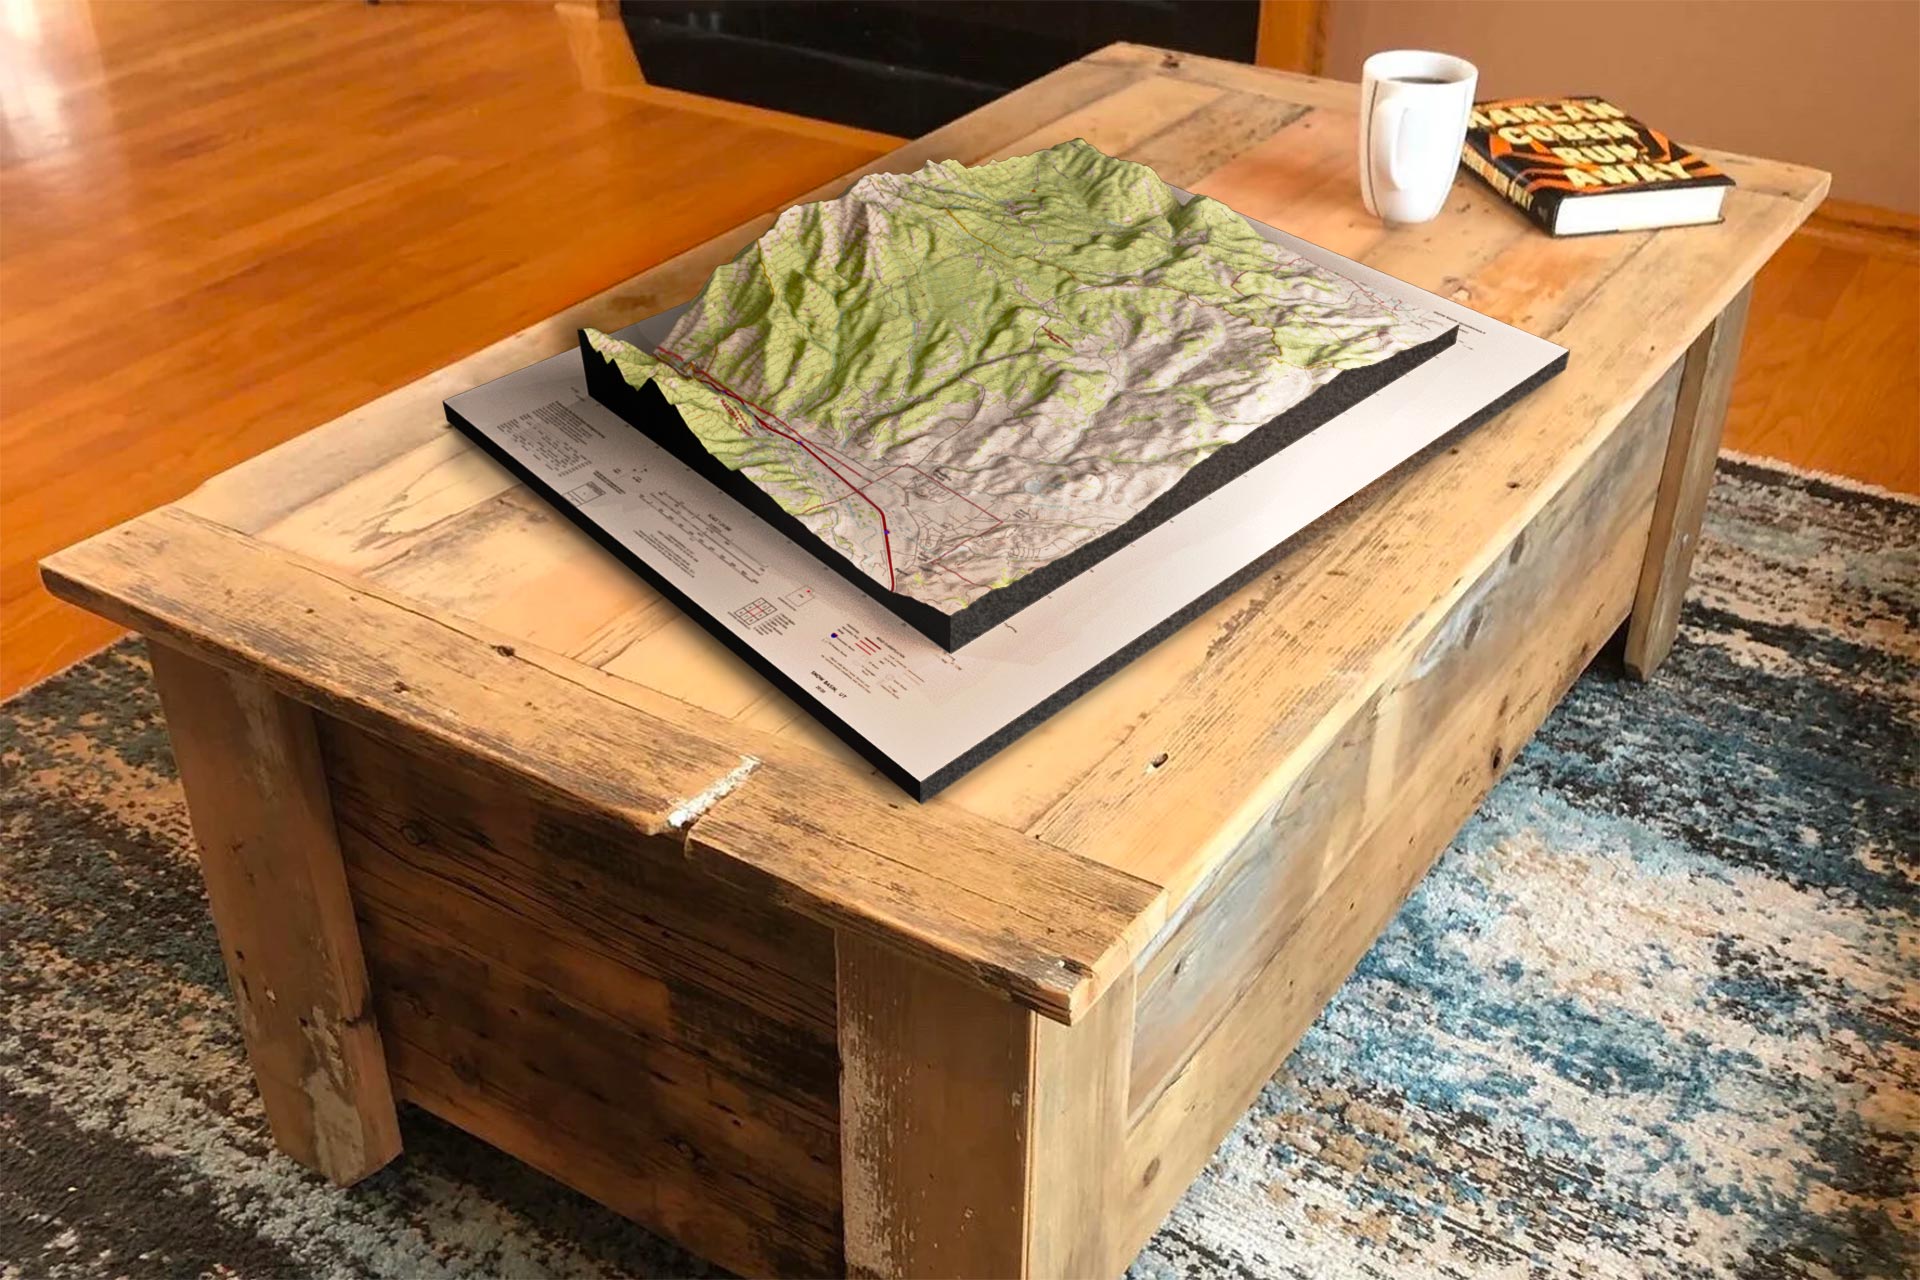
Raised relief maps are three-dimensional maps that are designed to show the topography of an area. Imagine being able to explore the grandeur of the Rocky Mountains, the vast expanse of the Grand Canyon, or the rugged coastline of California. Raised relief maps bring these natural wonders to life, allowing you to feel as if you are truly there, scaling the peaks and valleys with every glance. These maps are made by taking a two-dimensional map and using special techniques to add height and depth to it. Sometimes that height is exagerated. The result is a map that shows the contours and elevations of an area in a way that is much more realistic and easier to understand than a standard flat map.
Maps are essential tools for understanding the physical and cultural landscape of the world. They provide us with a detailed and accurate representation of the world, and have been used for centuries for navigation, exploration, and research. Maps come in different types and styles, and raised relief maps are one of the most popular ones.
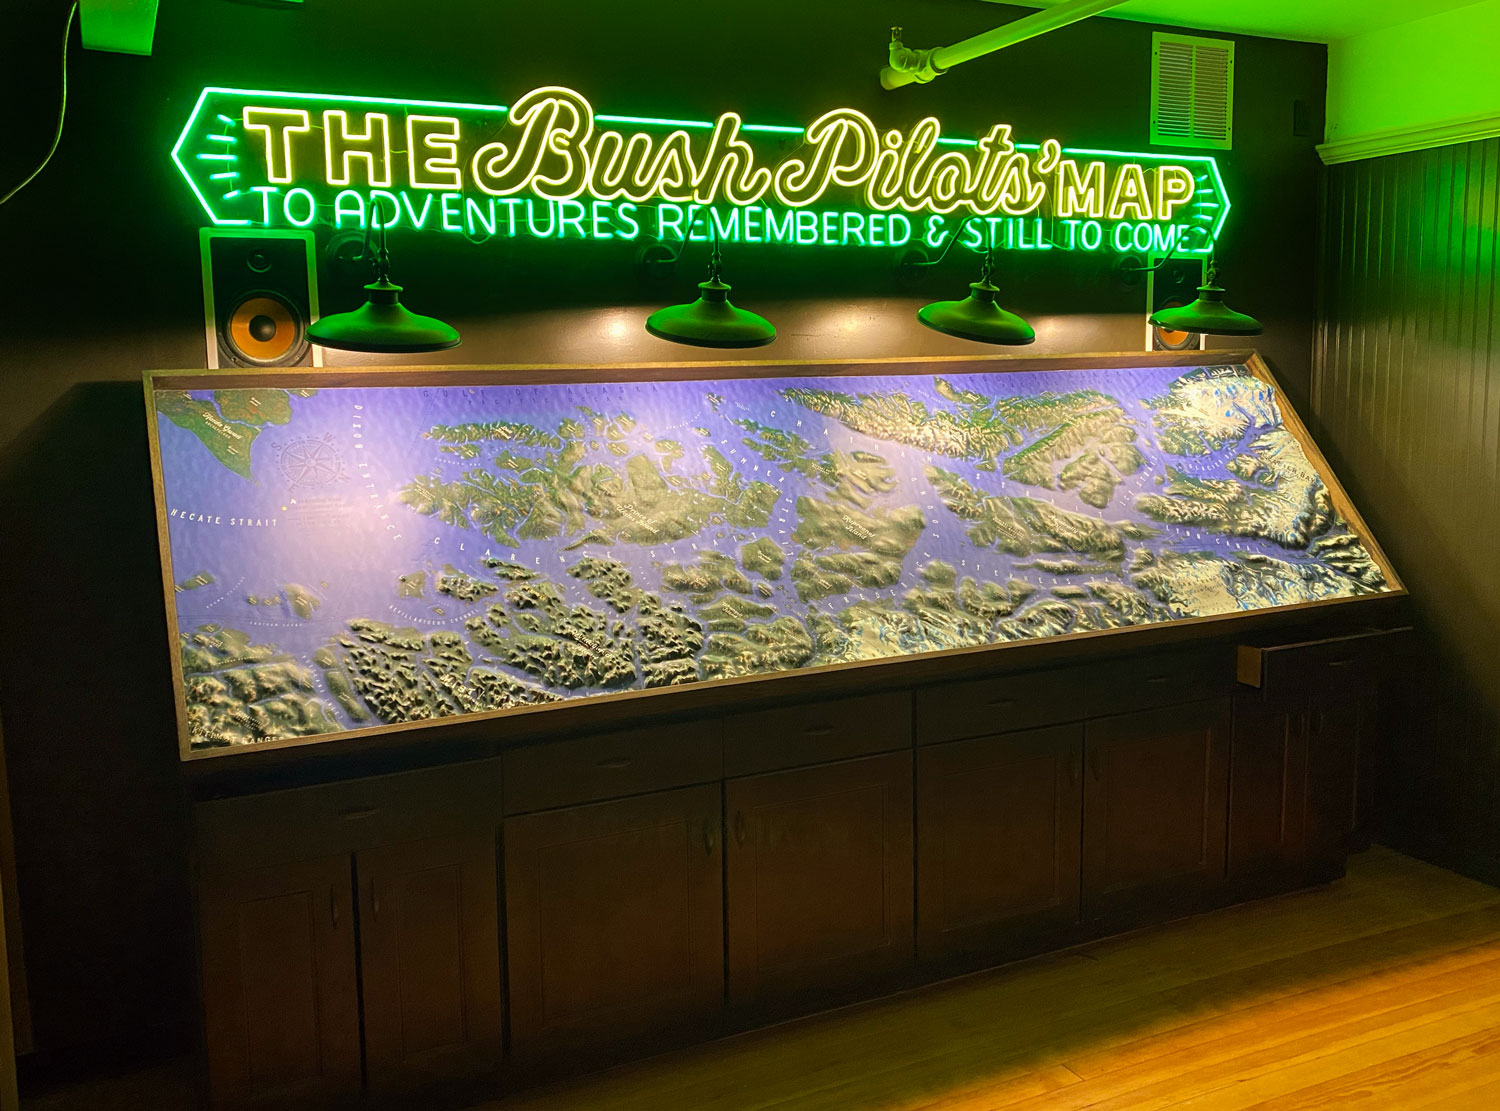
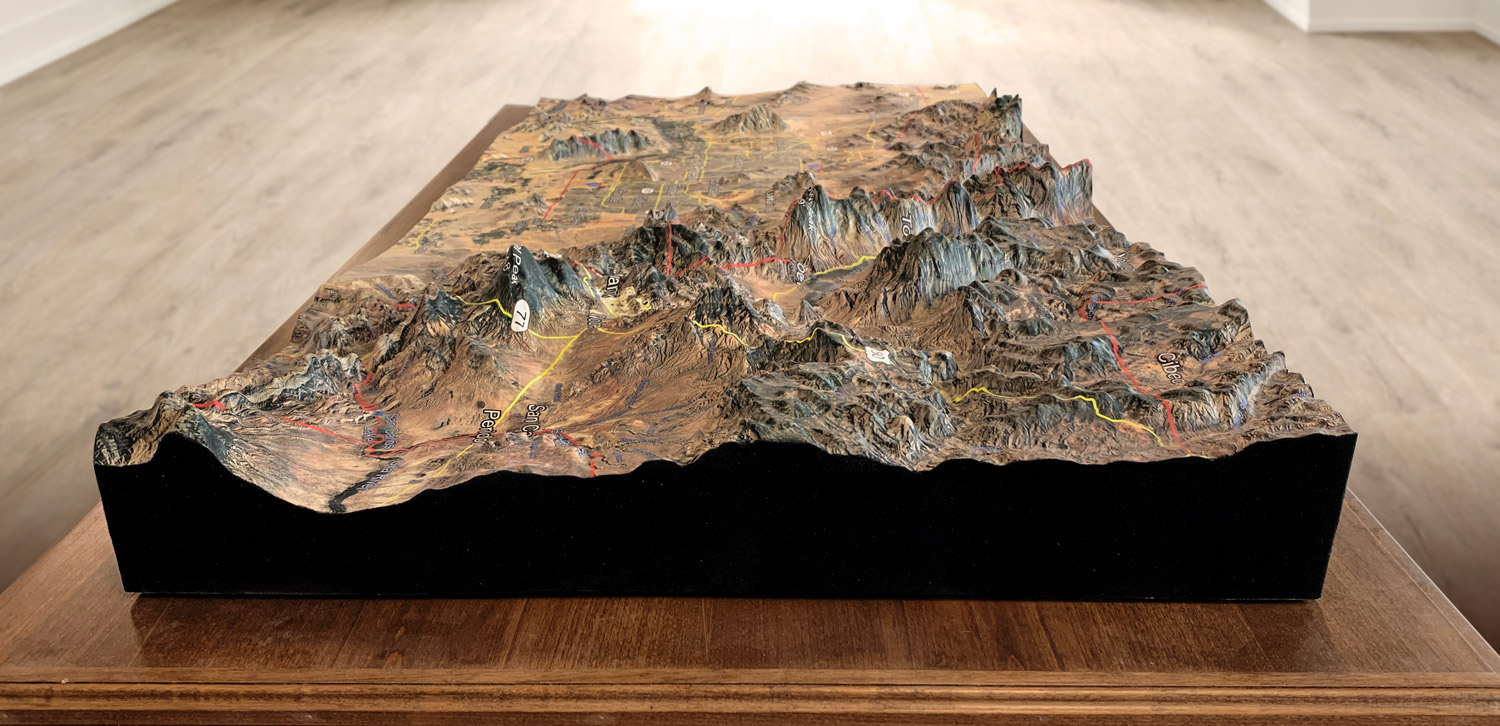
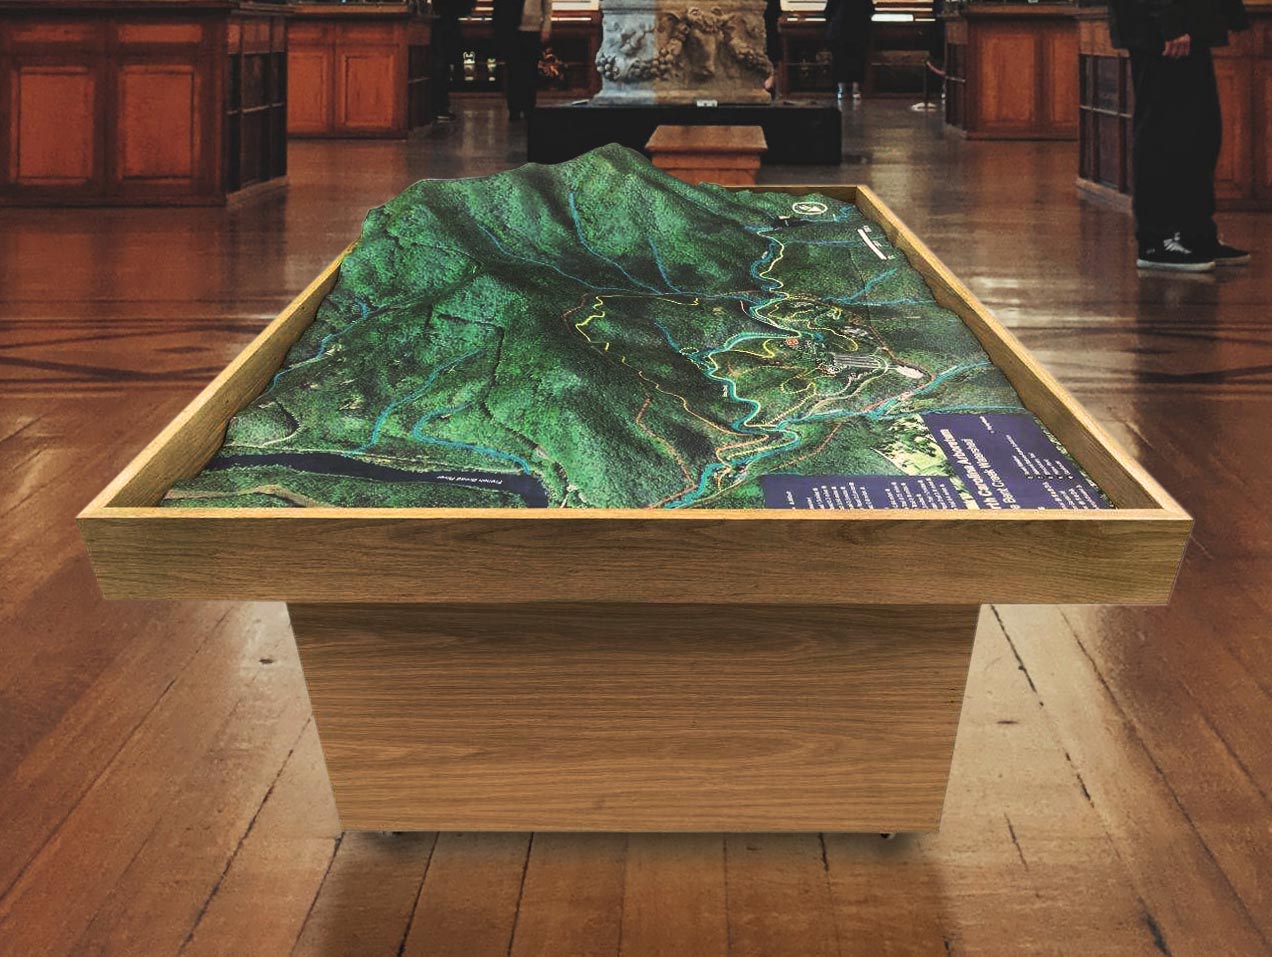
These 3D maps are usually made of plastic or resin, and are 3D printed or molded to replicate the topography of a particular area. They can be small enough to fit in a hand or large enough to cover an entire wall or to be the focal point in a museum-type setting. The maps are often fabricated with different colors to represent different types of terrain, such as green for forests, brown for mountains, and blue for water.
Raised relief maps have many important uses and benefits. Some of these include:
- Visualization: Raised relief maps provide a much clearer and more accurate visualization of the topography of an area than flat maps. This makes them an invaluable tool for planning and navigation.
- Education: Raised relief maps are often used in schools and museums to teach geography and geology. They provide a hands-on way for students to learn about the physical landscape of the world.
- Recreation: Raised relief maps are popular with hikers, campers, and other outdoor enthusiasts. They provide a way to explore and plan trips to new areas, and to better understand the topography of the land.
- Military: Raised relief maps are used by military strategists to plan troop movements and to study the terrain of enemy territories. They are an important tool for military planning and strategy.
- Urban planning: Raised relief maps can be used by city planners to better understand the topography of an area and to plan infrastructure projects such as roads, bridges, and buildings.
- Disaster planning: Raised relief maps are also useful for disaster planning and response. They can be used to identify areas that are at risk of flooding, landslides, or other natural disasters.
Gallery of Custom Raised Relief Projects
Gallery of eCommerce Raised Relief Maps
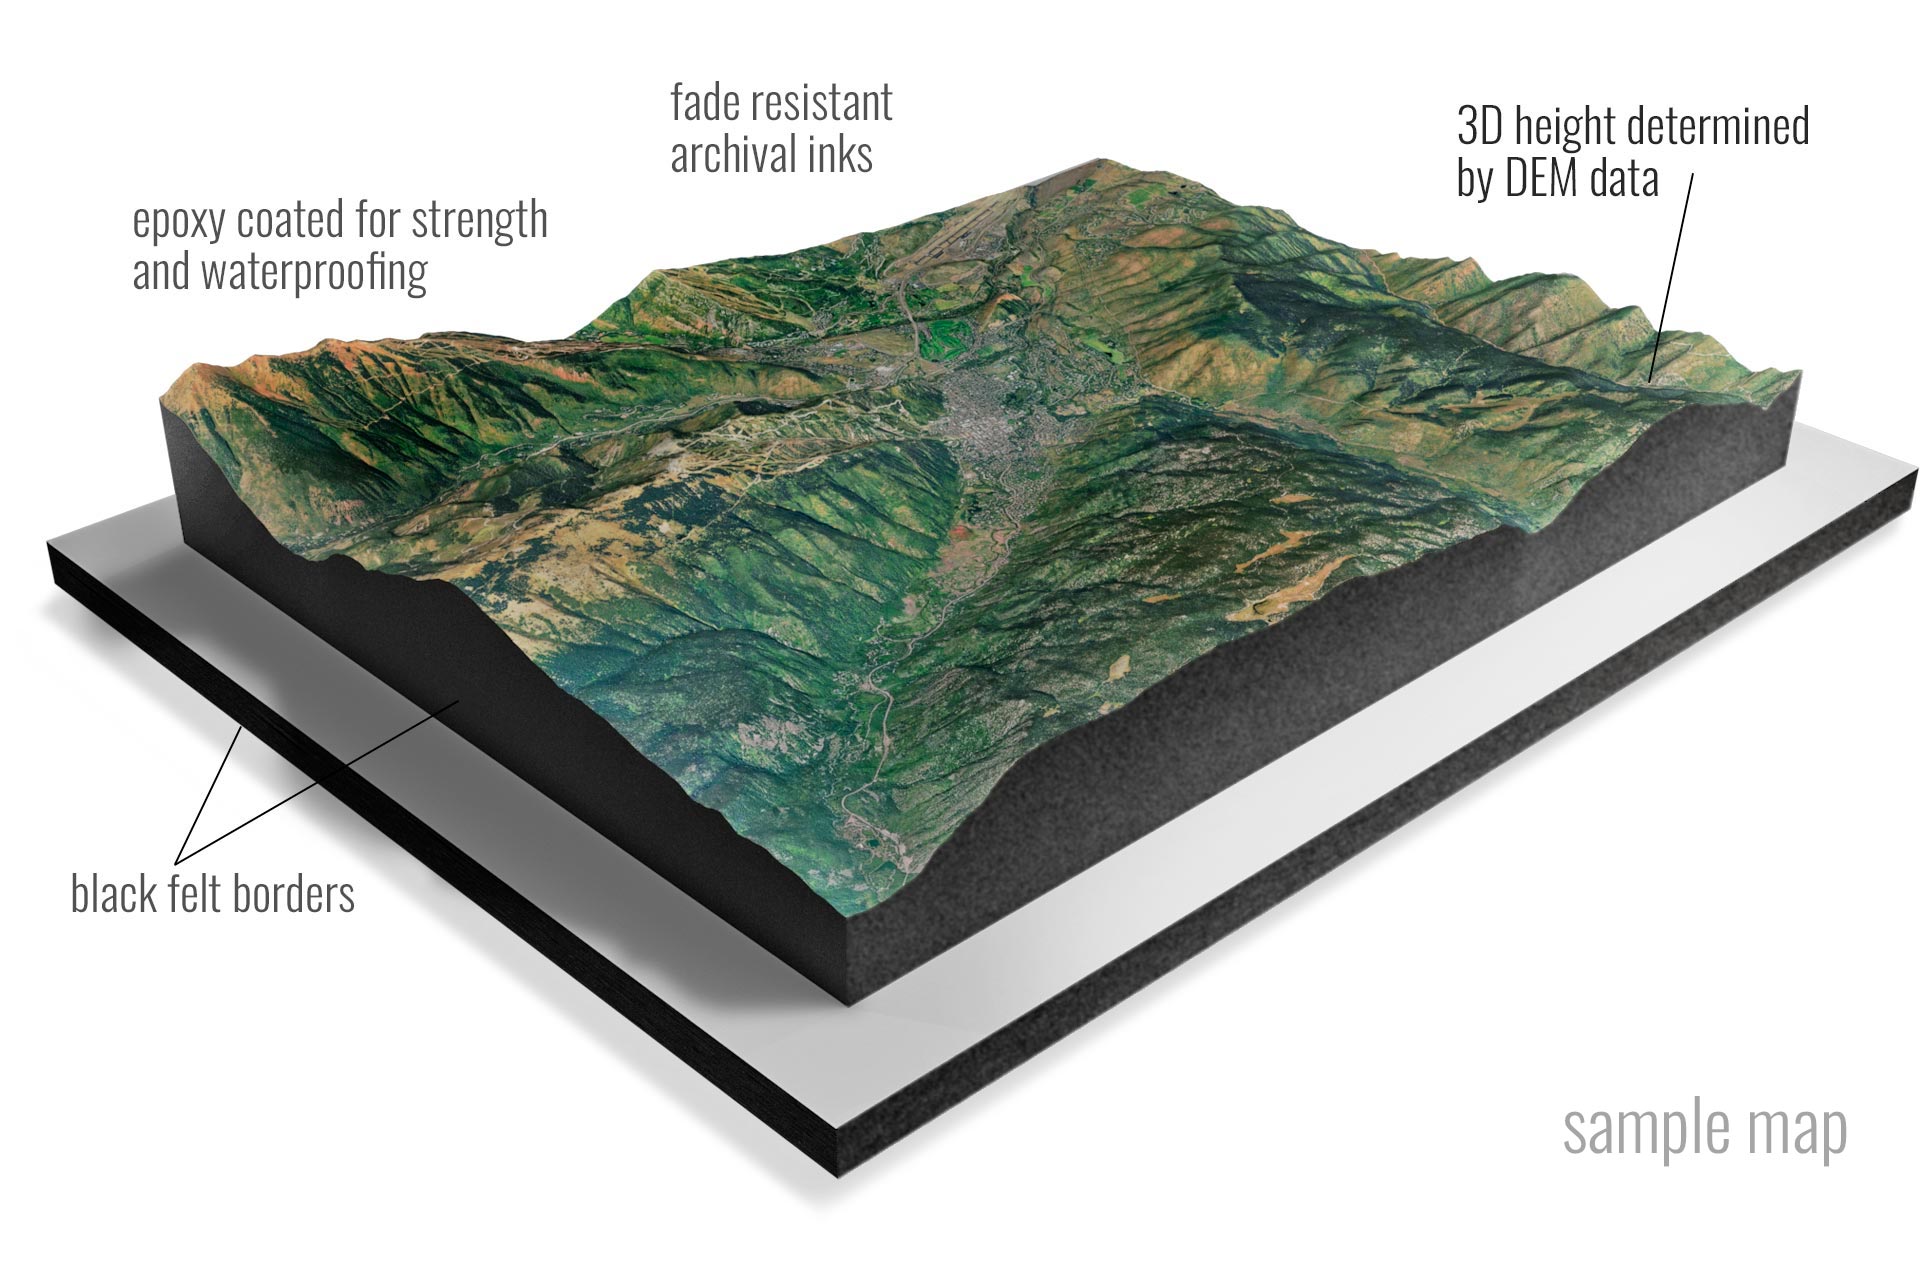
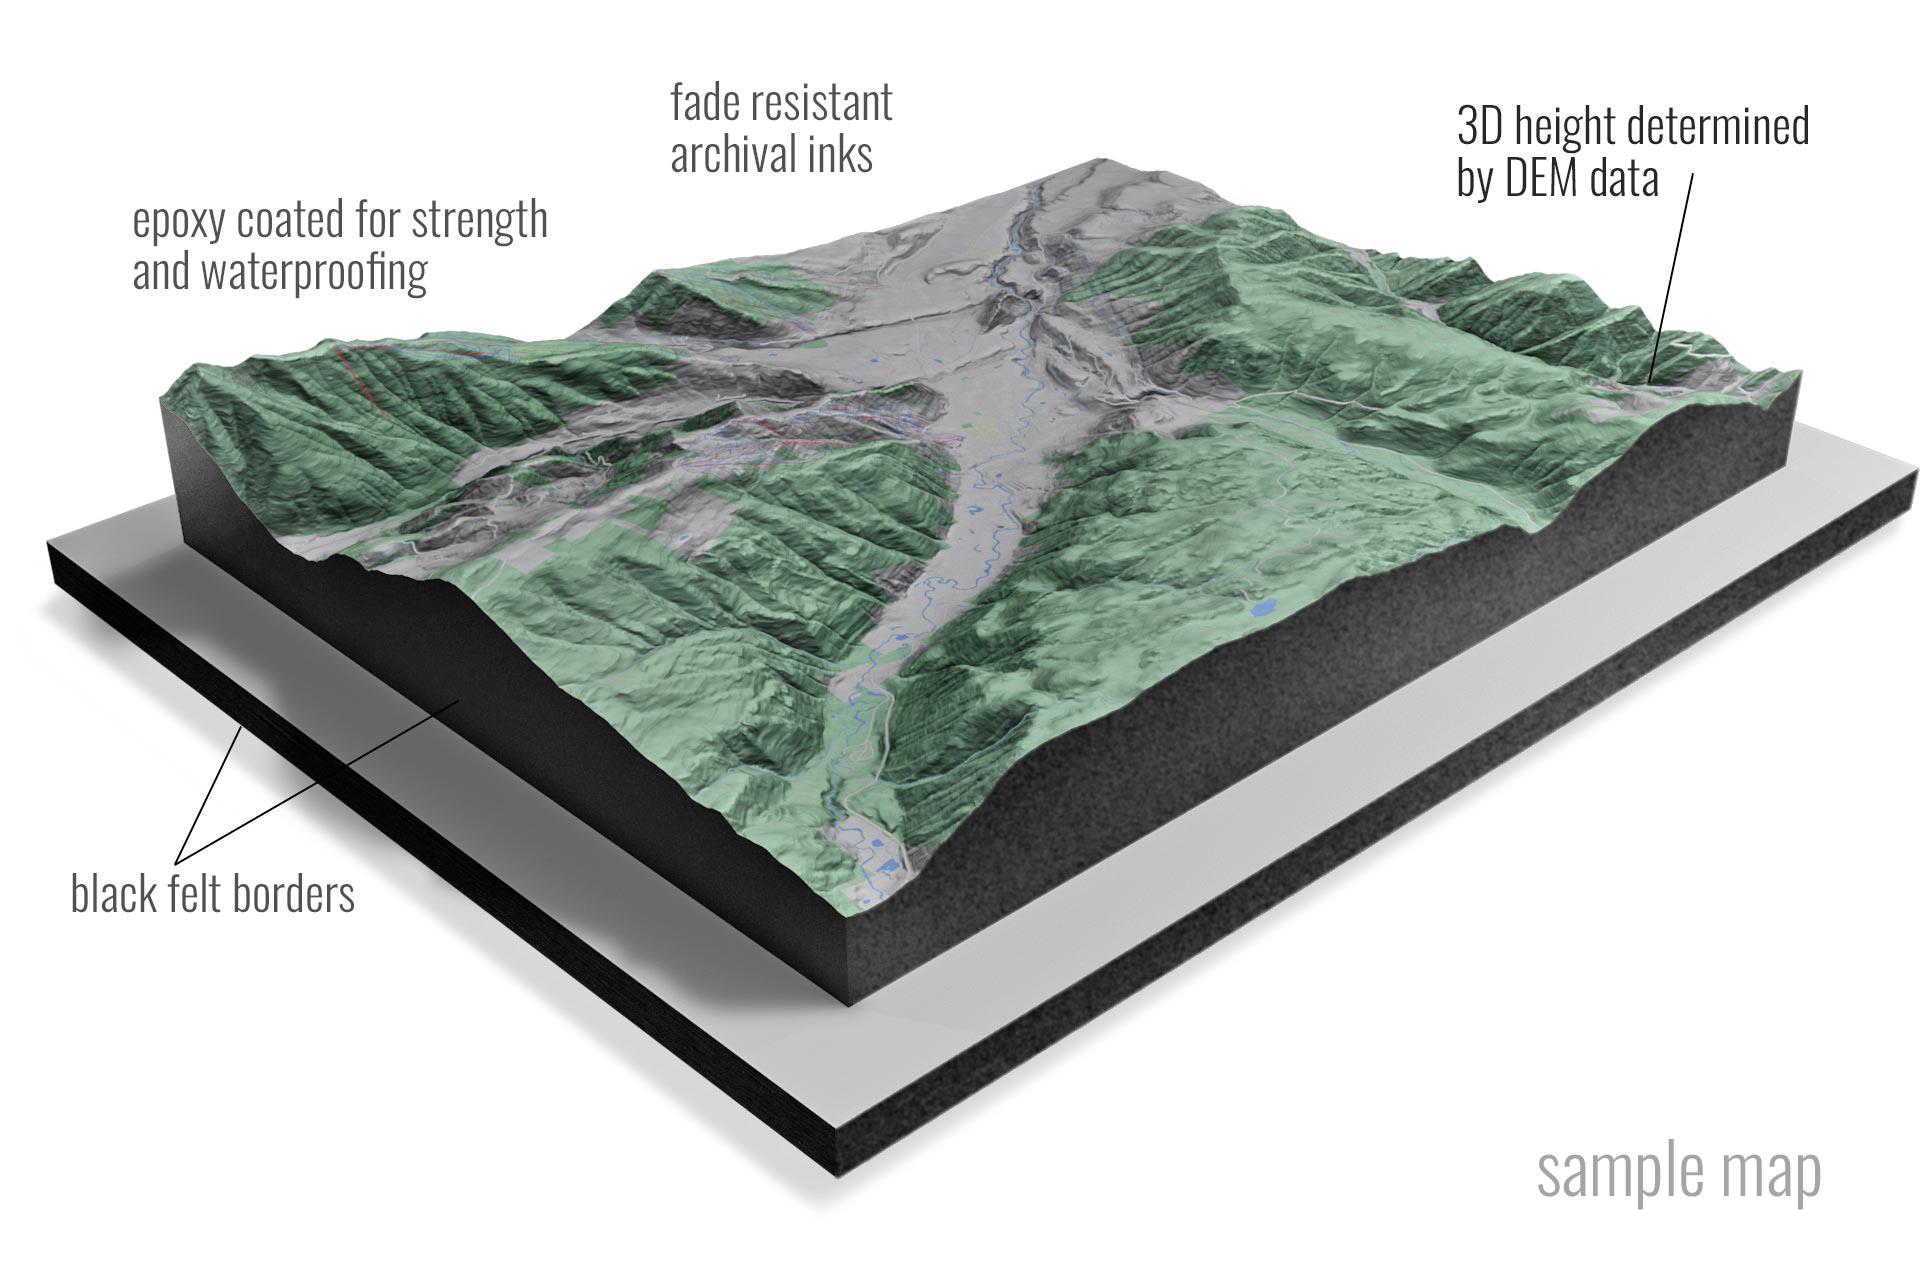
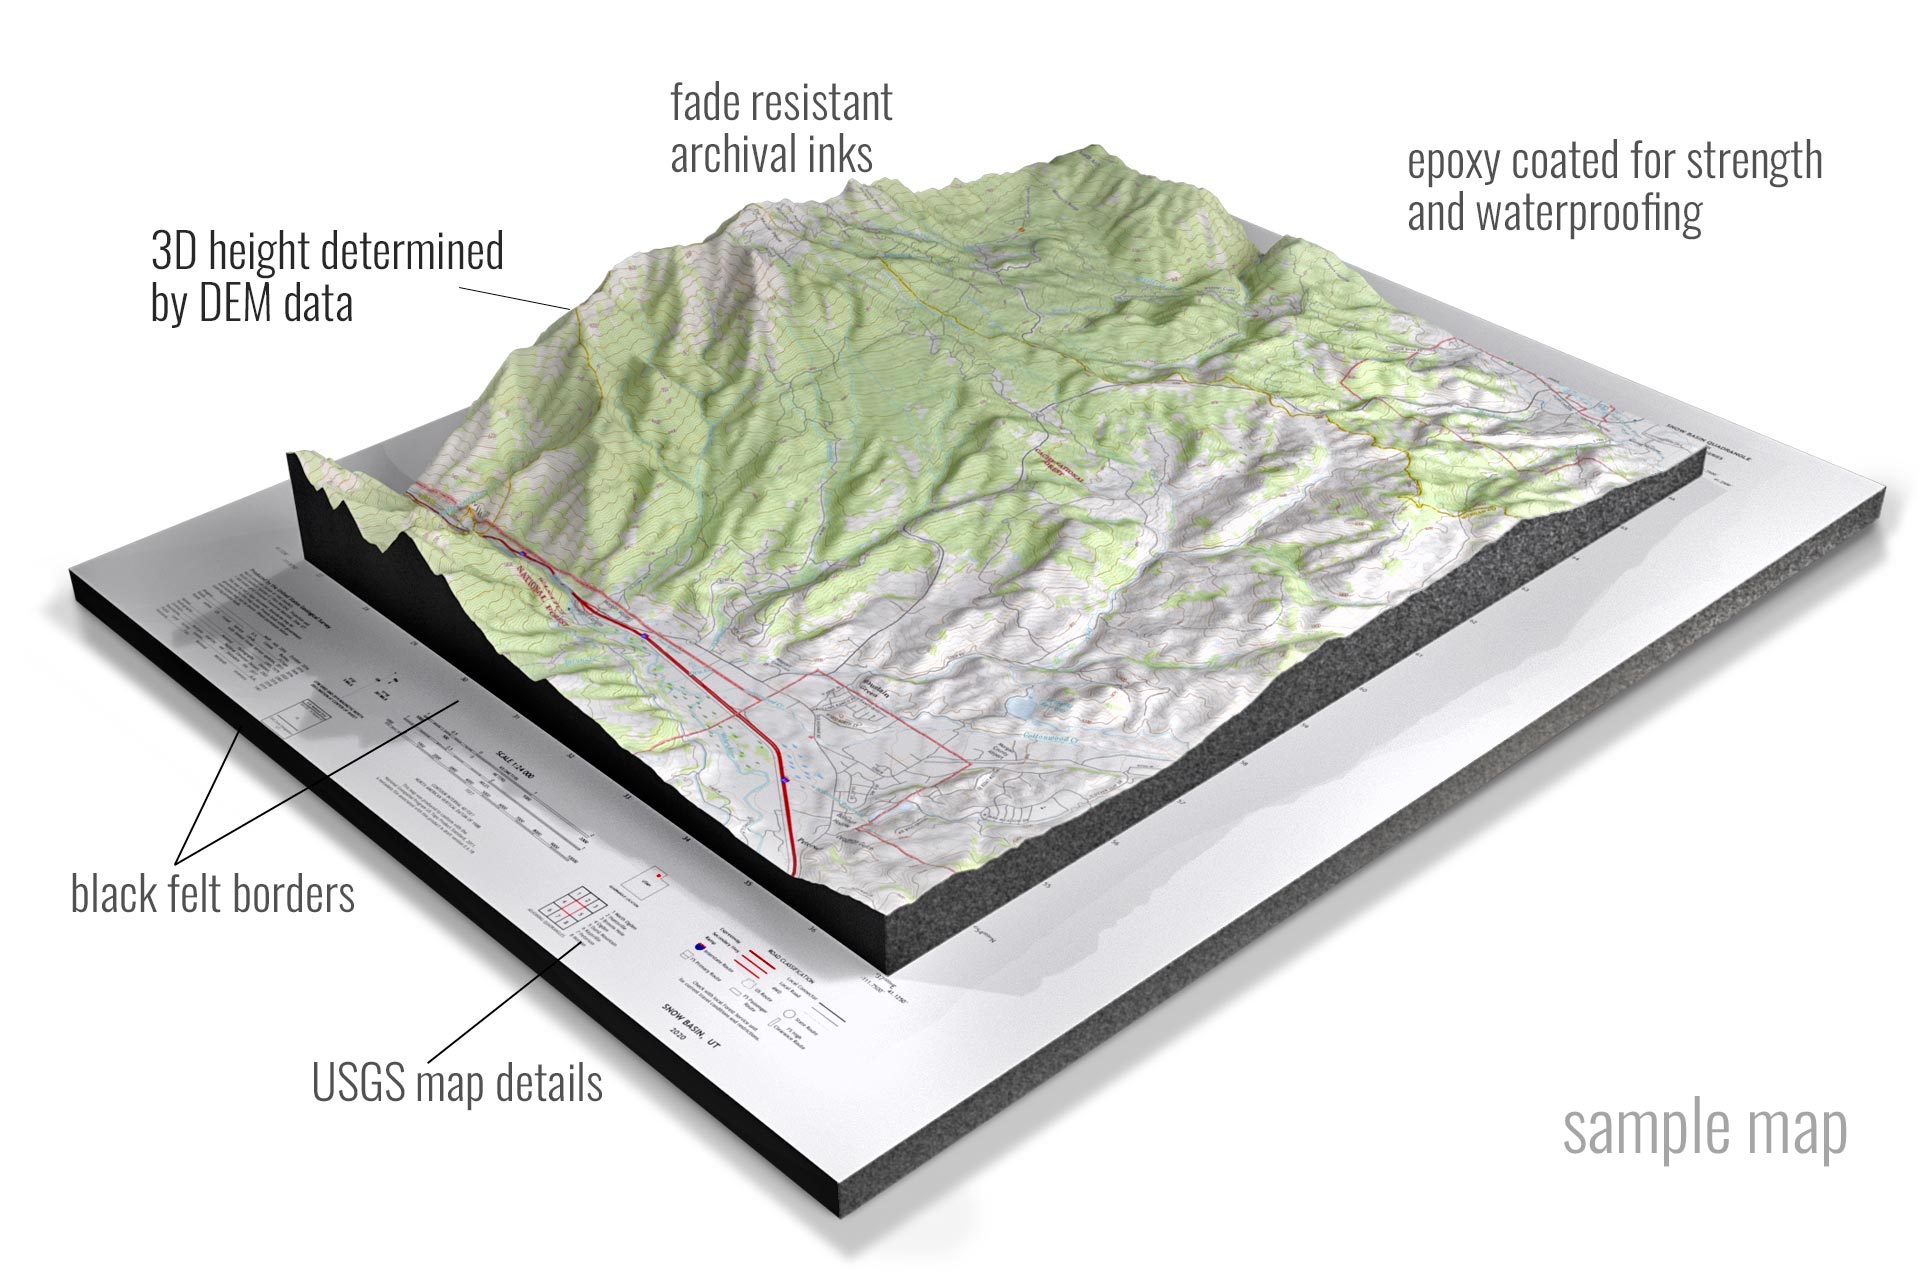
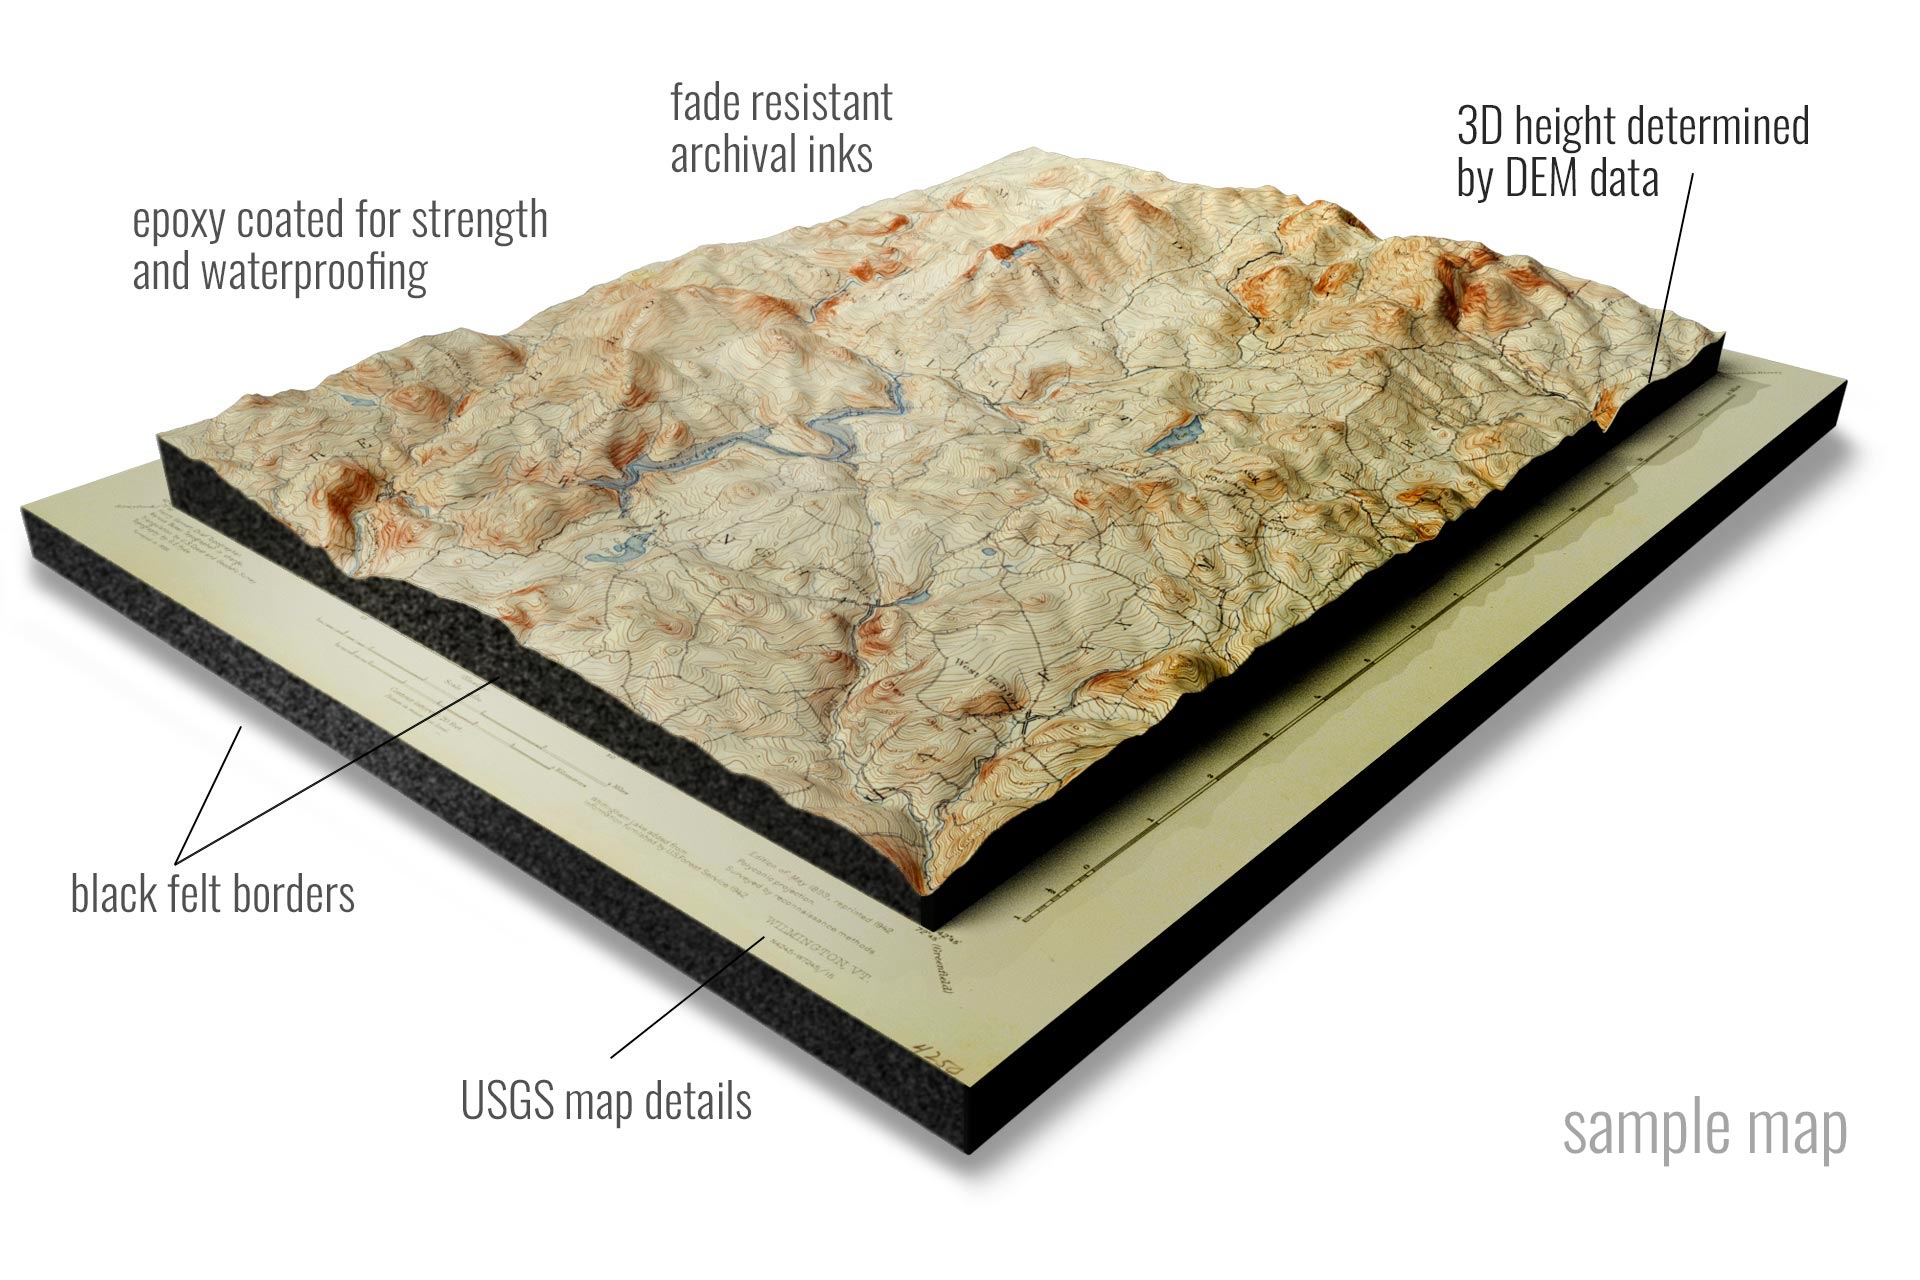
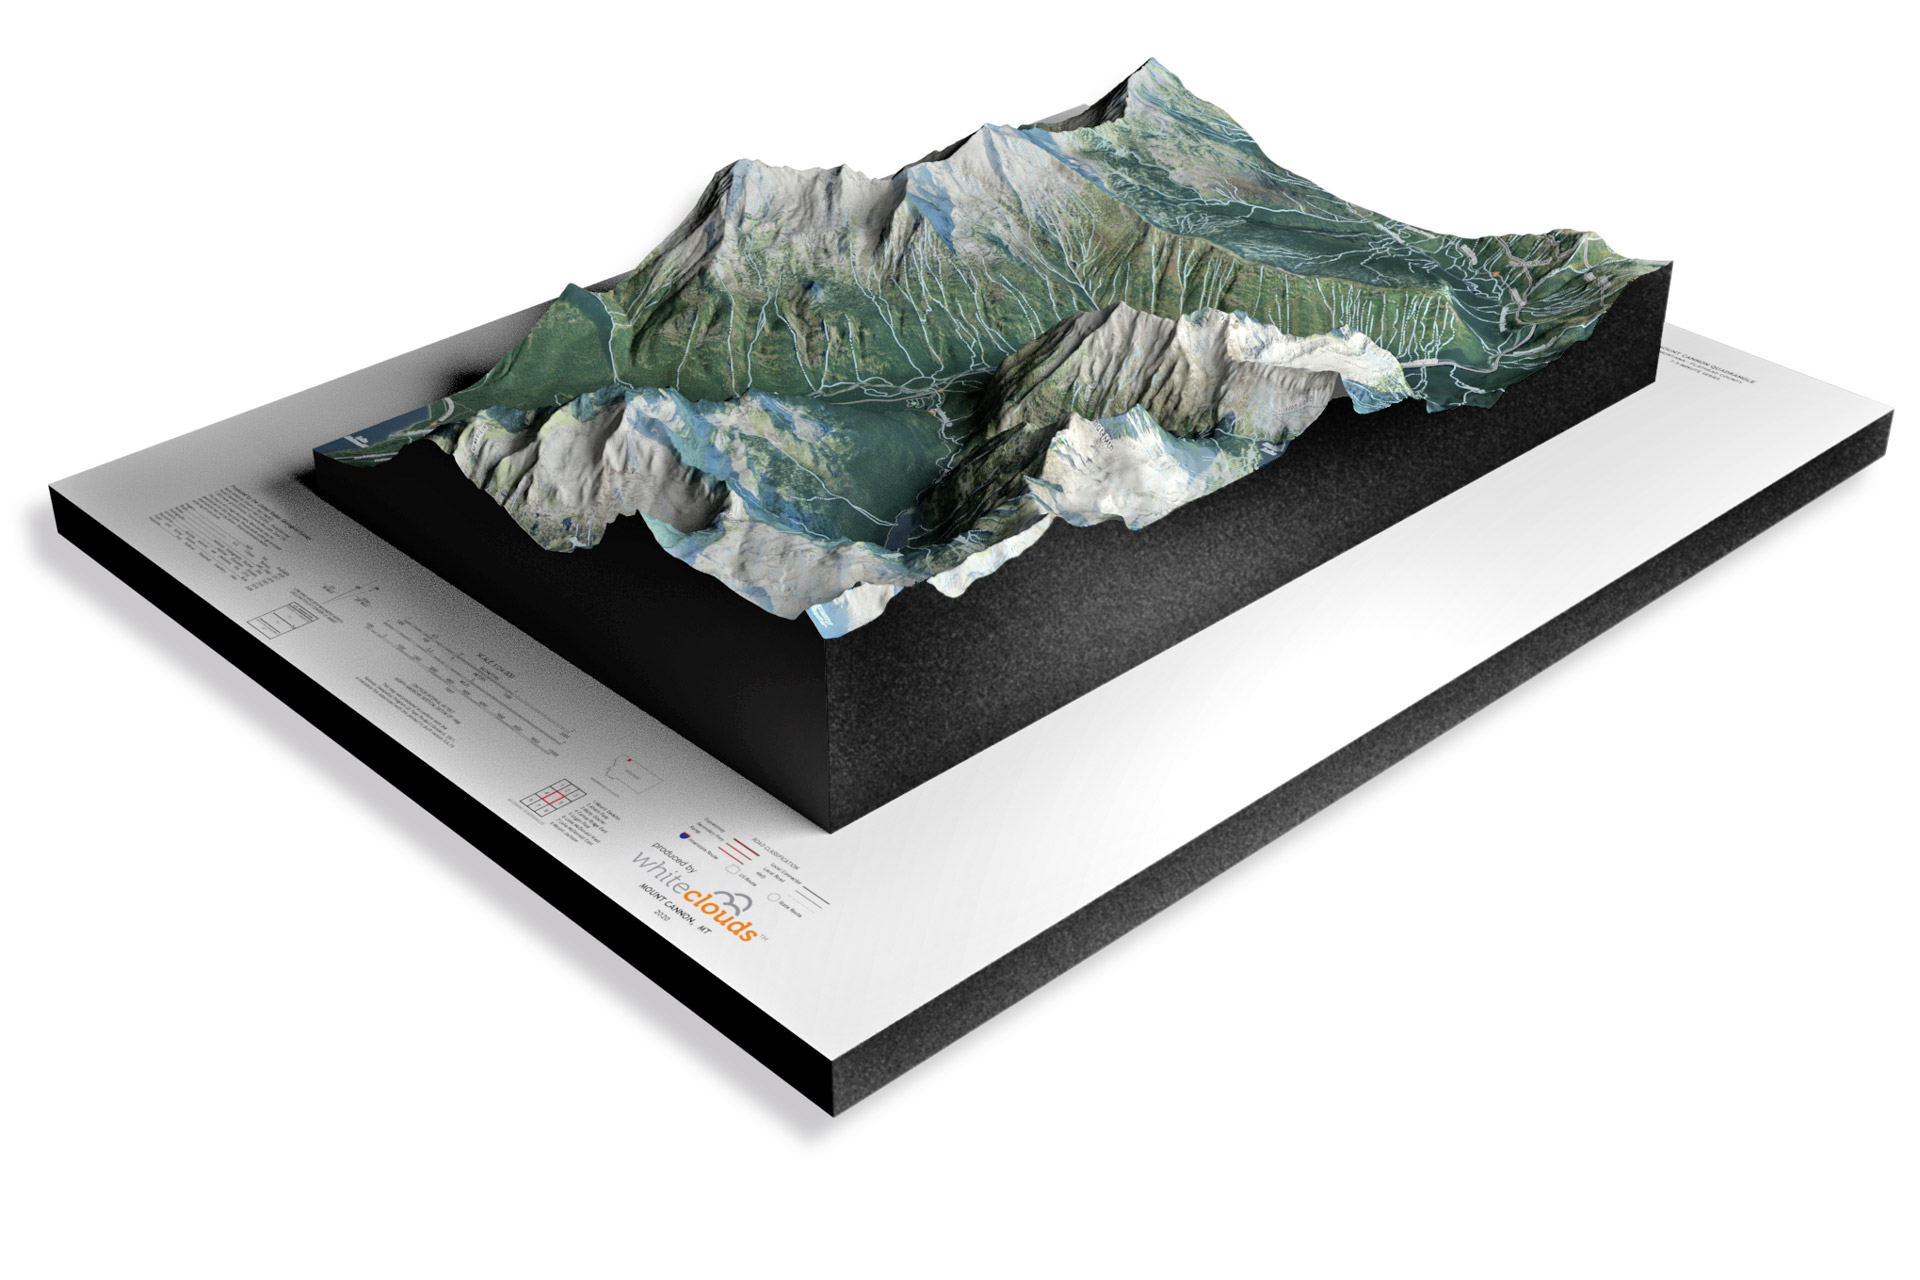
Shop WhiteClouds 3D Raised Relief Maps with 557,622 three-dimensional maps to choose from. These maps are not flat. They are three-dimensional, with the height being determined by Digital Elevation Model (DEM) data. These 3D maps are built by combining satellite imagery data from the USGS, Google Earth, Google Maps, and DEM data. Make a statement with these beautiful 3D map images from every part of the United States.
How Raised Relief Maps are Made
There are several techniques used to create raised relief maps, and the process can vary depending on the scale and complexity of the map. However, the basic steps involved in making a raised relief map are as follows:
- Create a base map. The first step in making a raised relief map is to create a base map of the area. This can be done using imagery from a standard two-dimensional map, aerial photographs, or satellite images.
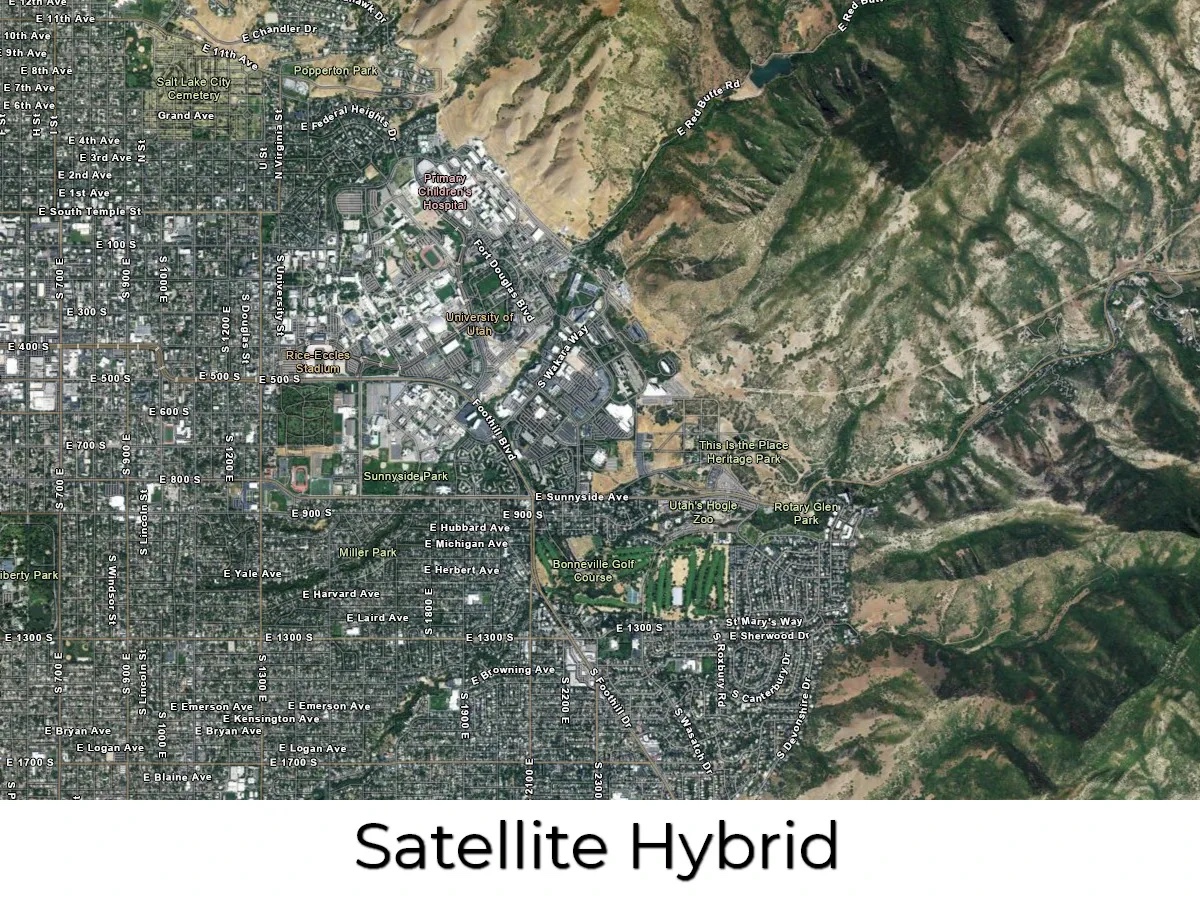
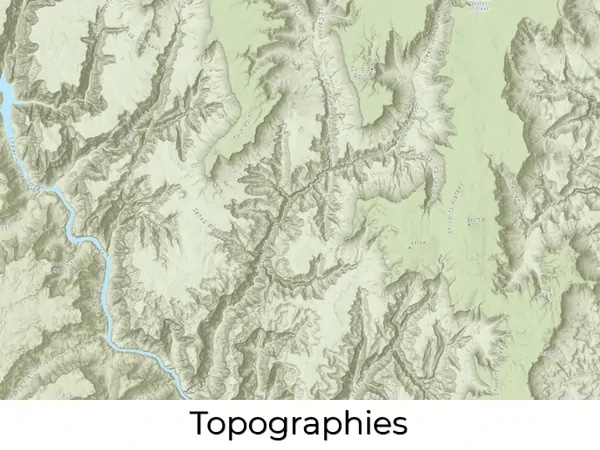
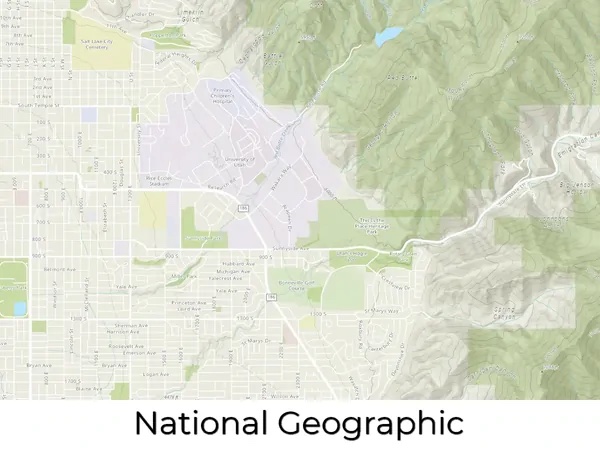
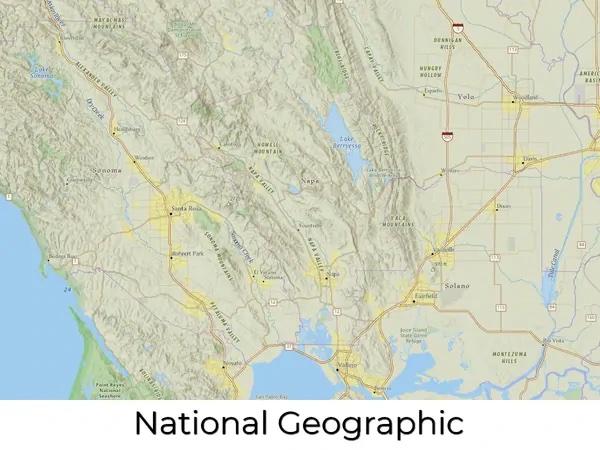
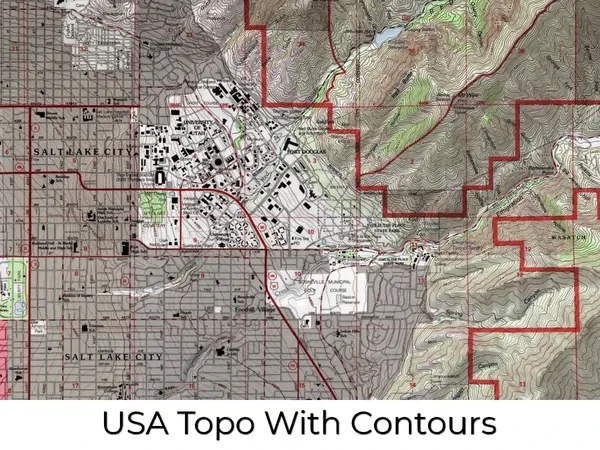
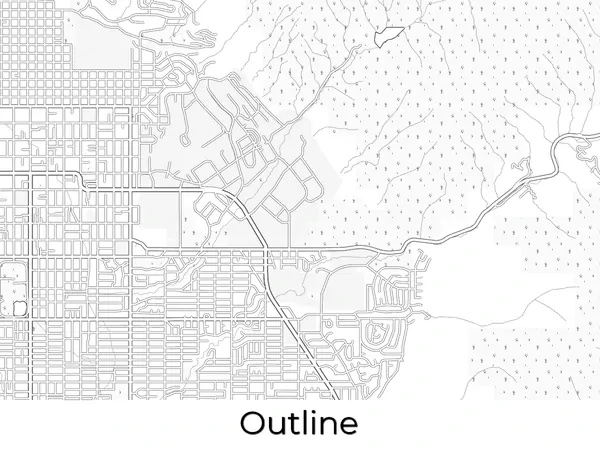
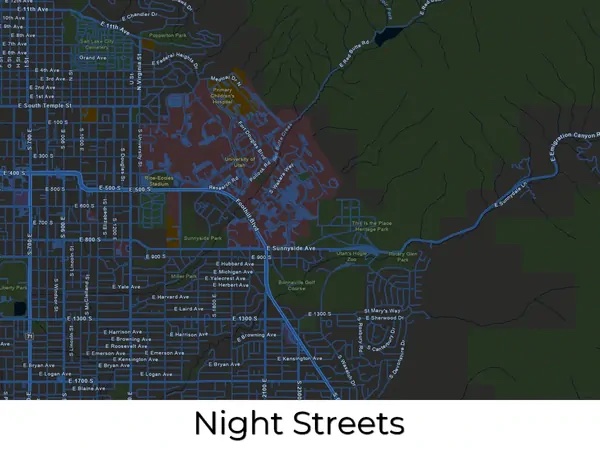
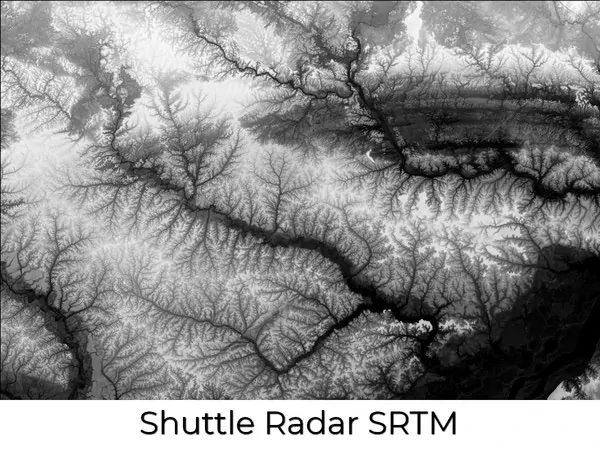
- Determine the design style of the map. There are over 40 styles to choose from. Popular ones include satellite, terrain, topography, raised relief, and satellite hybrid.
- Add any special design features not included in the source map, such as special features, landmarks, legends, roads, cities, symbols, etc.
- Add elevation data. The next step is to add elevation data to the map. This can be done using a variety of techniques, such as contour lines, shading, or digital elevation models (DEMs).
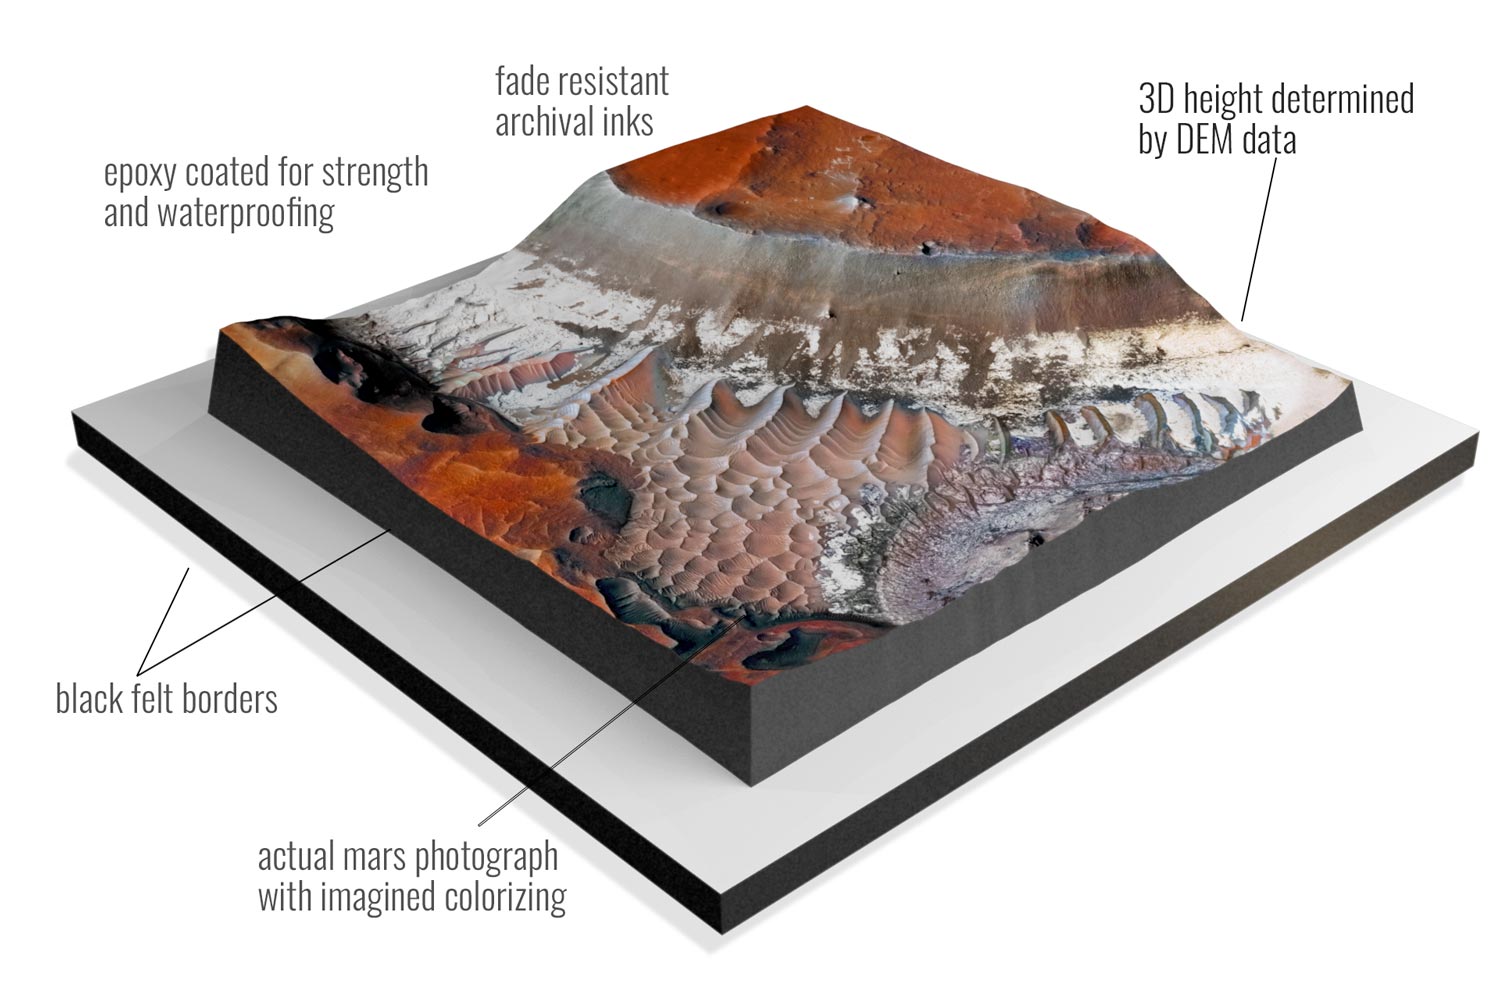
- Print the Map Overlay. Latex vinyl materials are used for the map details and colors.
- Create the 3D physical map. Once the elevation data has been added to the map, a physical 3D structure is created that replicates the topography of the area. This can be done using 3D printed plastic or thermoformed molding/casting. Either approach is combined with the Vinyl overlay.
- Finish the map. This is where any excess materials are cutaway. Any special sealers, matte finishes, hardeners, or UV protection is applied. Wood, metal or plastic bases are built and border flocking may be applied.
Features & Benefits of Raised Relief Maps
- Remarkably Strong: You can drive a 1-ton truck over our raised relief maps.
- Precision: We print our 3D raised relief maps to scale as accurately as are the original files and images.
- Excitement: It is much easier to get excited about 3D views of your ski runs or trails than flat printed maps.
- Stain and Water Resistance: Spills are easy to wipe up.
- Communication: Raised relief maps are simple to understand with a quick glance.
- Affordability: Our 3D technologies allow you to order custom 3D maps for a reasonable price.
- Testability: 3D technologies are affordable enough to test designs, such as several versions of planned work.
- Consistency: Using modern print and casting technologies, you can easily recreate identical raised relief maps.
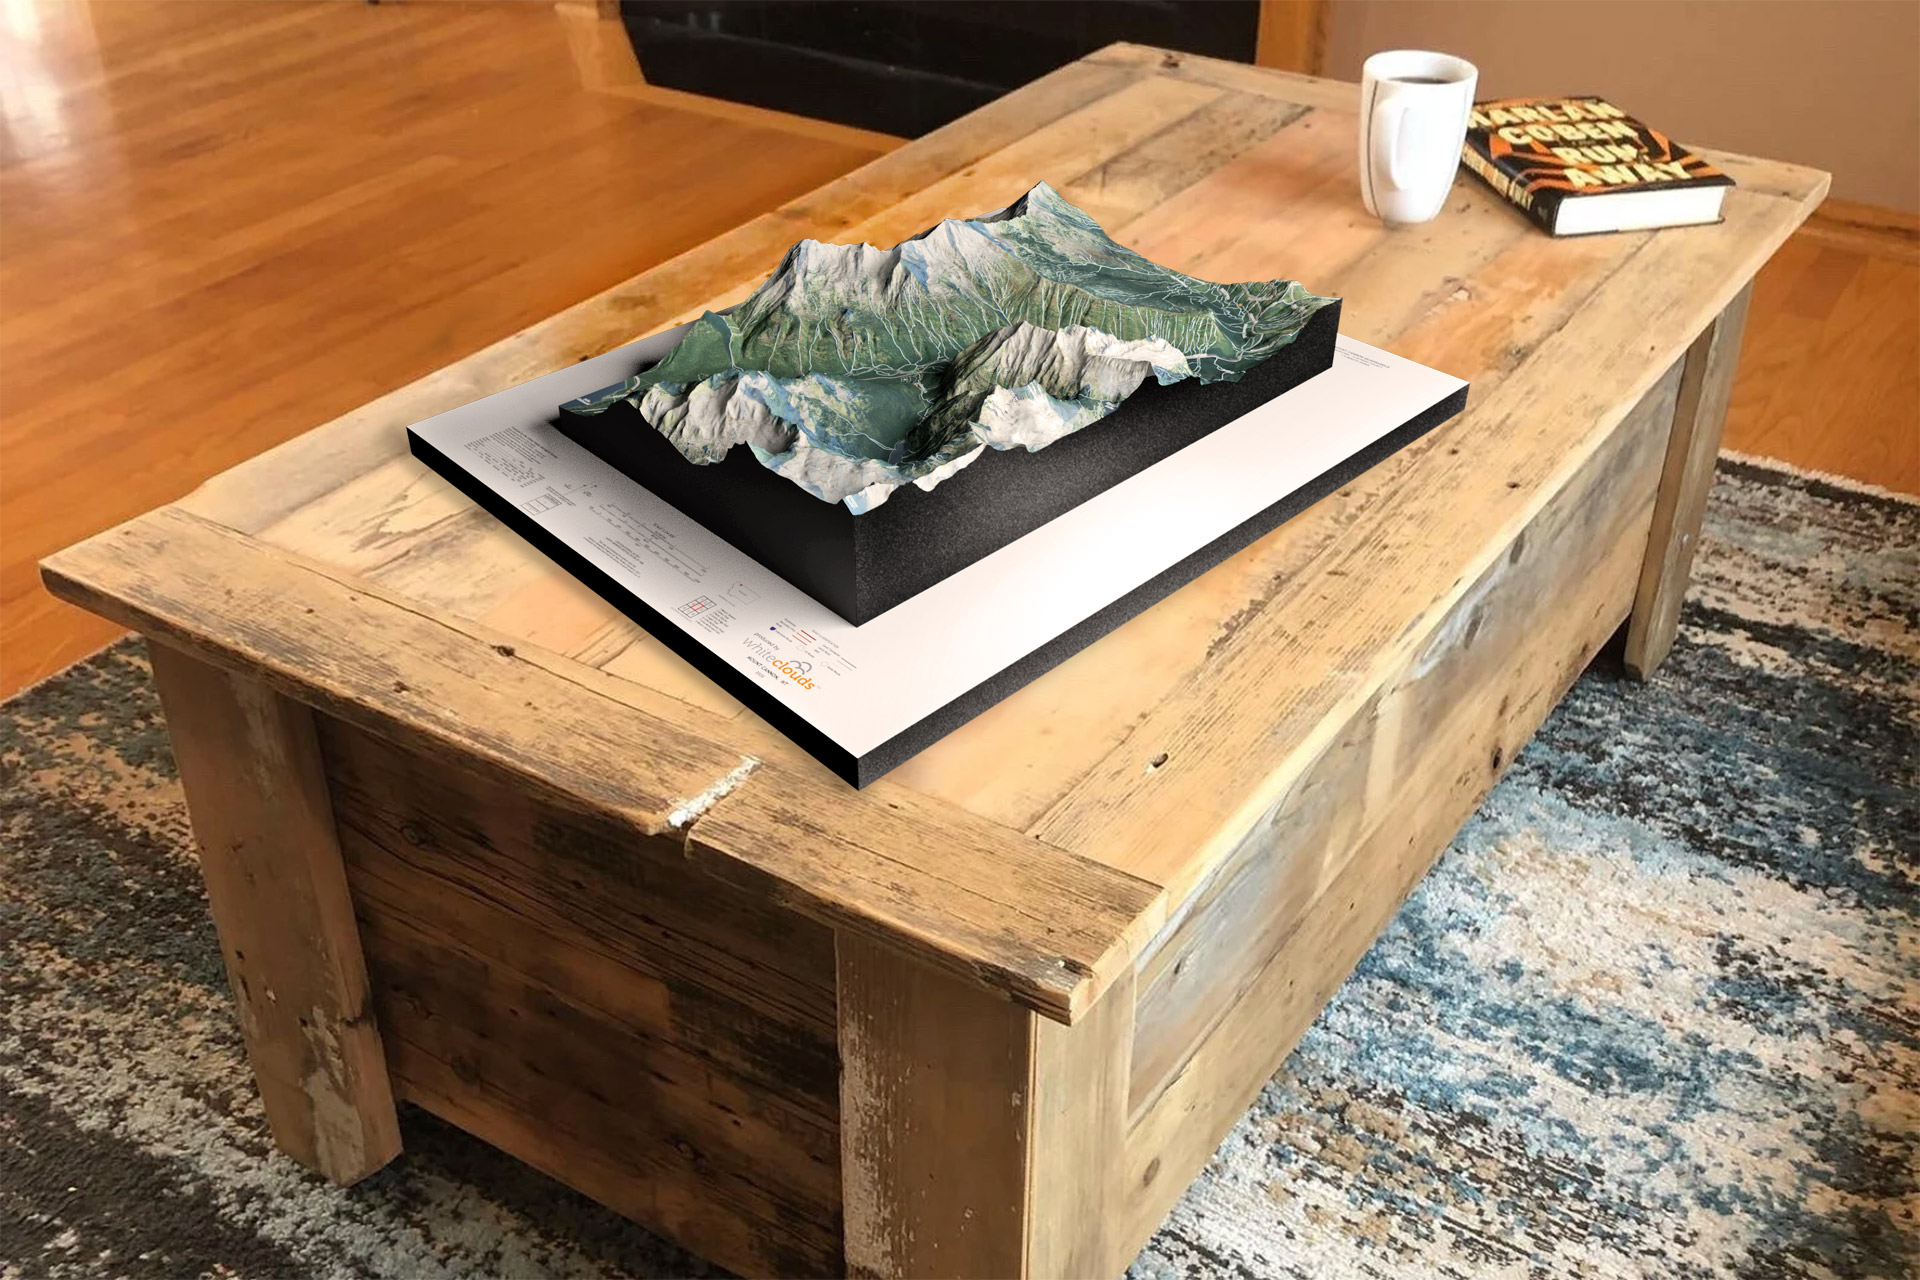
- Portability: We use lighter materials than what was available in the past, making our raised relief maps easy to transport.
Videos of Raised Relief Maps
Map Design Styles of Raised Relief Maps
Many design styles, or base maps, serve as a starting point for your raised relief map. We source and create our base maps using the same digital tools that expert cartographers use to create maps. Once you have selected your base map, everything else is fully customizable. We can layer informational text (such as landmarks or other points of interest) and even change the colors to suit your preferences.
Complex layers can be added such as streams and lakes, terrain, roads, and even more detail like political boundaries, religious, and other population-based demographics. Multiple layers can also be added to the same raised relief map. For example, community developers and city planners can benefit from a raised relief map with layers that include parcel lines, existing building footprints, and utility lines. Take a look at the map style categories below for inspiration.
Technology and Materials Used in Raised Relief Maps
- With 3D printing technology, you are not limited to straight lines and boxes. The curves and cliffs are captured accurately and beautifully in astonishing detail.
- Your vision of the final 3D map determines which materials we will choose to produce the best results. We help you to determine the materials that best suit your project.
- We use fabrication technologies such as 3D printing, CNC cutting, and molding/casting.
- Raised relief maps show incredible detail.
- Our maps are printed in full color (with over 17 million variations of color) for awe-inspiring presentations and displays. No painting required!
- Typically, we use a special process for finishing the sides of the raised relief maps in a suede-like material, similar to the finish of a jewelry box.
- Our in-house paint booth gives us flexibility in different types and grades of paint and finishing capabilities; we can provide UV-resistant coatings to protect the coloration of your 3M map for many years.
- We also offer customized additions to our 3D maps and models. Our in-house carpentry shop will build elegant bases, tables, or cabinetry to display any map you choose. Worried about dust? We can customize a case to protect your display as well. Our skilled artisans can hand-paint details to make your map a true work of art.
Pricing of Custom Raised Relief Maps
The price of 3D maps and models are generally based on your size requirements, specific design needs, and the amount of work it will take to produce. Each map is custom-built and charged for accordingly. The best way to determine cost is to email us, call us at 385-206-8700, or fill out the form below and let us bid on your project.
Get a Free Price Estimate for a Custom Raised Relief Map
Custom Fabrication Workflow

Common Questions & Answers
- What is the largest map you can fabricate? There is no limit to the size of a map we can build. There are practical limits that will impact shipping and installation, but we work closely with our customers on these special requirements.
- What type of 3D maps can you fabricate? All types. Satellite Maps, Terrain Maps, Topographical Maps, Raised Relief Maps, USGS Maps, Contour Maps, and many more.
- Can you fabricate with different technologies and materials? Yes. Our most common fabrication technology is 3D Printing, but we can also build 3D Maps with CNC Cutting, 3D Foam, Molding/Casting, Thermoforming, and Sculpting.
- What materials can you 3D print in? We match the correct material and fabrication process to your requirements in terms of presentation, size, and transportability. We can 3D print in PLA, FDM, Full-Color Sandstone, UV-cured resin, plastic, rubber-like, acrylic, and nylon – as well as combining multiple technologies.
- Can you sign a Non-disclosure Agreement that you supply? Yes.
- How long will it take to create my map? That depends on the design and size of the map. A more complex or detailed map will take longer than a simple map, we can’t really say exactly how long it will take until we have the chance to understand what type of map you want fabricated. Generally, smaller standard maps can be a couple of weeks and large museum exhibition maps can be 6 months.
- What do you need from me to start the map fabrication? Boundaries are a good place to start. Determining map styles, sizes, height (may be exaggerated), and cabinetry needs are all part of the process. Special design features can also be added.
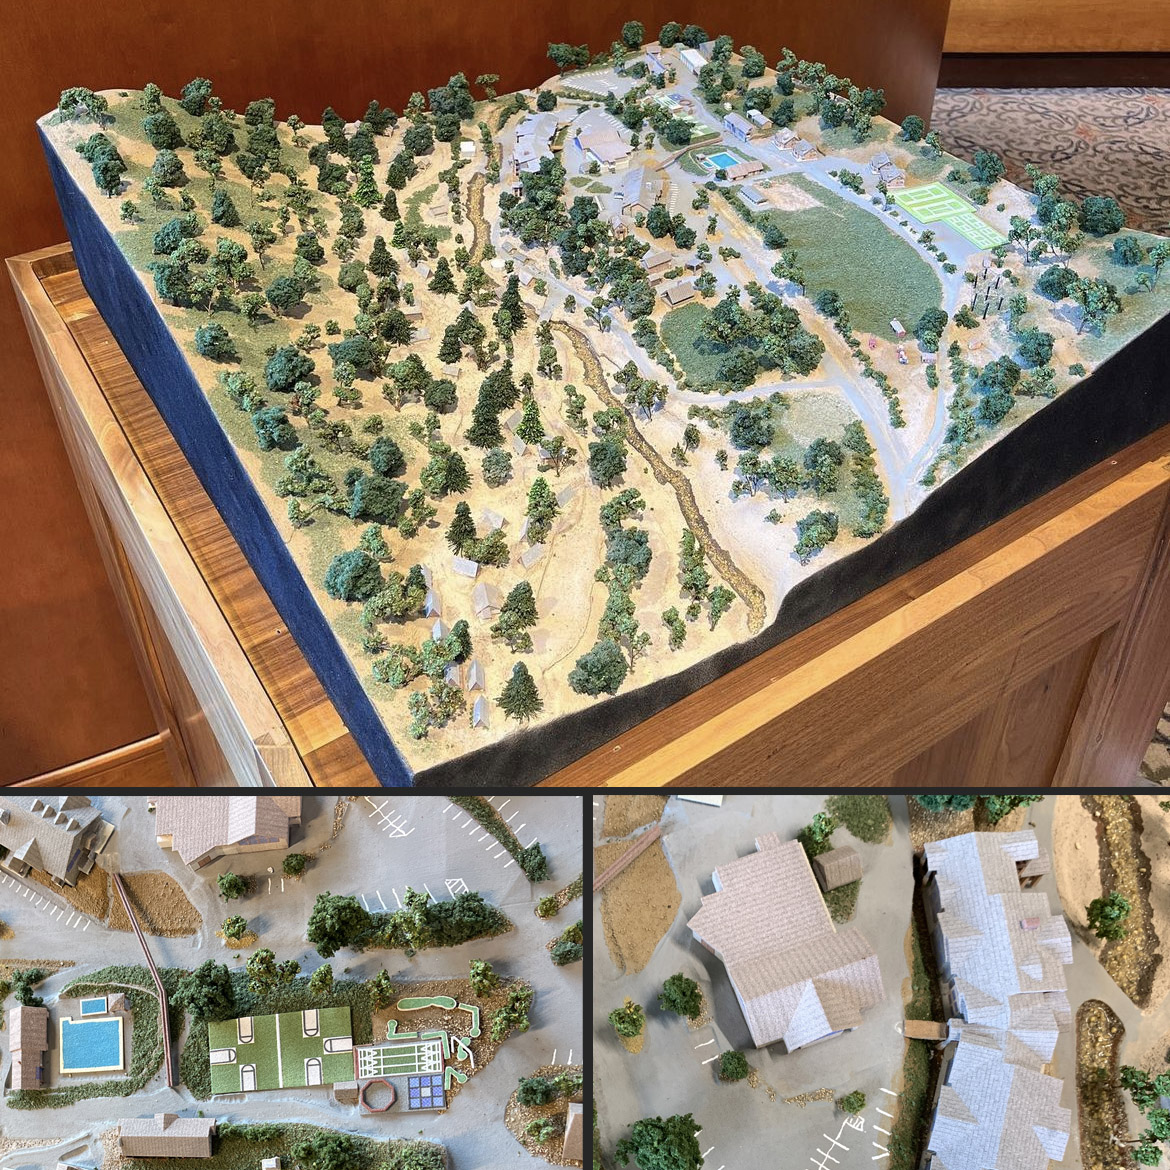
- Can you add homes, buildings, swimming pools, arbors, hardscaping features, etc.? Yes. We can 3D print many of these items and include them in our maps. We refer to these more complex maps as architectural dioramas.
- What is a raised relief map? A raised relief map is a type of map that uses shading and three-dimensional modeling to show the elevation and topography of a given area. The map is designed to provide a visual representation of the landscape, with higher elevations shown in relief and lower areas shown as depressions.
The raised relief map is created by molding the surface of the map to match the terrain it represents. Mountains, hills, and other high-elevation areas are given more depth, while valleys and low-lying areas are flattened out. The map may be color-coded to show different elevations or may use shading and contour lines to indicate changes in elevation.
Raised relief maps are often used by hikers, geologists, and other professionals who need to understand the topography of a given area. They are also used by map collectors and enthusiasts who appreciate the artistry and detail of these maps.
- What is meant by relief on a raised relief map? On a raised relief map, relief refers to the difference in elevation between different areas of the map. Relief is the vertical distance between the highest and lowest points of the terrain being depicted on the map.
The relief on a raised relief map is represented by the varying depths of the contours and shading, giving a three-dimensional appearance to the map. Mountains, hills, and other high-elevation areas are given more depth, while valleys and low-lying areas are flattened out.
The purpose of showing relief on a raised relief map is to provide a visual representation of the terrain, allowing the user to better understand the topography and elevation changes of a given area. This can be helpful for a variety of purposes, such as planning hiking routes, identifying potential hazards, or understanding the geological characteristics of a region.
- What is a 3D raised relief map? A 3D raised relief map is a type of map that uses three-dimensional modeling to represent the terrain and elevation of a given area. This type of map is created by molding the surface of the map to match the actual terrain it represents, using data obtained from satellite imagery or other sources.
The 3D raised relief map provides a realistic and highly detailed representation of the terrain, with elevations and other features shown in a lifelike and visually engaging way. This type of map is often used by hikers, outdoor enthusiasts, and other individuals who need to navigate unfamiliar terrain.
One of the key benefits of a 3D raised relief map is its ability to convey a great deal of information in a compact and easy-to-understand format. By using three-dimensional modeling techniques, these maps can show elevations, slopes, and other important features of the terrain in a way that is not possible with traditional two-dimensional maps.
Overall, a 3D raised relief map can be a highly effective tool for exploring and understanding the terrain of a given area.
- What is a US raised relief map? A US raised relief map is a type of raised relief map that depicts the topography and elevation of the United States of America. These maps are typically produced at a scale of 1:1,000,000 or larger, and they provide a detailed and accurate representation of the terrain across the country.
US raised relief maps are often used by hikers, geologists, and other outdoor enthusiasts who need to understand the topography of a given area. They can also be useful for educators and students who are studying geography or geology, as well as for map collectors and enthusiasts.
There are many different types of US raised relief maps available, each with its own unique features and level of detail. Some maps may focus on specific regions or areas of interest, while others provide a comprehensive view of the entire country. Some maps may be color-coded to show different elevations or geologic features, while others may use shading and contour lines to indicate changes in elevation.
Overall, a US raised relief map can be a valuable tool for exploring and understanding the complex and varied terrain of the United States.
- How is a raised relief map made? A raised relief map is made by using a combination of cartography and three-dimensional modeling techniques to create a highly detailed and accurate representation of the terrain being depicted. The process typically involves several steps, including:
Obtaining accurate topographic data: The first step in creating a raised relief map is to obtain accurate topographic data for the area being depicted. This data may be obtained from satellite imagery, aerial photographs, or other sources.
Creating a base map: Once the topographic data has been obtained, a base map is created that shows the boundaries, roads, and other key features of the area being depicted. This map serves as the foundation for the raised relief map.
Creating the raised relief model: The next step is to create a three-dimensional model of the terrain, using the topographic data as a guide. This may involve molding the surface of the map to match the terrain it represents, using materials such as plastic or foam.
Adding color and detail: Once the raised relief model has been created, color and other details are added to enhance its appearance and provide additional information. For example, different colors may be used to show different elevations, or shading and contour lines may be used to indicate changes in elevation.
Finishing and packaging: The final step in creating a raised relief map is to add any finishing touches, such as labels or legends, and to package the map for distribution.
- What do raised relief maps show? Raised relief maps show the topography and elevation of a given area in a three-dimensional format. They provide a highly detailed and accurate representation of the terrain, and can be used to convey a wide range of information about the area being depicted.
Some of the key features that may be shown on a raised relief map include:
Elevations: One of the primary features shown on a raised relief map is the elevations of different areas within the terrain being depicted. This may be indicated using different colors, shading, or contour lines.
Slopes and gradients: Raised relief maps may also show the slope or gradient of different areas within the terrain, which can be important for understanding how water flows and how easy or difficult it may be to traverse the area.
Rivers, lakes, and other bodies of water: Bodies of water are often depicted on raised relief maps, with different colors or textures used to differentiate between different types of water features.
Vegetation and land cover: Raised relief maps may also show the types of vegetation and land cover present in the area being depicted, which can be important for understanding the ecology of the region.
- How do scientists collect data for raised relief maps? Scientists collect data for raised relief maps using a variety of methods, depending on the area being studied and the level of detail required. Some common methods for collecting data include:
Satellite imagery: Satellites orbiting the Earth can capture high-resolution imagery of the terrain below, which can be used to create detailed topographic maps.
Aerial photography: Aerial photography involves taking photographs of the terrain from an aircraft or drone, and can provide highly detailed imagery of the terrain being studied.
Lidar: Lidar (Light Detection and Ranging) is a remote sensing technique that uses lasers to create detailed three-dimensional maps of the terrain. Lidar is particularly useful for capturing highly accurate elevation data.
Ground surveys: In some cases, scientists may need to conduct ground surveys of the area being studied in order to collect accurate data for a raised relief map. This may involve using specialized equipment such as GPS devices, sonar, or ground-penetrating radar.
Existing maps and data sources: Finally, scientists may also use existing maps and data sources as a starting point for creating a raised relief map. This may include older maps, government data sources, or other publicly available data.
- Who uses raised relief maps? Raised relief maps are used by a variety of professionals and organizations, including:
Geologists: Geologists use raised relief maps to study the topography and geology of a given area, and to better understand the processes that have shaped the landscape over time.
Cartographers: Cartographers use raised relief maps to create accurate and detailed representations of the terrain, which can be used for a variety of purposes, including navigation, land-use planning, and environmental management.
Educators: Raised relief maps are often used in classrooms and educational settings to help students learn about geography, geology, and other related subjects.
Tourists: Raised relief maps can be useful tools for tourists who are exploring a new area, as they provide a detailed and accurate representation of the terrain that can help visitors better understand the geography and features of the region.
Government agencies: Government agencies, such as those responsible for land-use planning or emergency management, may use raised relief maps to better understand the terrain of a given area and to make informed decisions about how to manage or respond to different situations.
- How do I read a raised relief map? Reading a raised relief map can seem daunting at first, but with a little practice and knowledge of some basic principles, it can be fairly straightforward. Here are some tips for reading a raised relief map:
Understand the scale: Raised relief maps come in different scales, meaning that the relationship between the size of the features on the map and their real-world size varies. Be sure to check the scale bar on the map to get a sense of the size of the area being depicted.
Look for contour lines: Contour lines are the wavy lines that run across the map, indicating areas of equal elevation. These lines are often labeled with the elevation they represent, and can be used to understand the shape of the terrain and the relative elevations of different features.
Pay attention to shading: Raised relief maps often use shading or different colors to indicate areas of different elevation or slope. Darker colors or shading may indicate steeper slopes or higher elevations, while lighter colors may indicate flatter areas or lower elevations.
Look for bodies of water: Raised relief maps often depict rivers, lakes, and other bodies of water using different colors or textures. Be sure to pay attention to these features, as they can provide important information about the hydrology of the area being depicted.
Understand the key: Raised relief maps may include a key or legend that explains the symbols and colors used on the map. Be sure to refer to the key if you are unsure of what a particular feature on the map represents.
- How do I draw a raised relief map? Drawing a raised relief map can be a challenging task, but it is also a fun and rewarding way to explore the geography and topography of a given area. Here are some steps you can follow to create your own raised relief map:
Choose a location: Start by choosing a location that you would like to depict on your map. This can be a local area that you are familiar with, or a more remote location that you find interesting.
Gather data: To create an accurate and detailed raised relief map, you will need to gather data about the topography of the area you have chosen. This can include information about elevation, slope, and other features of the landscape. You can collect this data using a variety of tools, including digital elevation models, topographic maps, and satellite imagery.
Choose a scale: Once you have gathered your data, you will need to choose a scale for your map. This will depend on the size of the area you are depicting and the level of detail you want to include. You can choose a standard scale, such as 1:50,000 or 1:100,000, or create your own custom scale.
Draw the base map: Using a pencil and paper, or a digital drawing tool, draw the base map of the area you have chosen. This should include the outlines of any major landforms, such as mountains, valleys, and rivers.
Add contour lines: Using the data you have collected, add contour lines to your map. These lines should indicate areas of equal elevation, and should be drawn at regular intervals according to your chosen scale.
Shade the map: To create a 3D effect on your map, you can use shading or different colors to indicate areas of different elevation or slope. Darker colors or shading may indicate steeper slopes or higher elevations, while lighter colors may indicate flatter areas or lower elevations.
Add other features: Finally, add any other features that you would like to include on your map, such as bodies of water, roads, and landmarks. Label these features as necessary to make your map clear and informative.
Creating a raised relief map requires a bit of skill and patience, but with practice, you can create a beautiful and informative representation of the geography and topography of a given area.
Worldwide Delivery
WhiteClouds has delivered maps around the world.
History of Raised Relief Maps
Way back in grade school, many of us were already experienced 3D model creators when we built our first volcano for a science class. However, the first raised maps were built in the Qin Dynasty over 200 years BCE. In the past, maps were made of wood, clay, beeswax, wheat paste, and rice.
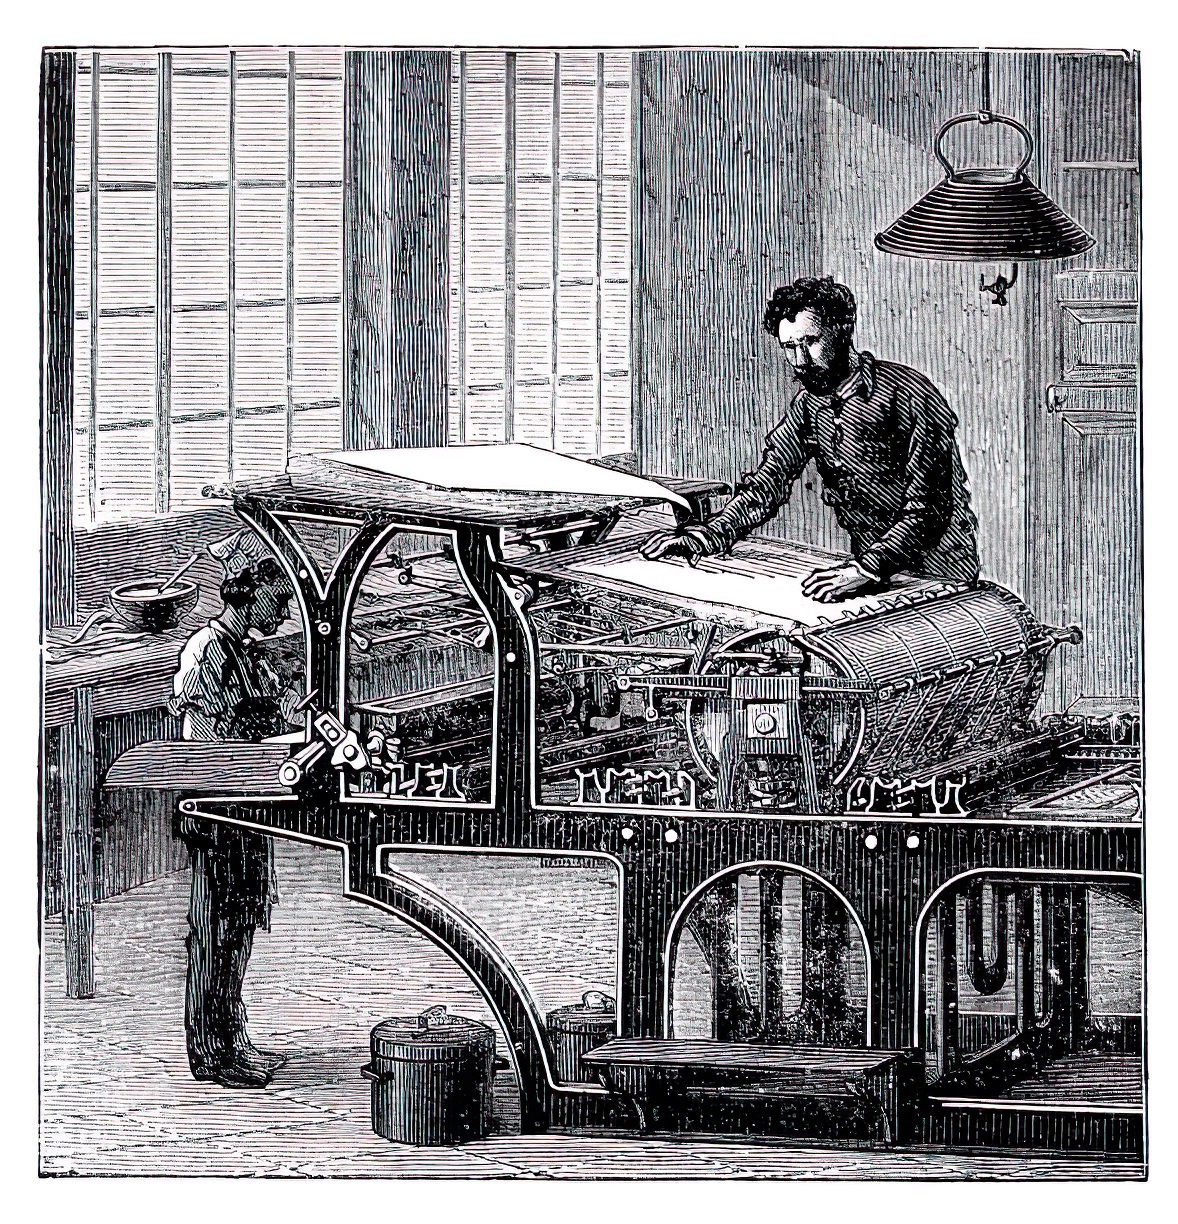
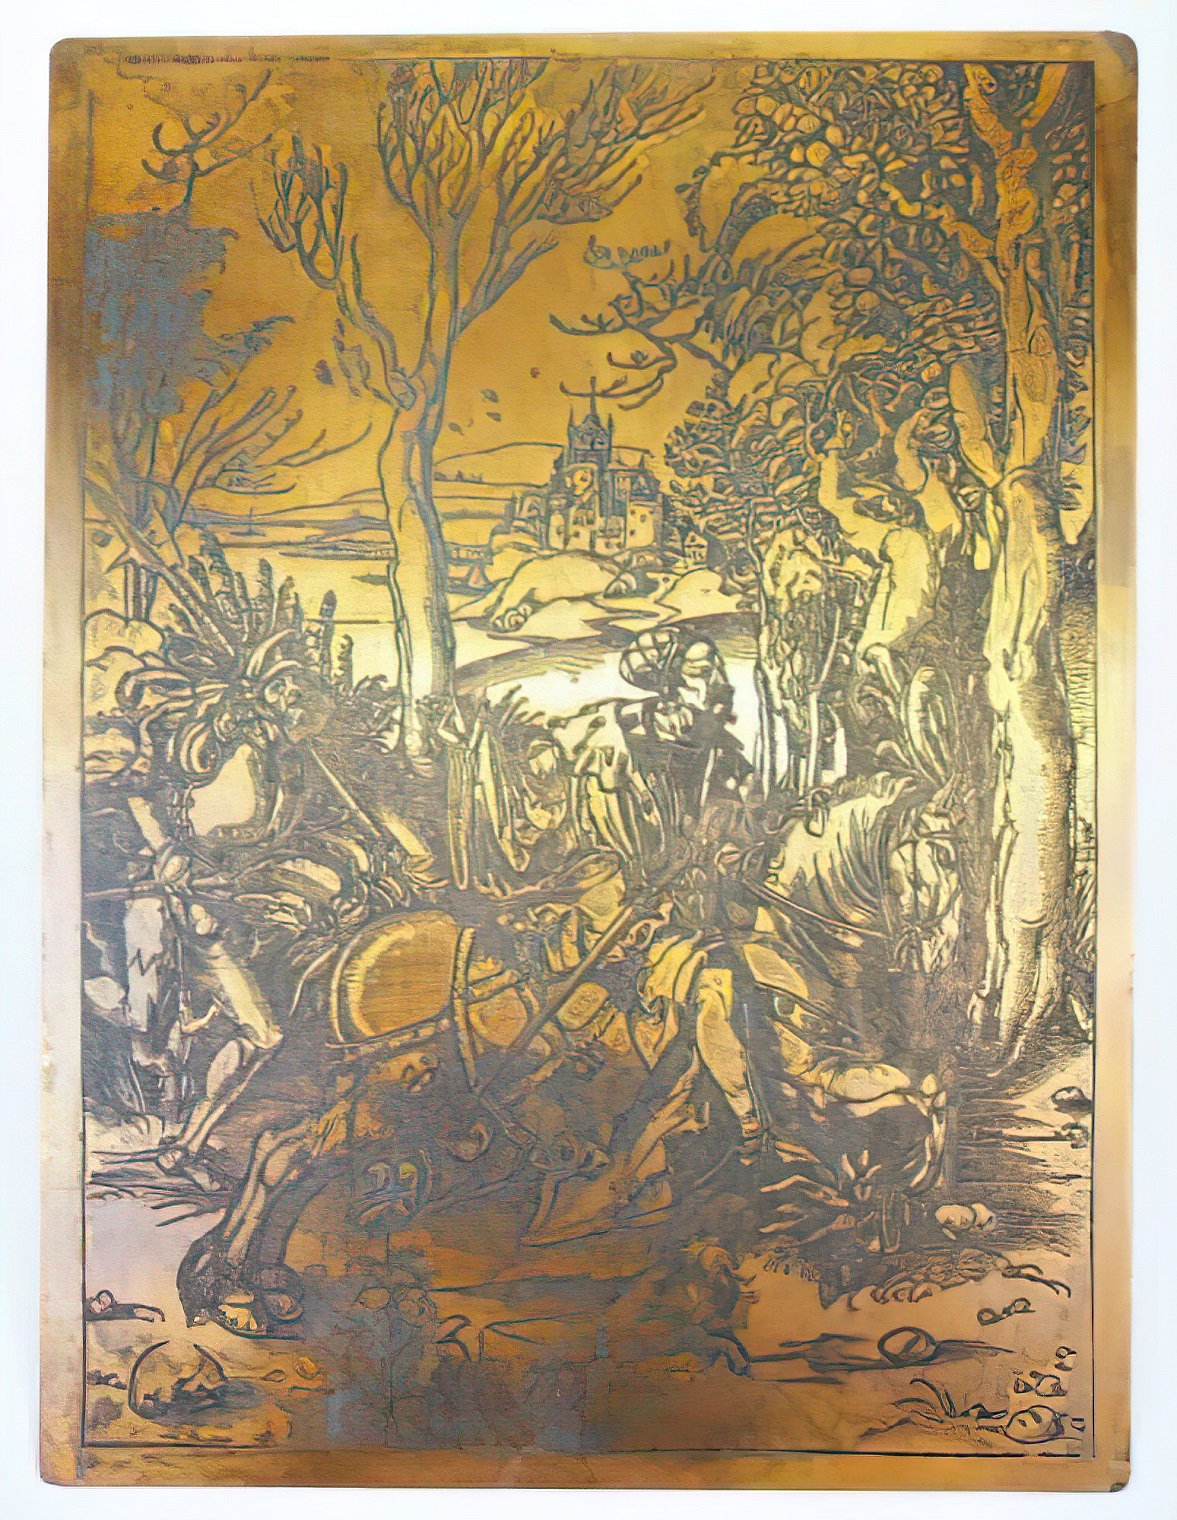
More recently, raised relief maps date back to the early 19th century. The first raised relief maps were made by hand, using a process called “copperplate engraving.” Copperplate engraving involves etching a map onto a copper plate, and then using a press to transfer the image onto paper. The map was then cut out and pasted onto a wooden board, which was then carved to create the raised relief.
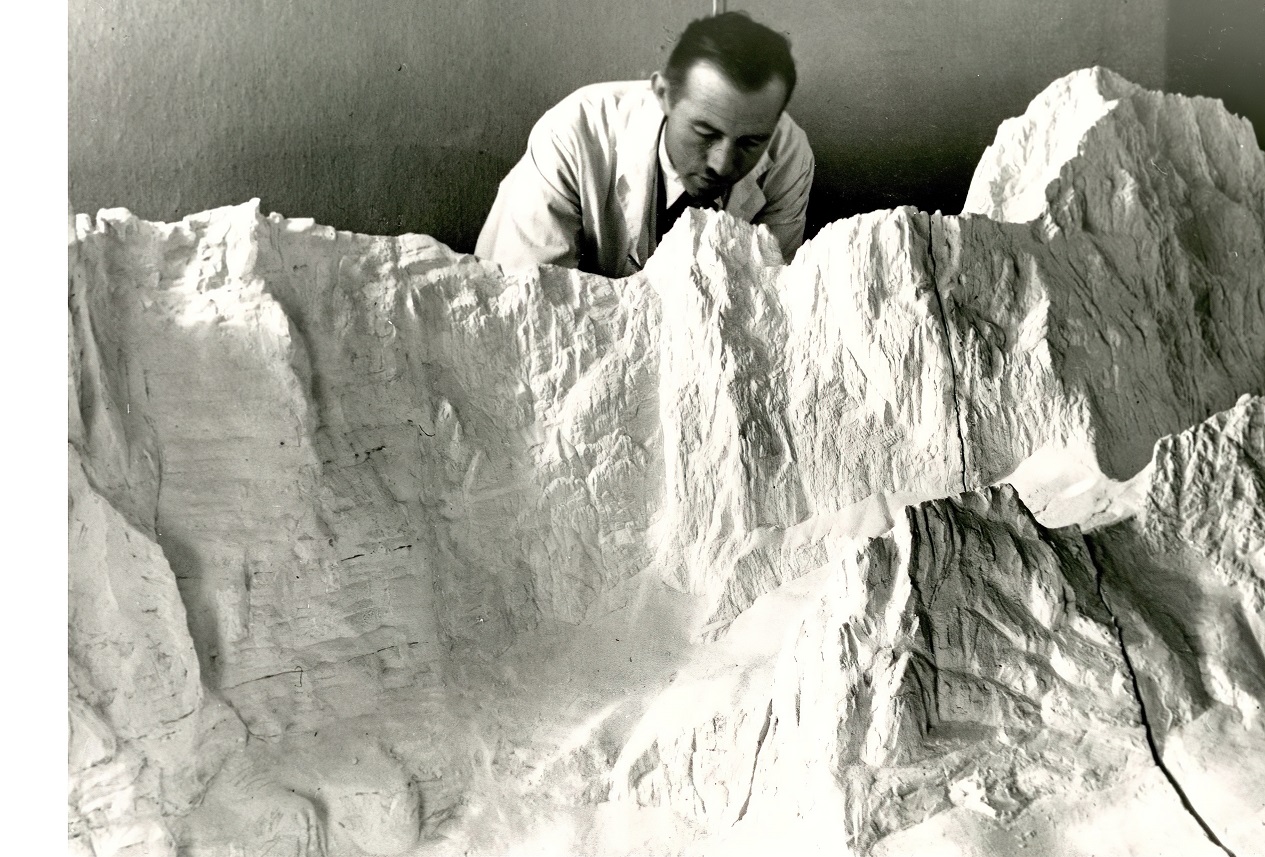
In the late 19th century, advances in technology made it possible to produce raised relief maps on a larger scale. The first large-scale maps were made by Eduard Imhof, a Swiss cartographer who is considered the father of modern raised relief mapping. Imhof used a technique called “photo-engraving” to create his maps. This involved photographing a standard map and then using a special engraving process to add depth and texture to the image.
During World War II, raised relief maps became an important tool for military strategists. The maps were used to plan troop movements and to study the terrain of enemy territories. After the war, raised relief maps became popular with hikers, campers, and other outdoor enthusiasts who used them to plan their trips and explore new areas.
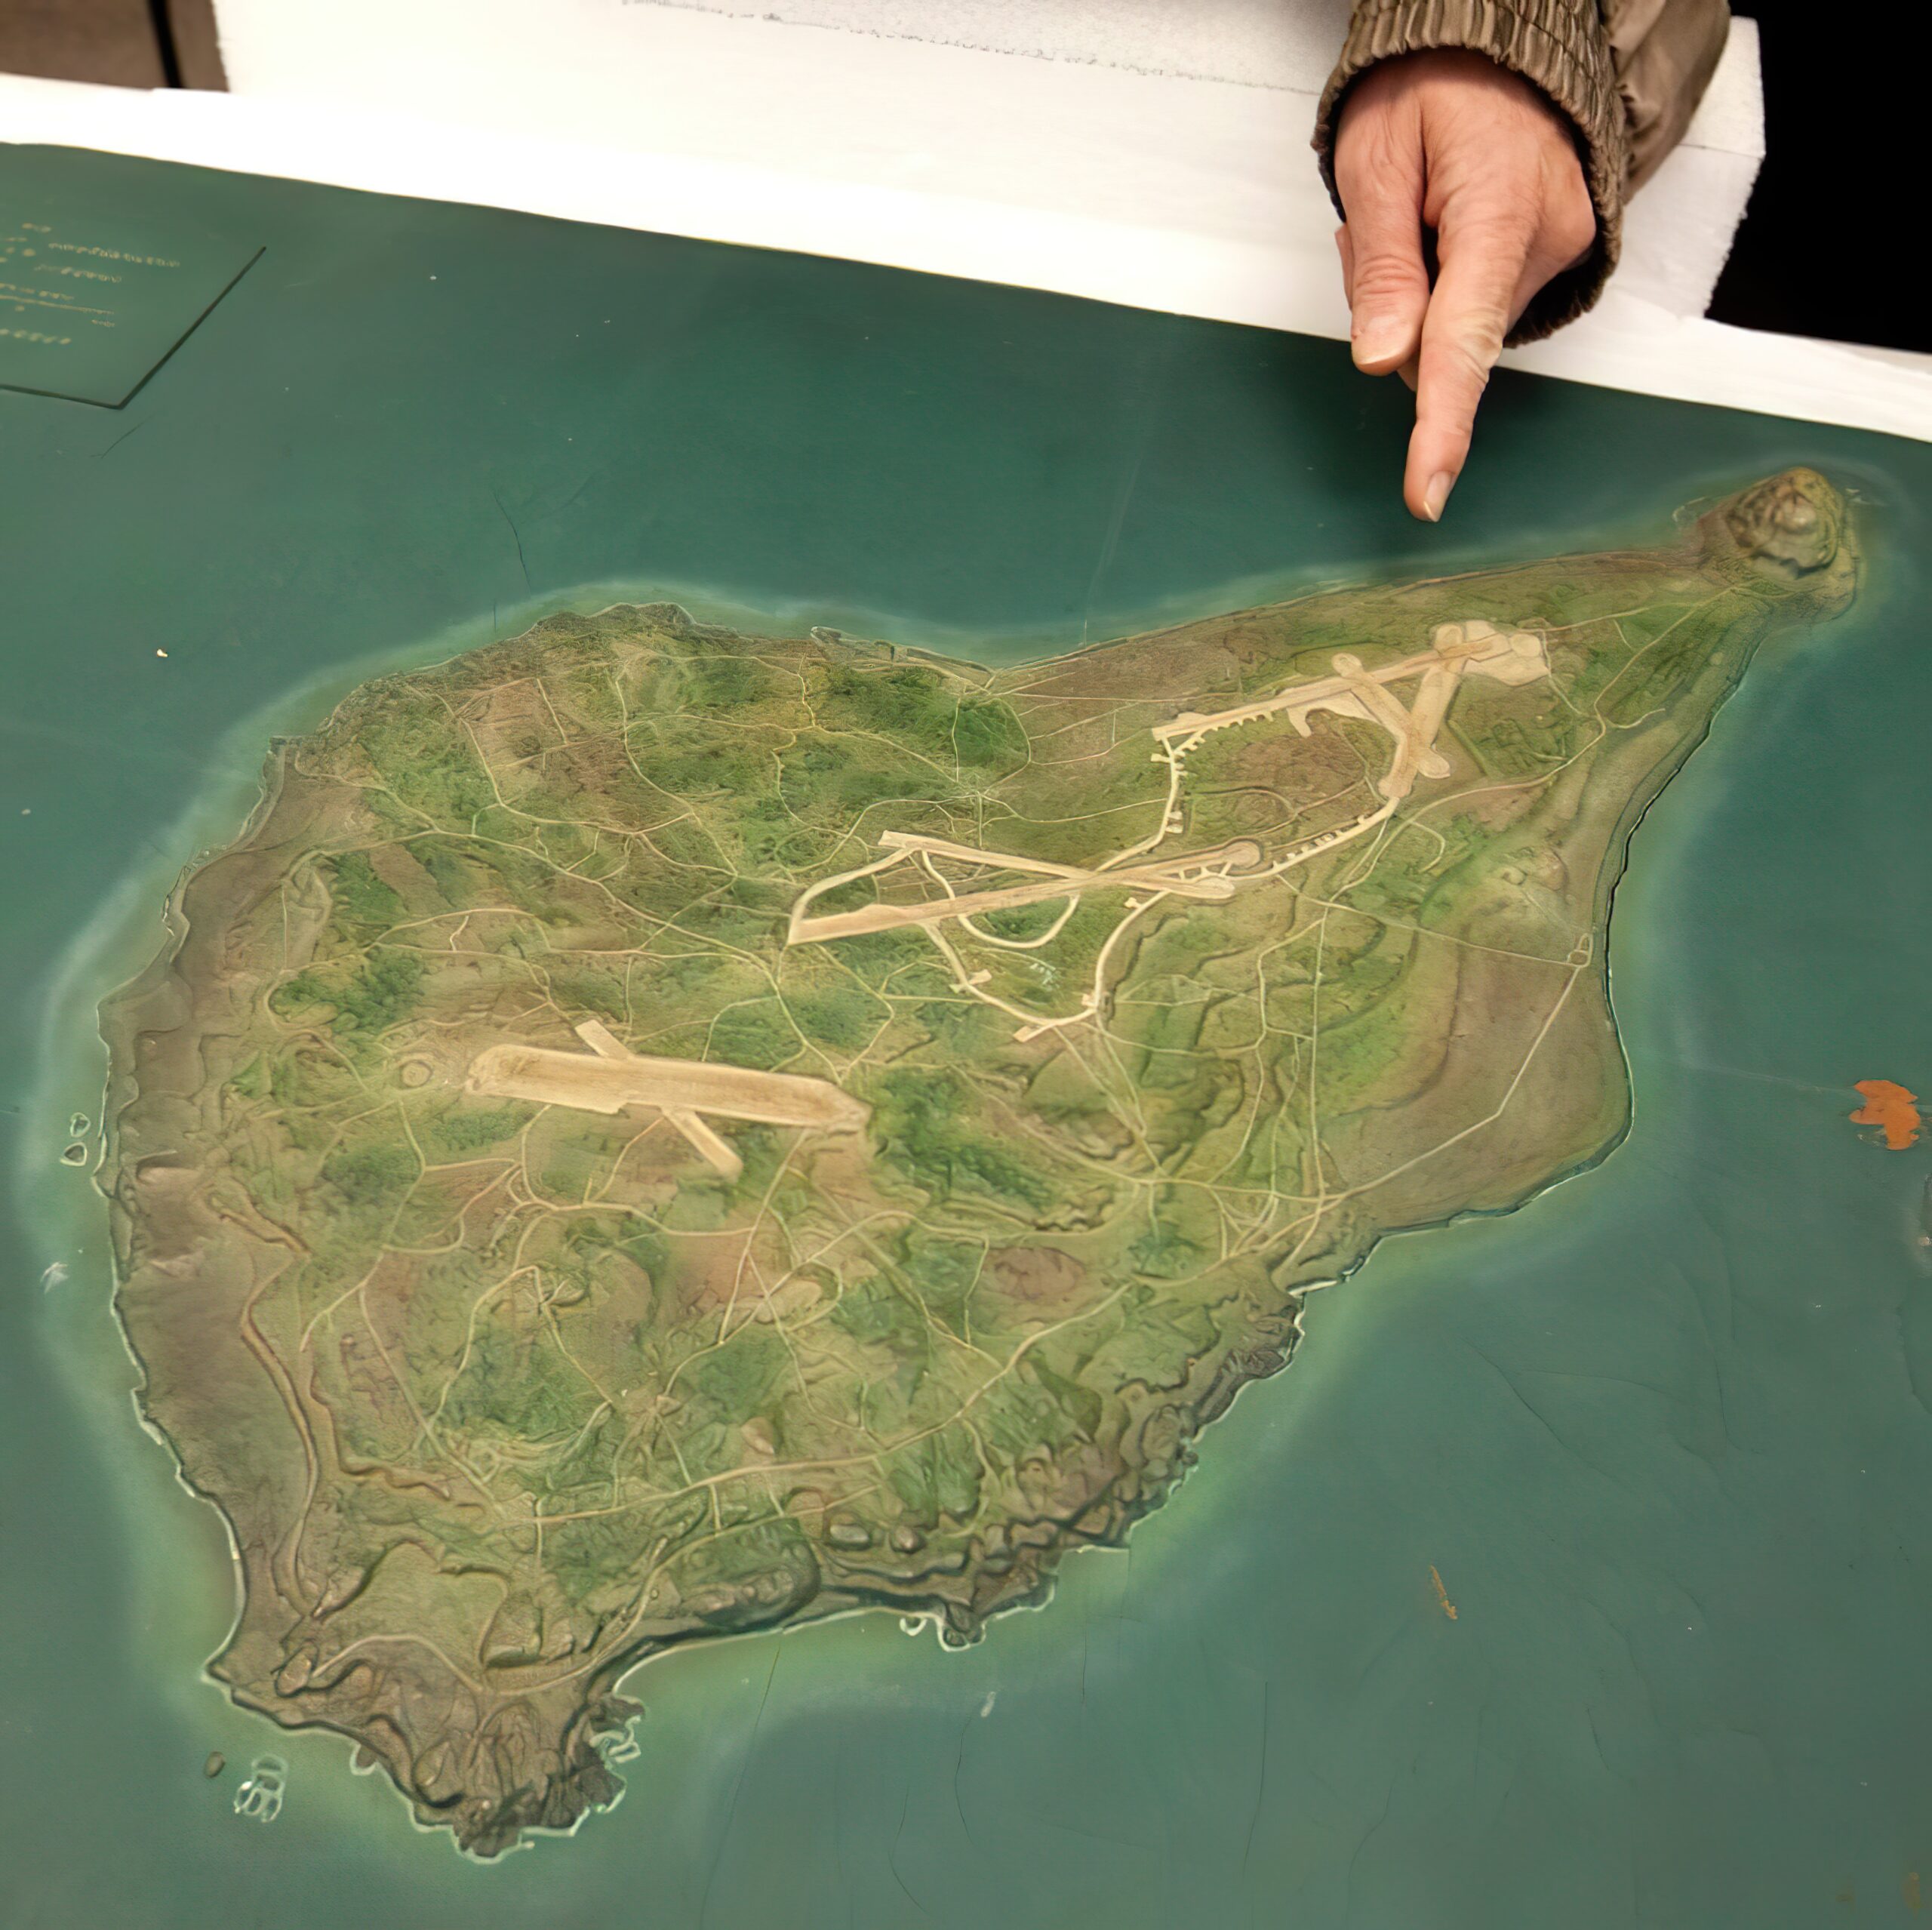
Later maps were created from layering sheet material, sometimes over a plaster mold. Then plastic formed maps became common in the late 1940s. These thermoformed maps were the first type of 3D-raised relief maps that could be quickly produced. They were not known to be highly accurate and had a difficult time forming sharp points, like high-pitched mountain ranges.
Now 3D printers can create 3D maps more accurately and affordably. Also, the maps can be designed to be much more portable than versions of the past. Emerging 3D printing technologies is opening the opportunity for 3D maps to be used in more industries than what existed even just a few decades ago.