
Planning a Giant Microscope Prop
A giant microscope prop is recognized through the relationship among its base, arm, stage, objective cluster, eyepiece, and focus controls. Planning those parts as one composition helps the enlarged object read clearly while defining its scale, primary viewing side, orientation, and display footprint.
Plan a Giant Microscope Prop
Choose the Microscope Reference and Main View
Begin with a specific microscope reference rather than a general science theme. Different microscope types change the angle of the arm, the position of the eyepiece, the shape of the base, the stage proportions, and the arrangement of the objective cluster. Front, side, and three-quarter references help define one consistent object before scale or graphics are finalized.
Select the principal audience or camera view at the same time. A side view emphasizes the complete arm and eyepiece profile. A three-quarter view can reveal more of the stage, objectives, and controls. If the display will be visible from several directions, identify every finished side and provide references for details that continue around the object.
Coordinate the Parts That Make It Read as a Microscope
Recognition depends on the relationship among several parts, not on one isolated feature. Resolve these component groups as a single measured composition.
Base and arm
Define the base footprint, edge profile, arm curve, and the point where the arm meets the base. These large masses establish the overall silhouette and visual balance.
Stage and objective area
Mark the stage size, its position beneath the objectives, the number and arrangement of visible objective forms, and the clearance that keeps this area readable.
Eyepiece and upper assembly
Confirm the eyepiece angle, tube length, upper housing, and their relationship to the arm. Small proportion changes here can shift the object toward a different microscope type.
Focus controls and details
Identify the controls, markings, bands, and other details that must remain visible after enlargement. Prioritize a few clear cues instead of crowding the surface with unsupported technical features.
Set the Display Scale, Orientation, and Footprint
Overall height is only one part of the scale decision. Provide the target width and depth, the available floor or platform area, the required clearance around projecting parts, and the intended viewing distance. The eyepiece, objective cluster, stage, and controls may need proportion adjustments so they remain visually clear at the larger size.
An upright side presentation keeps the familiar microscope profile prominent. A rotated or three-quarter presentation can expose more of the stage and objective area but may require a wider footprint. Define the placement, adjacent circulation, primary sightline, access route, and any movement between venues before the orientation is treated as final. Unless a separately engineered function is part of the project scope, plan the prop as a view-only display.
Compare Two Microscope Concept Views
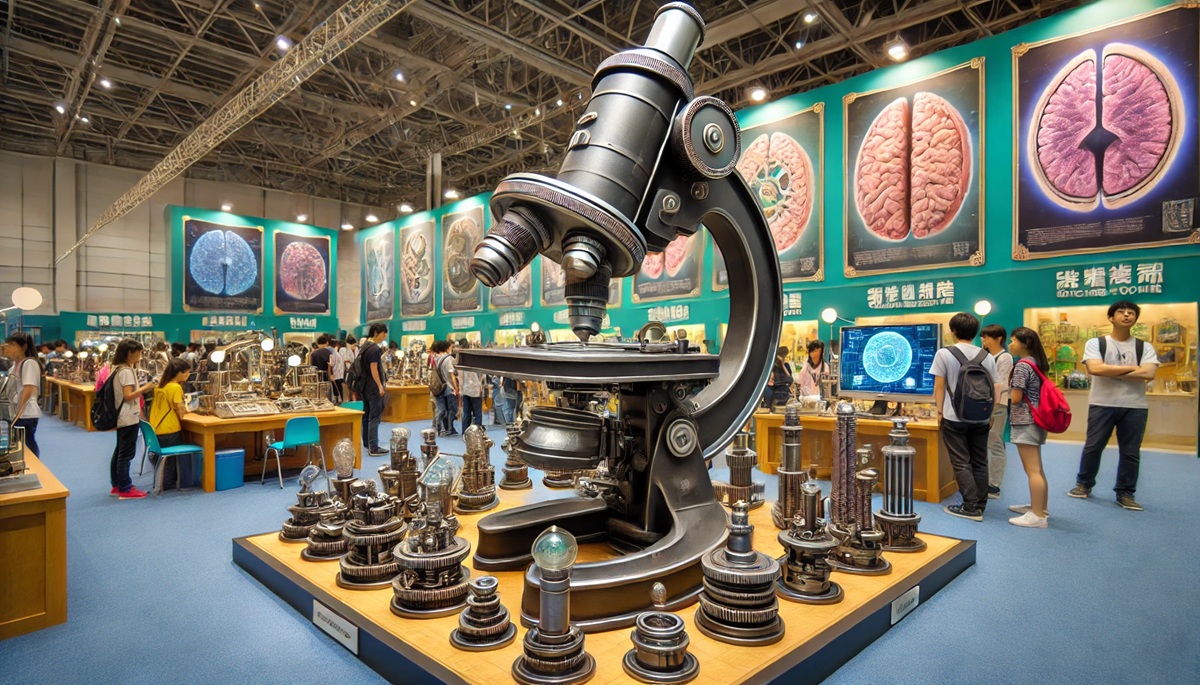
The full concept view is useful for discussing the relationship among the base, arm, stage, objectives, eyepiece, and overall footprint. The closer concept view makes the stage, focus controls, and upper assembly easier to compare when deciding which details need emphasis.
Both images are illustrative planning references rather than completed WhiteClouds commissions. They do not establish dimensions, materials, construction, a customer, load capacity, interaction, or working optical components.
Plan Color, Markings, and Surface Detail
Use the approved reference to define the main body colors, contrasting controls, objective accents, labels, logos, and any graphic panels. State whether the goal is to match a particular microscope reference or create an original visual direction. Supply vector artwork and color references for marks that need precise reproduction.
Consider viewing distance when choosing the level of detail. Broad color breaks and clearly sized controls may read better across a room than small labels. For close viewing, identify which markings and transitions deserve additional definition. Any request for illumination, movement, or audience interaction should be described separately so it can be evaluated as part of the project scope rather than assumed from the concept.
Send the Microscope Reference Set
A useful request combines the visual reference with the physical conditions of the display.
- Approved front, side, three-quarter, and component-detail references
- Microscope type or exact product reference that controls the silhouette
- Target height, width, depth, and available display footprint
- Required base, arm, stage, objective, eyepiece, and control details
- Primary viewing side and every additional finished side
- Upright, angled, platform-mounted, or other approved orientation
- Colors, logos, labels, and production-ready graphic files
- Interior, sheltered, or weather-exposed placement conditions
- Access route, destination, installation window, and required date
- Any requested lighting, movement, or interaction for separate review
A completed giant microscope display
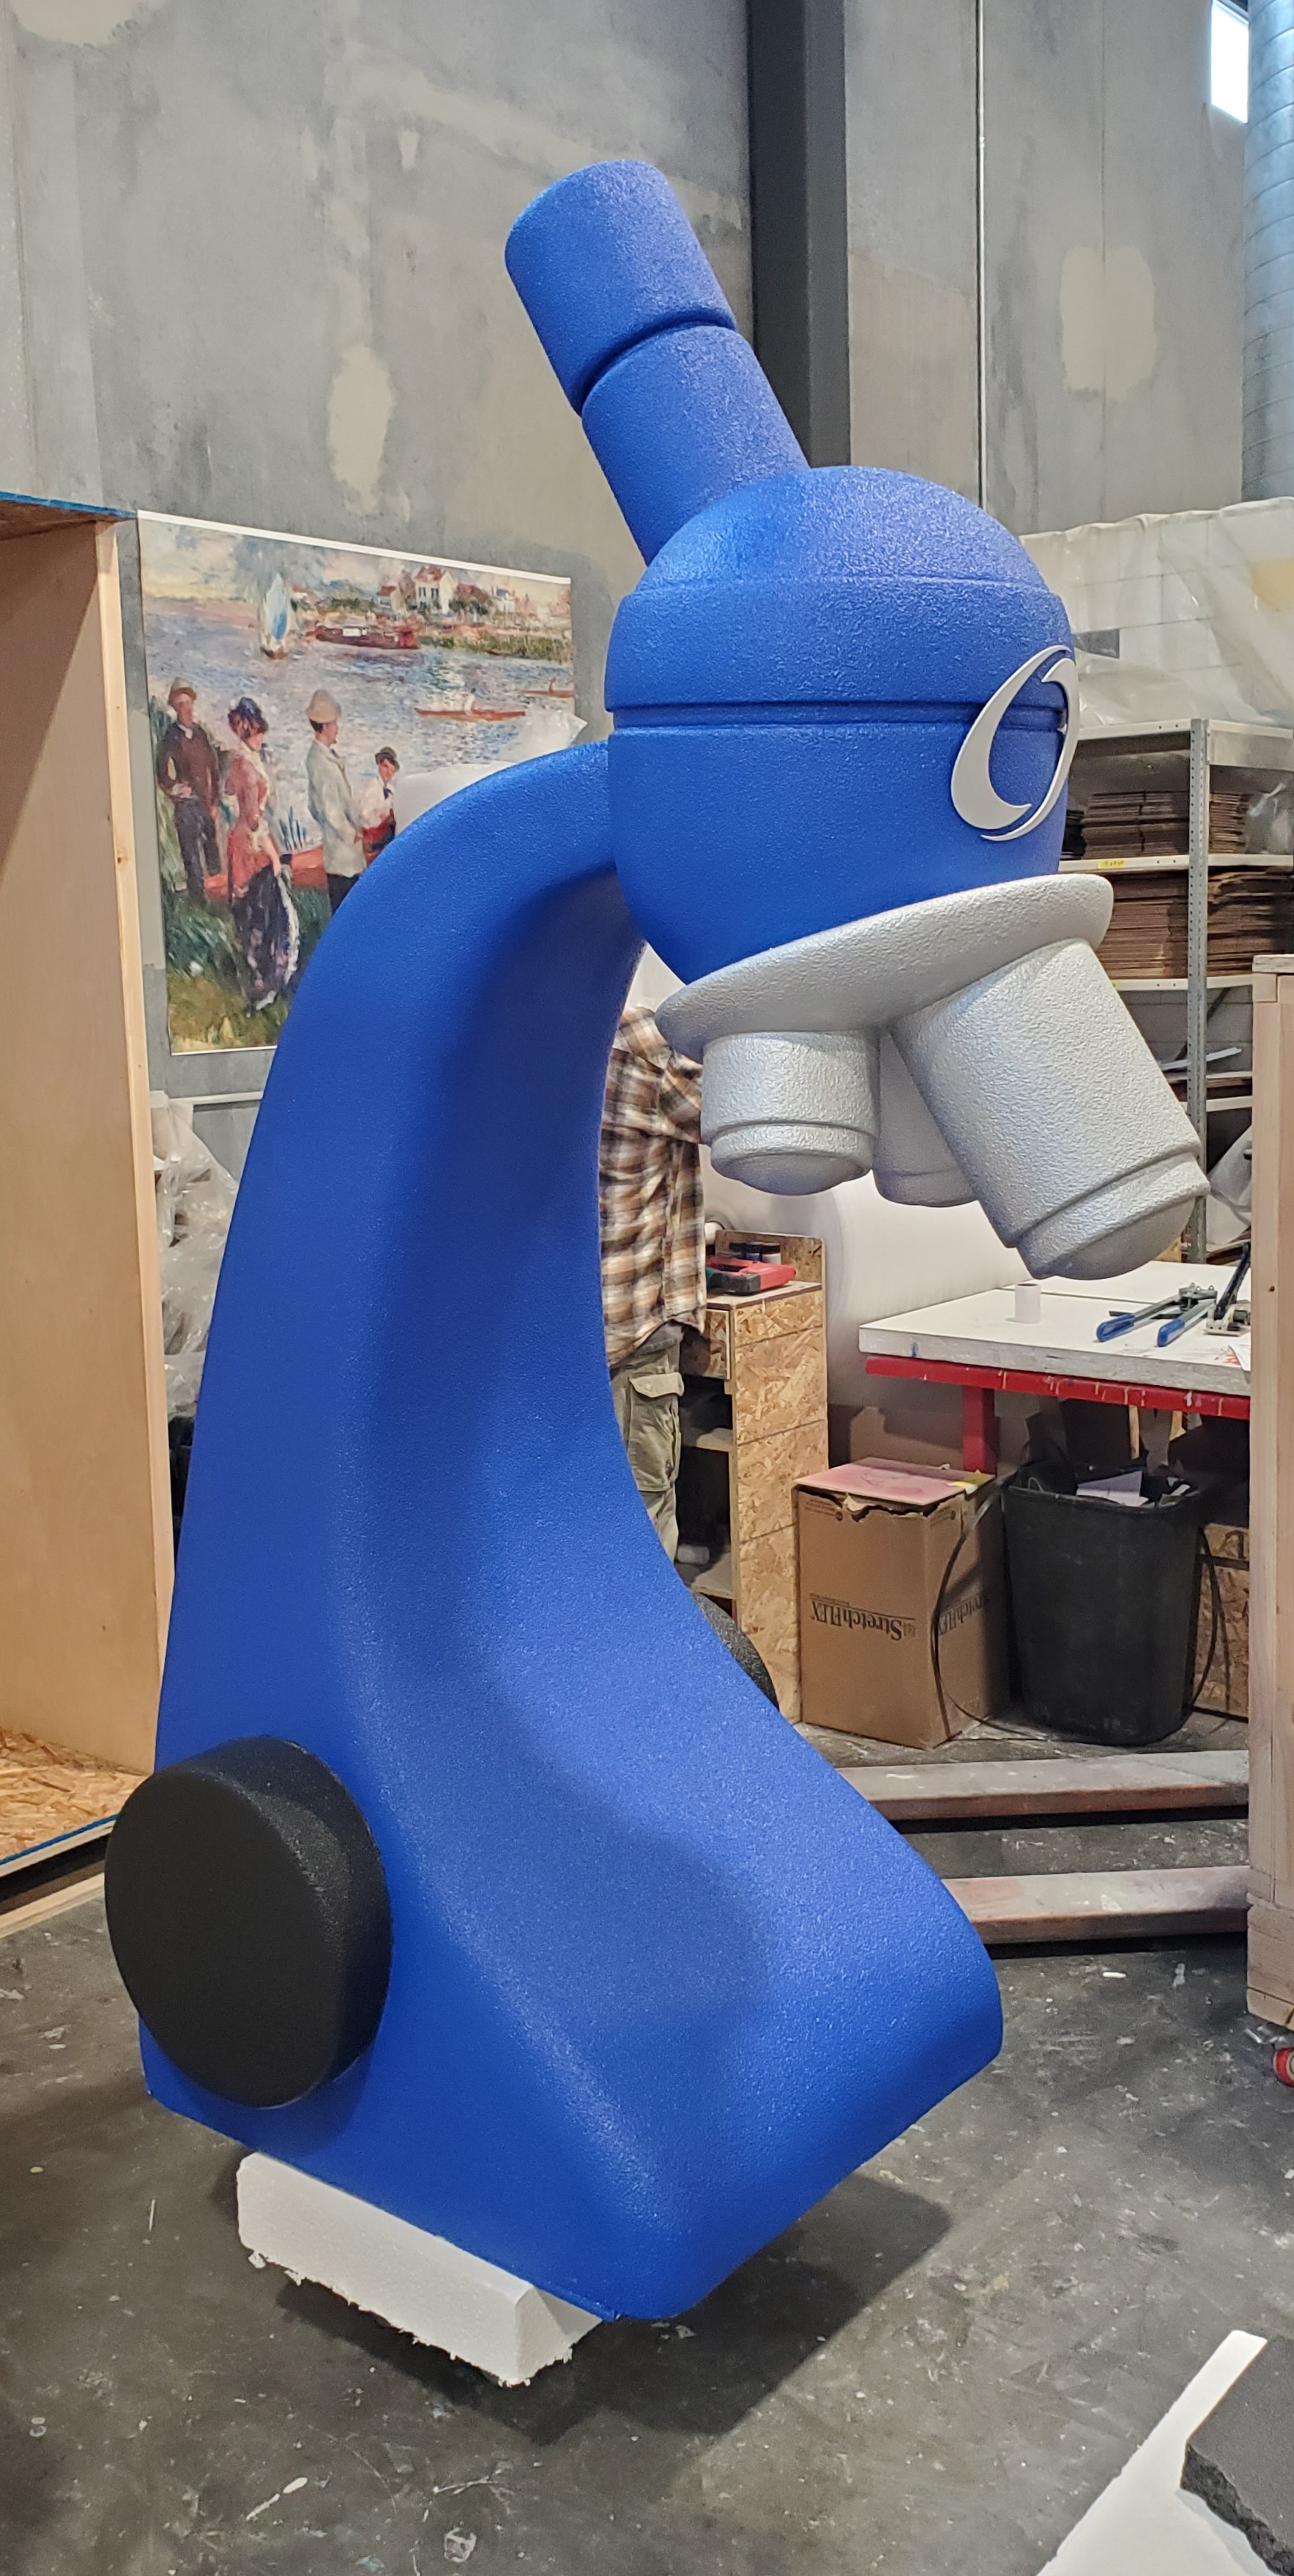
WhiteClouds fabricated the giant microscope shown here. The project provides a physical example of the recognizable relationship among the base, curved arm, stage, objective area, focus controls, and eyepiece. It is presented as one example within the broader microscope planning page rather than as a separate foam-microscope product category.
Request a Custom Prop Quote
Send the approved microscope references, target dimensions, required visible components, main viewing side, orientation, graphics, placement conditions, access information, destination, and schedule. WhiteClouds can review the scope and prepare a custom quote.