Veterinary 3D Printed Models
We build Custom 3D Models to aid in veterinary care
Table of Contents
Veterinary + Technology + Innovation
Even though 3D Printing has been available for many decades in industrial applications, it has recently caught the attention of veterinary professionals in creating anatomical models.
It is often hard to visualize aspects of a tumor or damage to soft/hard tissue looking at a CAT Scan or MRI. A physical 3D Printed veterinary anatomical model tells the entire story. Now, with 3D printing and other modern technologies, models are created in less time, are more affordable, more accurate, and have a higher level of detail than ever before.
These 3D models provide a hands-on perspective with high detail and full-color segmentation. Veterinary models are used in pre-surgery planning and preparation, and provide a variety of other benefits.
Large 3D product replicas and models of medical devices, inventions and products are also valuable tools for trade shows, funding, demonstrations or prototyping.
Selected Project Gallery
Rhinoceros 3D Veterinary Model Case Study
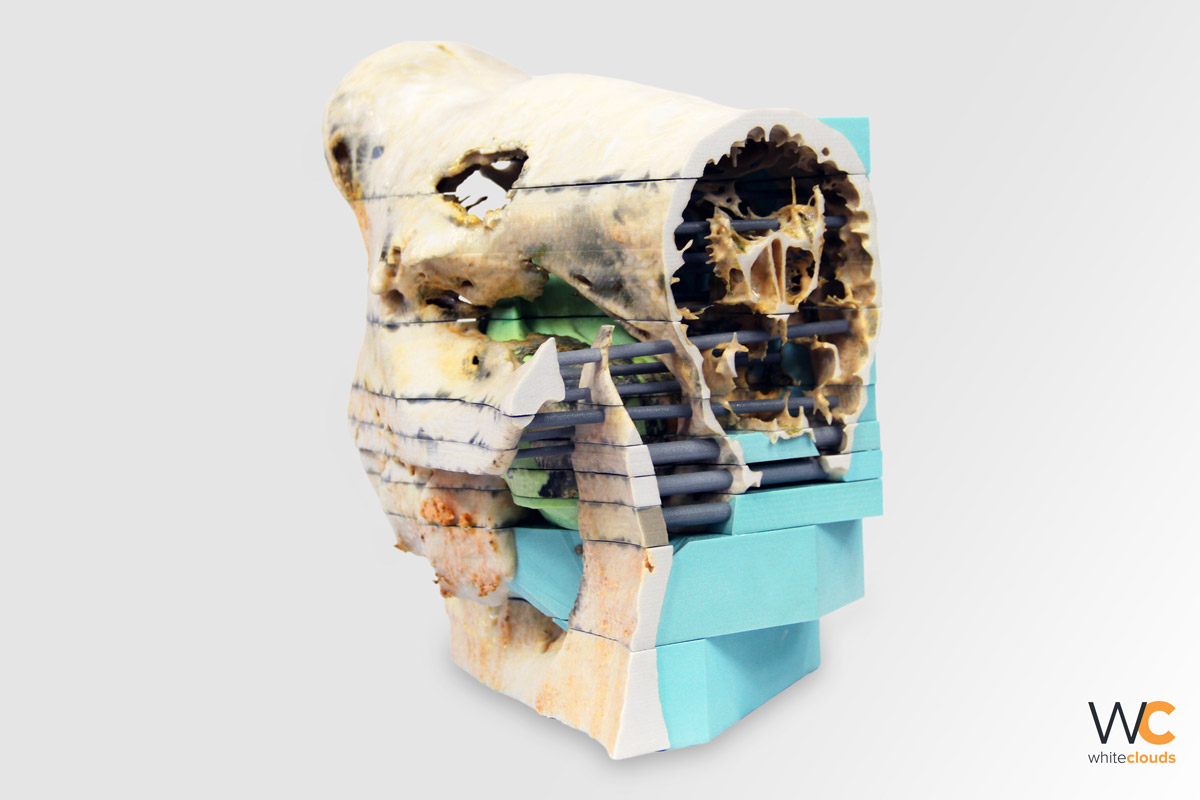
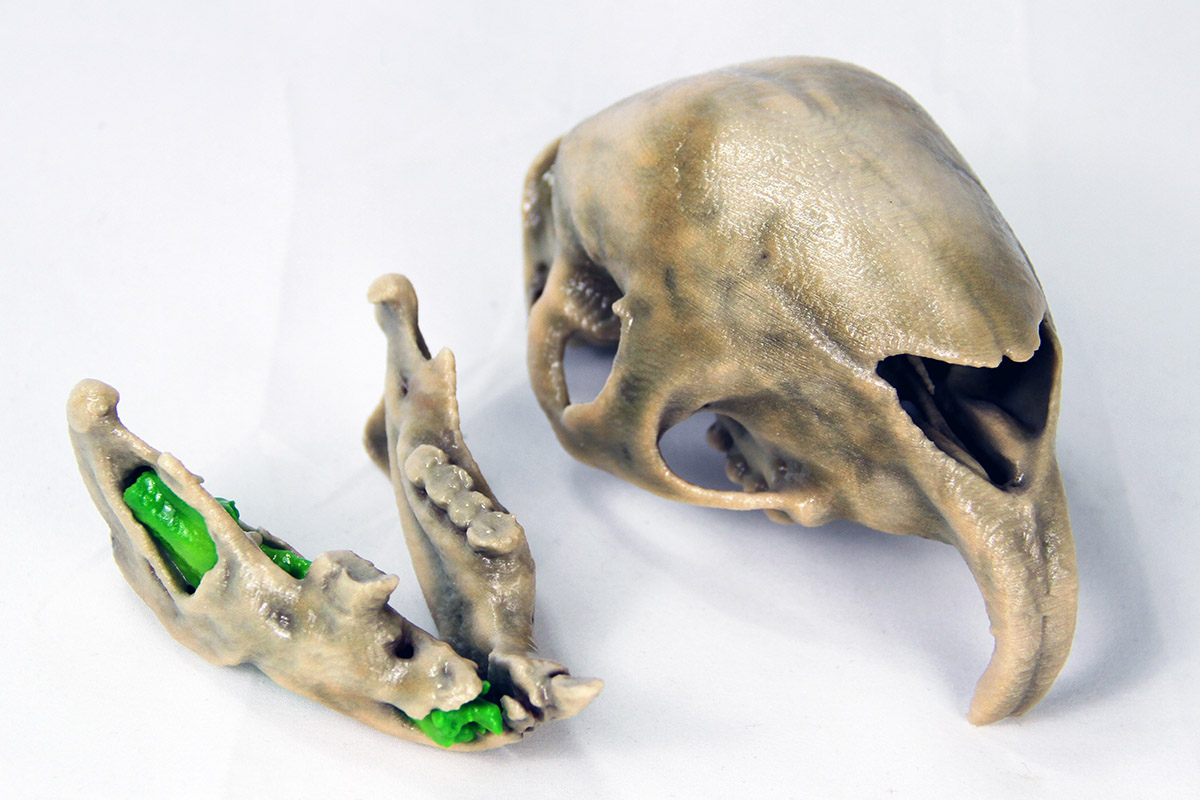
When the time came to perform surgery on a Rhinoceros, WhiteClouds was able to help. At the Brookfield Zoo, seven year old Layla, had been suffering from an impacted molar. With the help of TeraRecon’s medical imaging technology, WhiteClouds was able to print a 3D model of the rhinoceros that accurately showed surgeons where to operate.
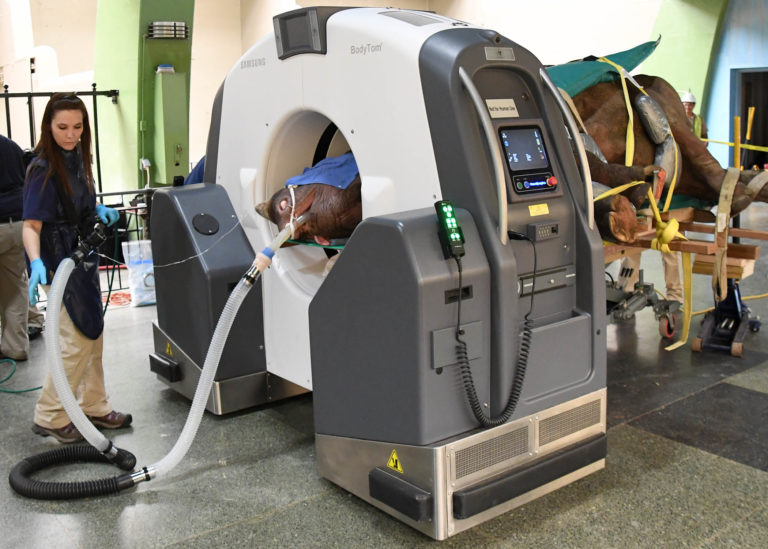

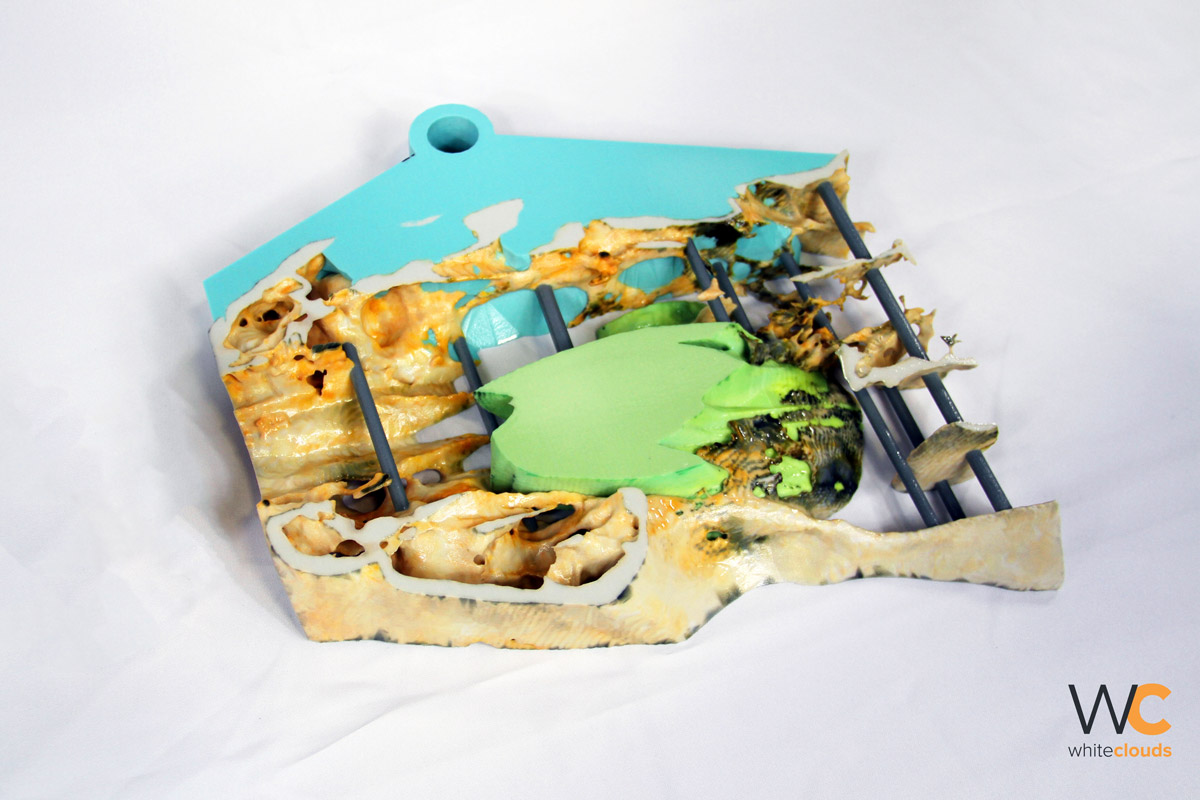
For veterinary models, WhiteClouds uses a unique hinge and slice technique that allows for a full visual of their model. In this case, it gave surgeons a fan-like view of the area of Layla’s skull containing the impacted tooth.
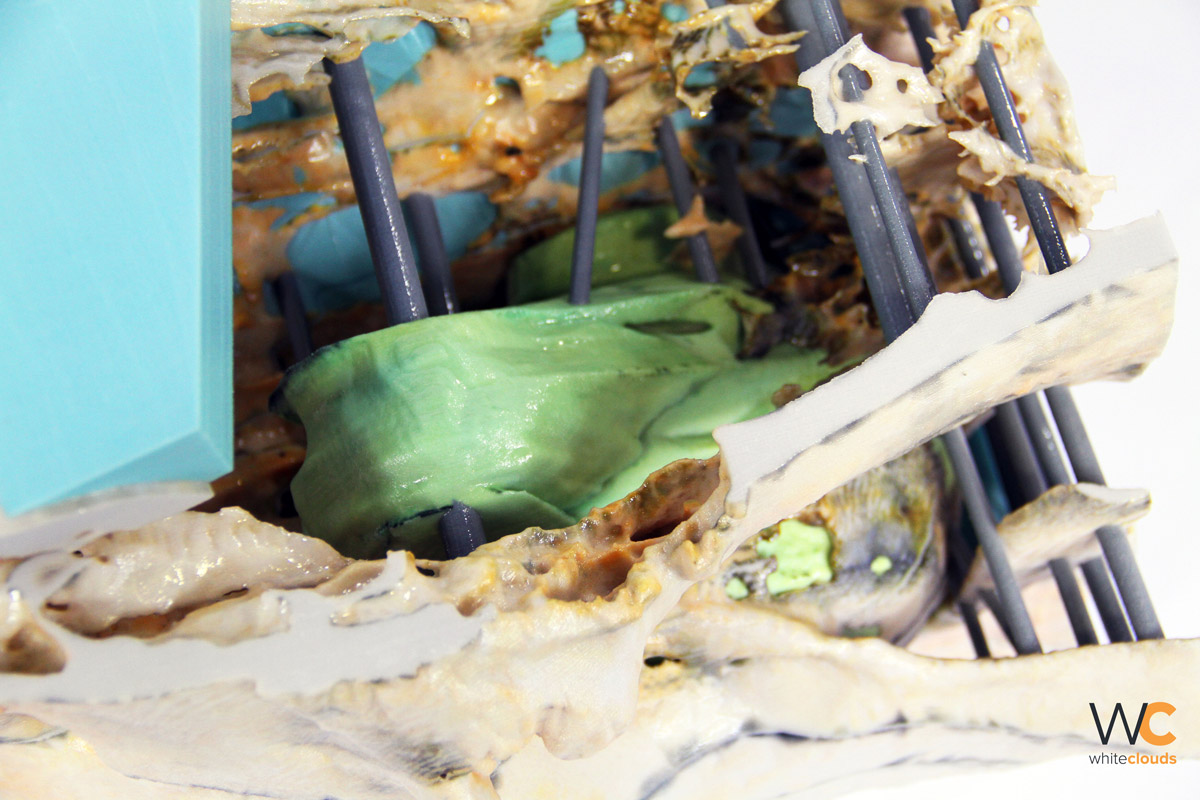
By using this model, operators were able to determine exactly where the impacted tooth and the infectious tissue were located. They were then able to effectively remove both tooth and tissue within two surgeries.
Thanks to 3D printing, Layla was able to have successful surgeries. Combined with the medical imaging technology that WhiteClouds based their model off of, surgeons were able to plan and execute a smooth operation on the rhinoceros.
3D printing has become an innovative and resourceful tool when it comes to veterinary medicine. WhiteClouds continues to provide prints to the veterinary community. Being able to play such a crucial role in Layla’s surgery has opened up new possibilities in medical and 3D printing fields.
Features and Benefits
- A physical model provides a visual perspective that you can’t achieve with 2D sliced MRI/CT images.
- Models can be used for pre-surgery planning, preparation, and practice: owner communication and education; and prosthetics and prosthesis testing.
- Models can be full-color, monochrome, transparent, pliable, and highly detailed.
- Strikingly high-resolution models with multiple options of finishes to emulate the desired outcome of the model such as dry-look or wet-look models.
- Provides ability to interact in a learning environment with real case studies demonstrating a prognosis and then comparing with the outcome is invaluable.
- Personalized veterinary models can be created fast with next-day service and very economical – typically 48 hours or less.
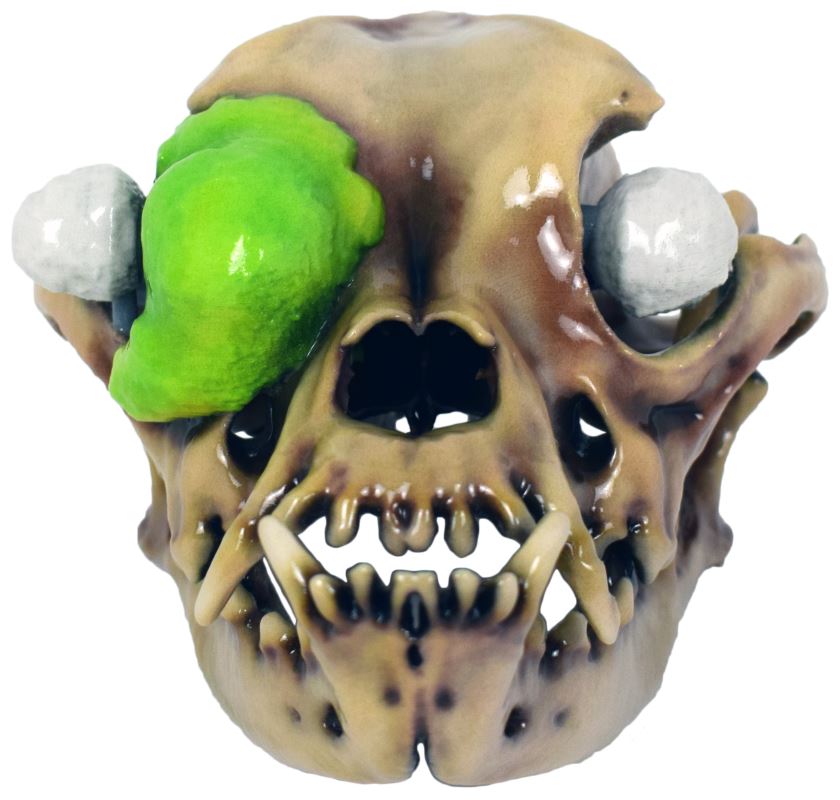
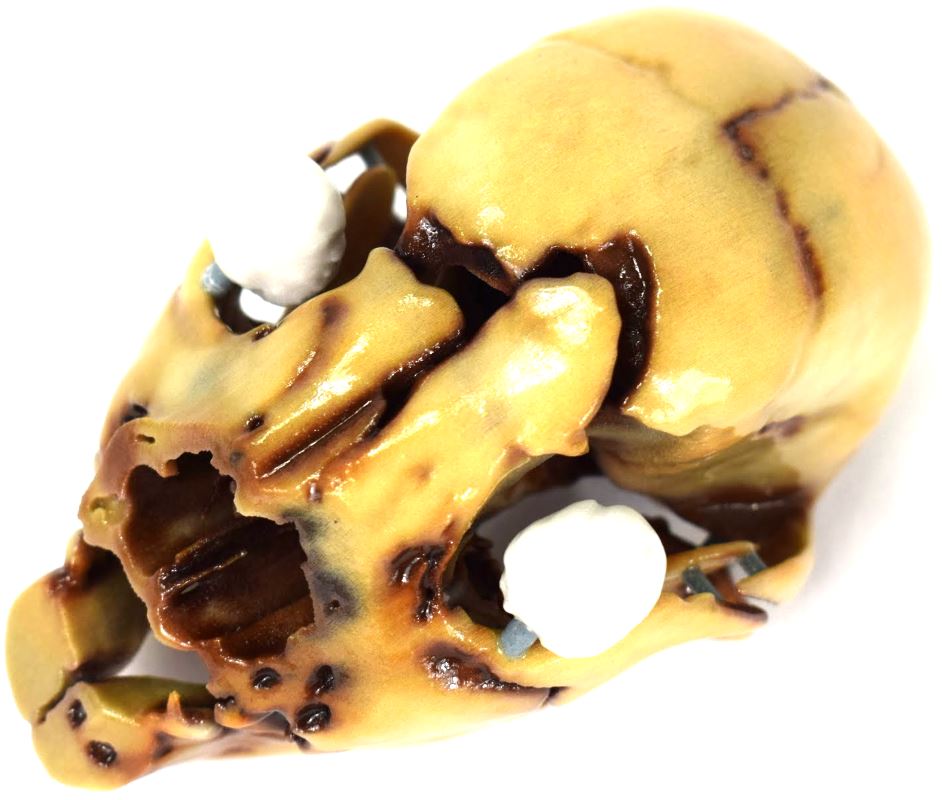
- Tumor resection models can be used to clearly highlight the tumor and the surrounding tissue.
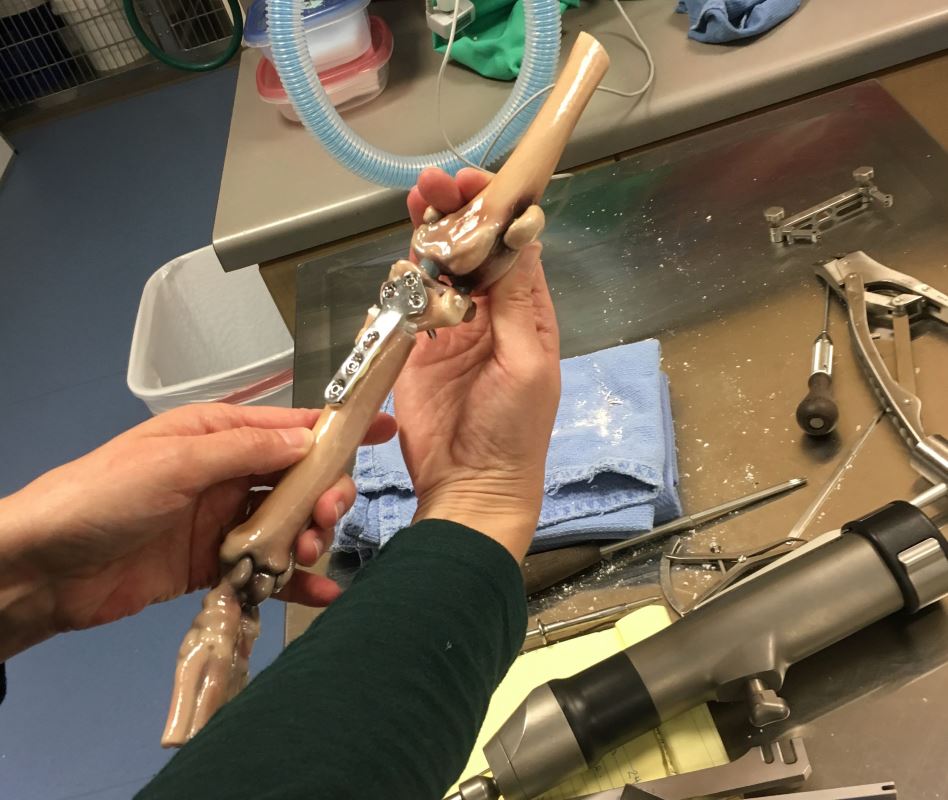
- Orthopedic models can be built from materials that are bone-like and can be used for pre-surgery measuring and hardware matching and contouring. Metal plates can be 99% pre-molded prior to surgery reducing intra-op anesthesia times.
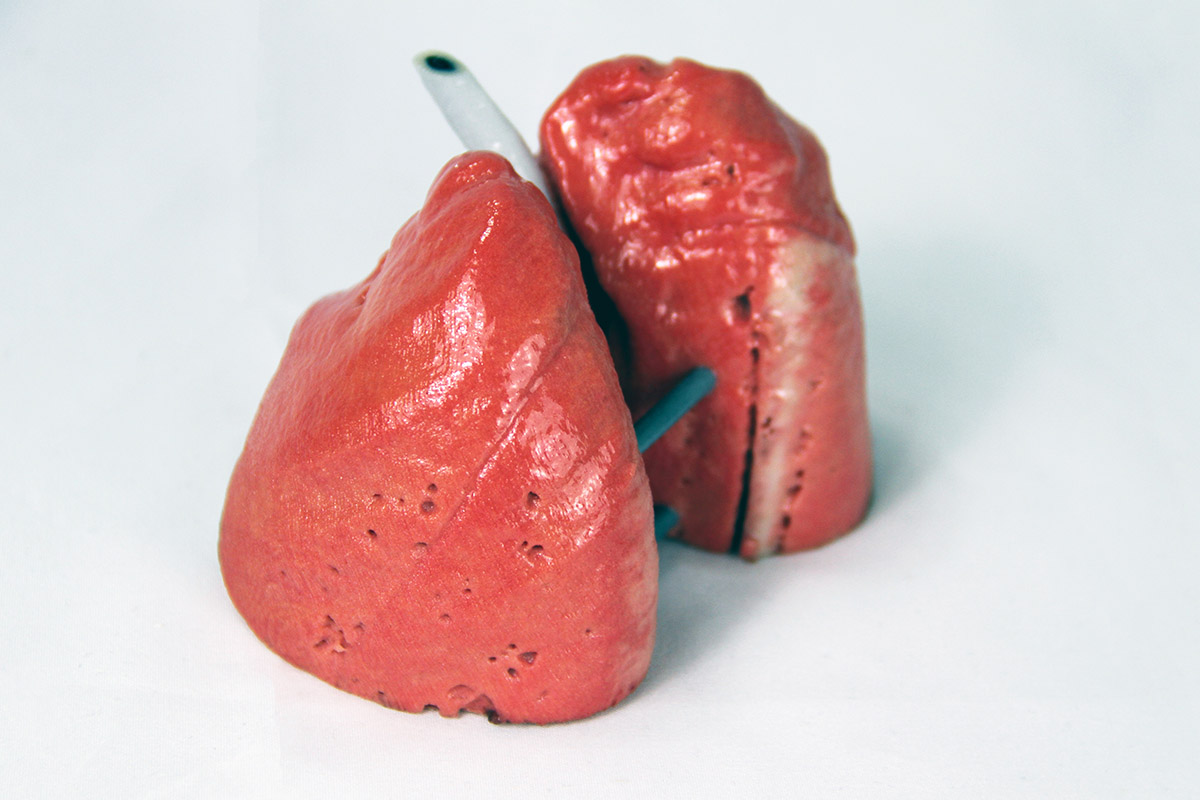
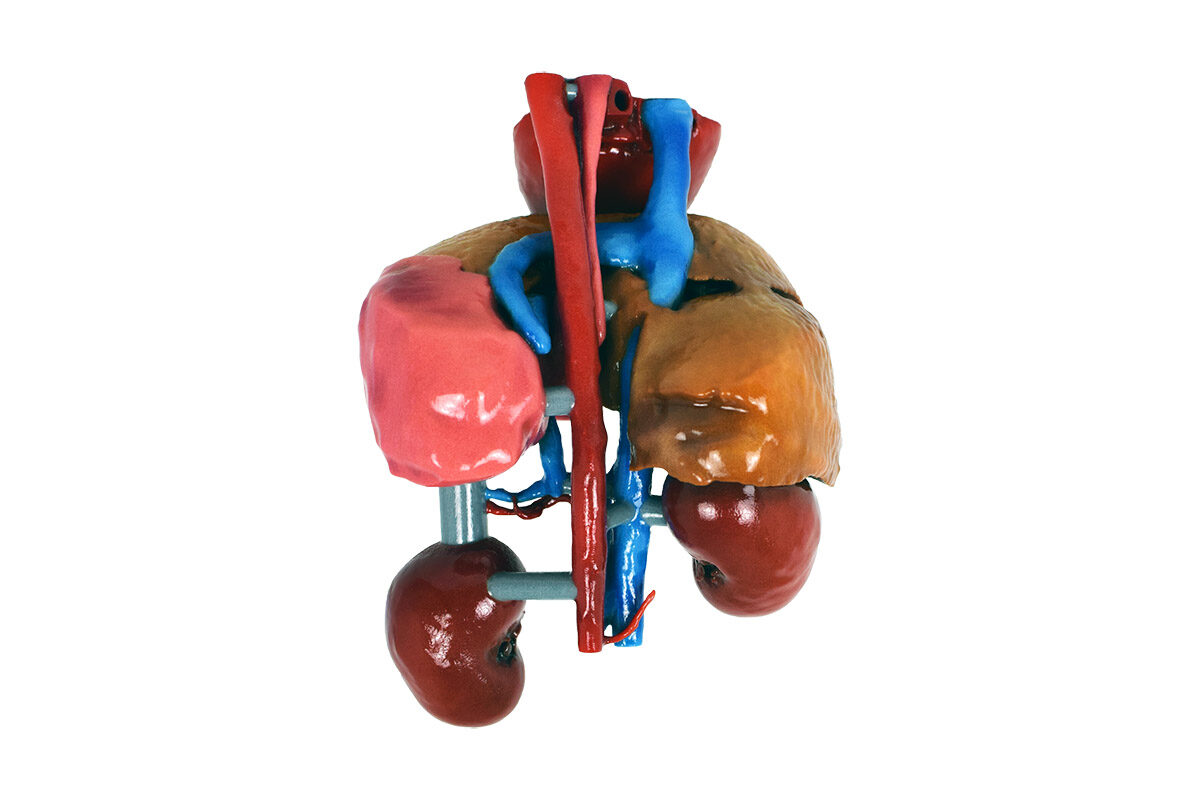
- Vascular models can be printed in full-color or transparent materials and can identify abnormalities in the organ, tumors, blood flow, sliced chambers, valves, muscle tissue, calcified tissue and have proven critical in a variety of complicated cases.
- Veterinary models can be designed and built for viewing with sliced, hinged, magnetized, flexible, pull-aparts, and cutaway features.
- Models can be used to eliminate preliminary exploratory surgeries and reduce the need for additional corrective surgeries.
Steps in Creating the Veterinary Anatomical Model
- Obtaining the DICOM file is the first step. These 2D images (slices) within DICOM files are produced from CT Scans (Computed Tomography) or MRI’s (Magnetic Resonance Imaging).
- Since medical imaging techniques show the entire body, including the surrounding tissues, the 2D data set must be Segmented. Segmentation removes any undesired data within the region of interest and only the relevant portions remain. There are several ways to accomplish this, but typically requires specialized software and trained personnel to perform the accurate segmentation.
- The outcome from the Segmentation step is a 3D model. A commonly over-looked step includes an Engineering and functionality design to ensure the resulting 3D Print will have the proper support, pegging, slicing, presentation, color application, etc. This pre-production design of the 3D model is typically done by a 3D graphics designer.
- Once the 3D model has been completely designed, the file is output to a standard 3D Printing file. At this point, the file is 3D Printed on the appropriate printer and materials. There are many technologies that can 3D Print models in numerous materials allowing for full-color options, physical characteristics (hard to pliable), and visual perspectives with transparent or hinge/slice models. Some of these technologies are FDM (Fused Deposition Modeling), CJP (Color Jet Printing), MJP (Multi-Jet Printing), PolyJet, SLA (Stereo Lithography Apparatus), SLS (Selective Laser Sintering) along with many others.
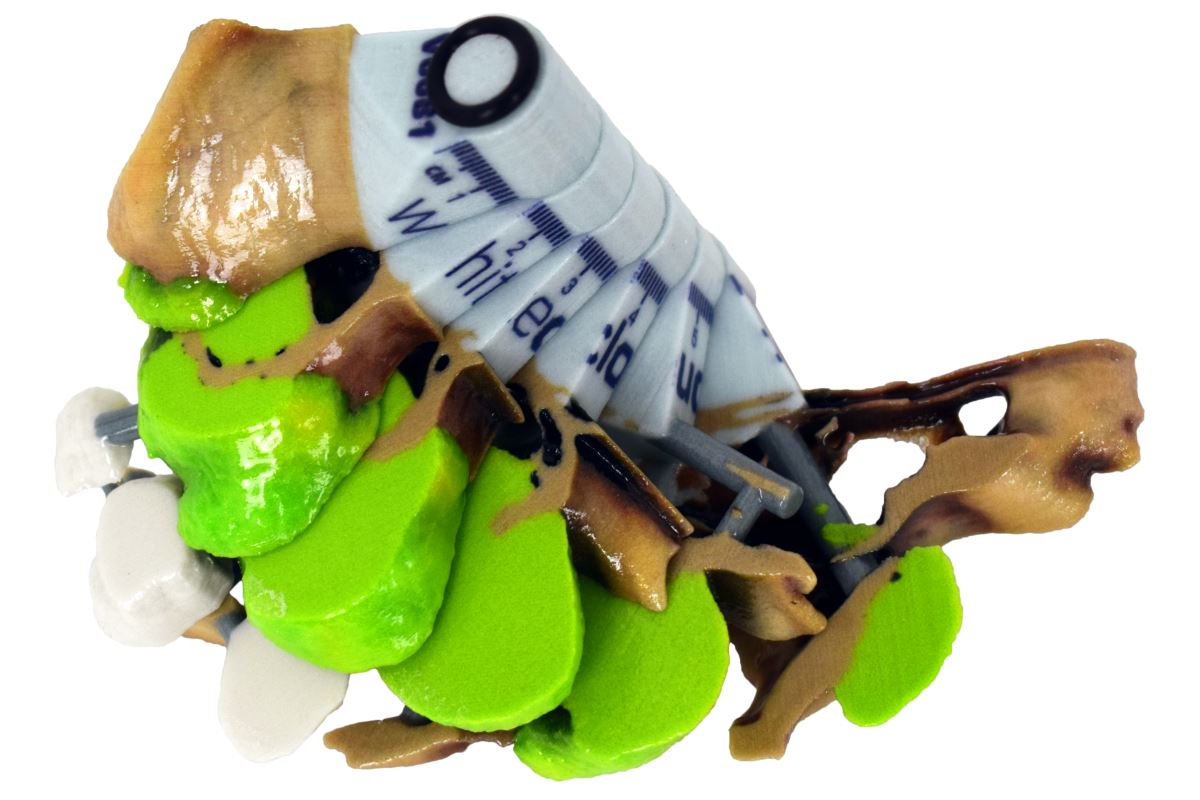
Hinge and Slice Models
WhiteClouds has a patent-pending “Hinge and Slice” technology that allows for examining specific areas of interest in more detail by evaluating various slices of the model. These slices can be designed in desired thicknesses and in various view planes giving multiple views.
Viewer Discretion Advised.
Click to see original photo.
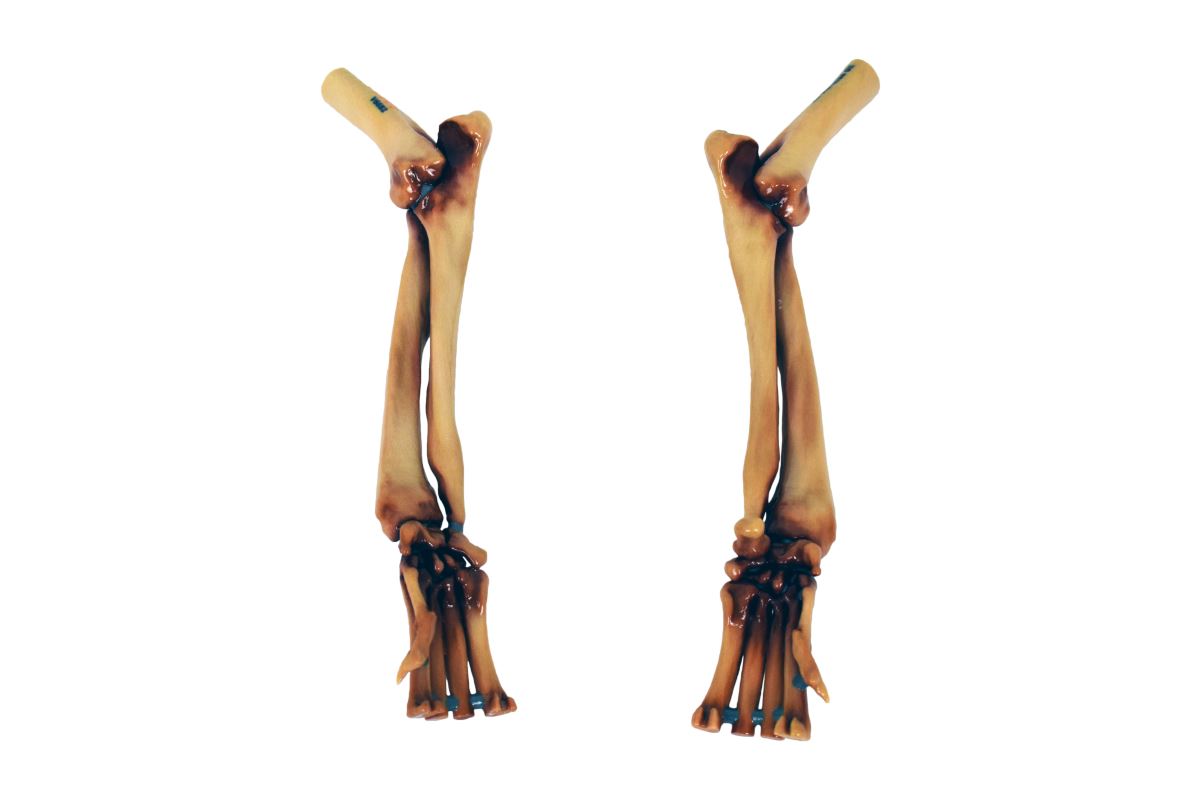
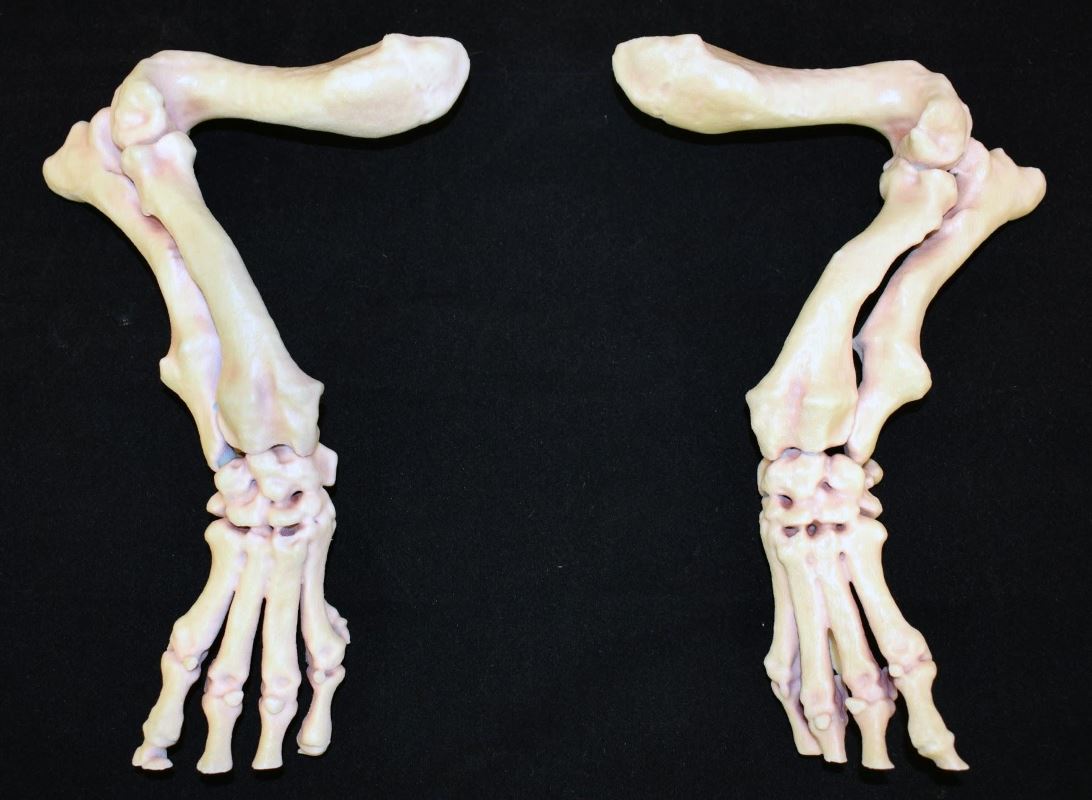
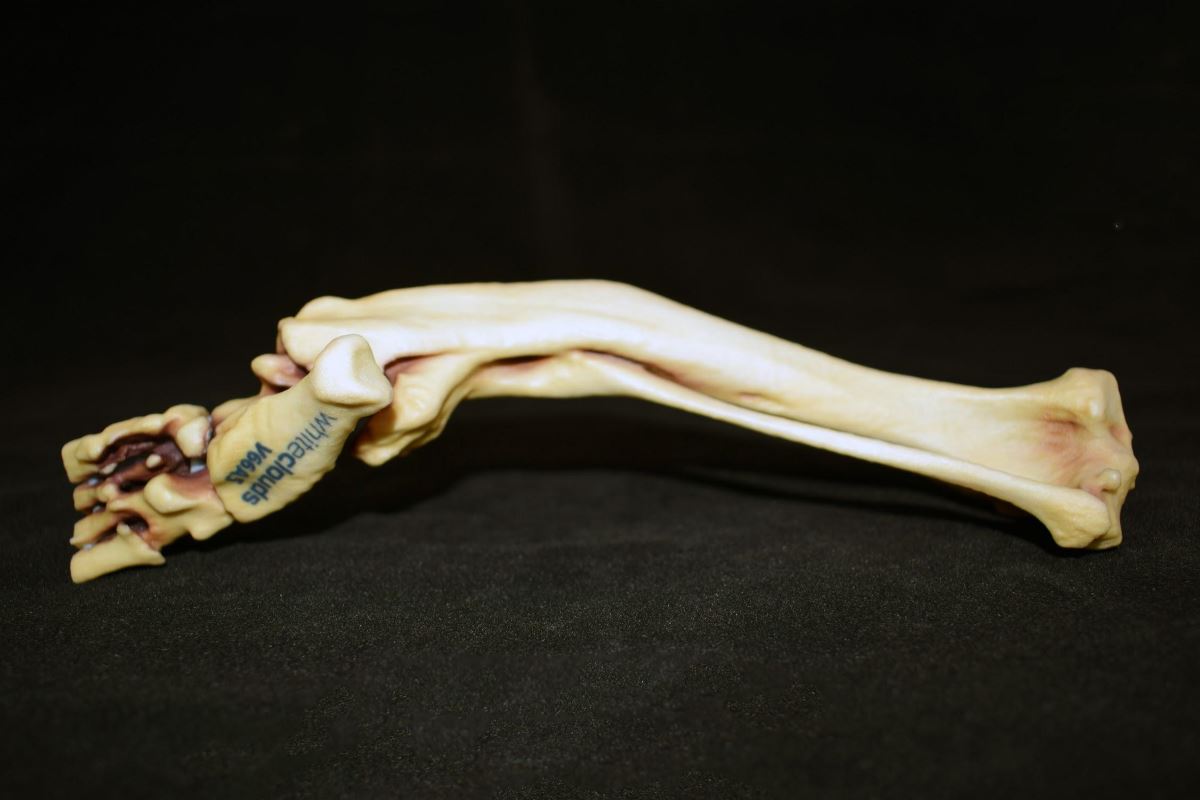
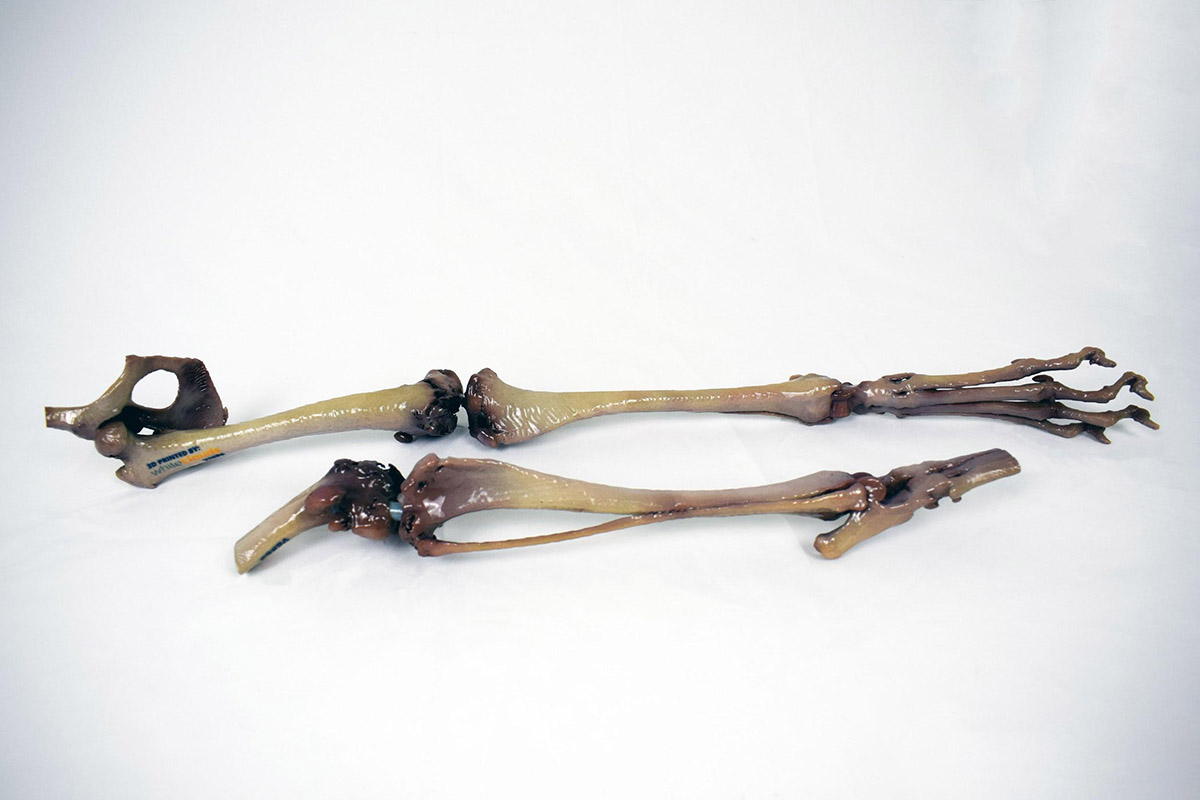
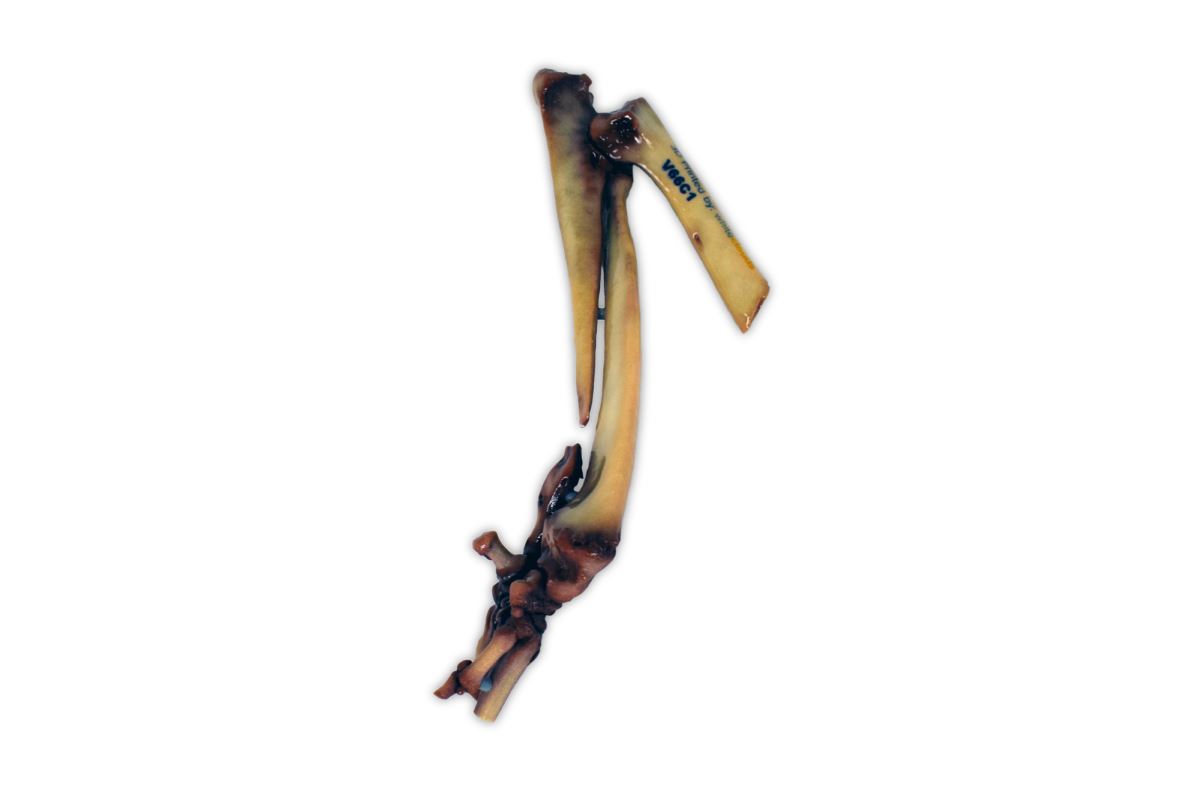
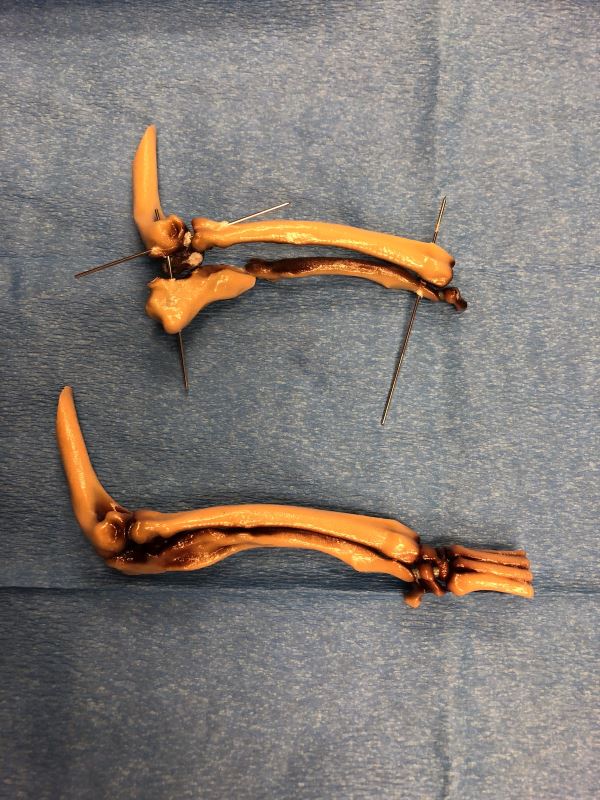
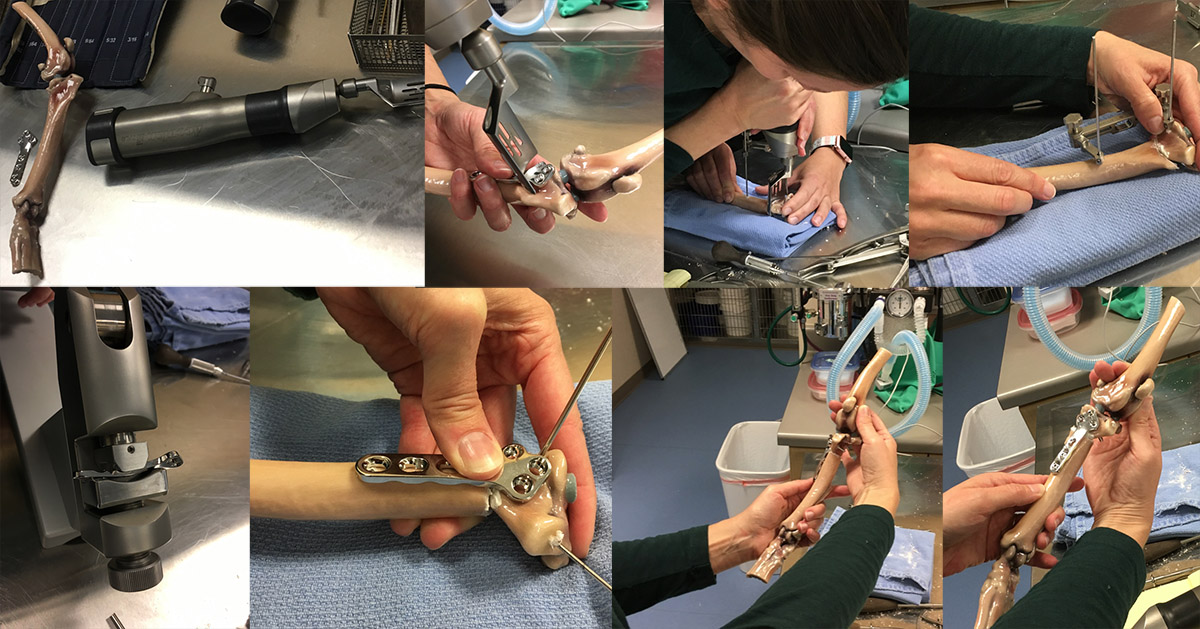
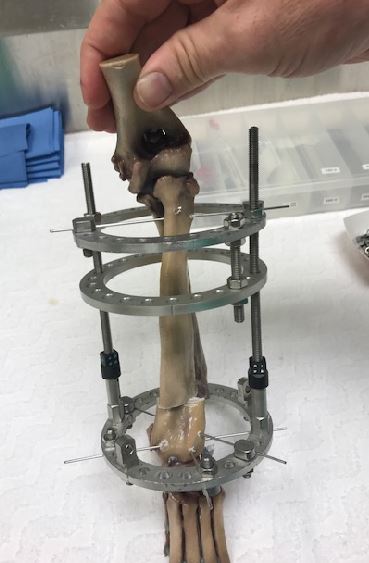
Sham Procedure for Angular Limb Deformity
High quality 3D printed bones are life-like and can be treated similar to bone structures. They can be used to practice cutting, sawing, drilling, and screw placement within the bone. This equivalent to living bone, allows for sham/mock procedures for complex case planning with no risk to the patient.
Client Reviews
"I did the sham procedure today and the 3D model was very nice to work on. Pins drilled into it similar to bone as did drilling and cutting. It cut easier than bone and was dry and did not heat up, and was not brittle... I liked it and would definitely endorse it and Whiteclouds. You have been very helpful and responsive to our needs and in your interest in producing a good model. I look forward to working with you in the future."
Dr. Richard Howard
"It's difficult to fully understand the malformation until we have it in our hands... That usually doesn't happen until we're in surgery."
Dr. Evelyn Galban Neurosurgeon University of Pennsylvania School of Veterinary Medicine
"We'll basically have everything done on the model, know exactly how our surgery is going to go before we go in the OR and do anything on our actual patient... It's almost a cheat code for surgery sometimes, it makes it very nice for us to go in there and for our plan to work well."
Dr. Kyle Snowdon Veterinary Surgeon University of Tennessee Veterinary Medical Center
"When you are in surgery and the patient is under anesthesia, you can actually decrease the surgery time. Decreasing surgery time means you could decrease amount of complication," Dr. Hespel said. "The longer a patient is under anesthesia, the more complication you could potentially have. Because the use of anesthesia requires the use of drugs, drugs are expensive," explained Dr. Hespel. "If we are able to do a fair amount of pre-planning and pre-surgical while the patient is not under anesthesia, then we can reduce the cost and the complication rate for the patient, and that's very gratifying."
Dr. Adrian-Maxence Hespel Veterinary Radiologist University of Tennessee Veterinary Medical Center
Technology and Materials
- We can print 3D models in different materials including digital plastic, and UV-cured resin. The type of model determines which material will produce the best results. We can help you choose the material that is best for your project.
- 3D printed veterinary models show incredible detail. The resolution of our printers is finer than a human hair.
- Our patent-pending “Hinge and Slice” technology allows for examining specific areas of interest in more detail.
Pricing
Cost of veterinary models is based on the volume of material (size of the model), the time it takes to create the 3D printable file and other elements of the model. Each model is bid individually and the best way to determine cost is to email us, call us at 385-206-8700, or fill out the form below and let us bid on your project.
Get a Free Price Estimate
Workflow

Common Questions
The short answer is starting with a DICOM set, a 3D printable file such as STL, ZPR, OBJ, WRL, and other 3D formats can be generated. Veterinary care image files are aggregated into a standard DICOM format. However, the DICOM format is not a 3D format. The region of interested has to be segmented out of the DICOM slices and made into a 3D model. That 3D model is then exported into any of the common 3D formats. We can generate your model starting with your DICOM or we can start with a 3D file if you have already performed the segmentation.
Yes. As requested, some models are printed in UV-cured resin materials with a transparent shell in the form of the internal organ. There are some color abilities with those materials but they are limited.
Yes, for two reasons. First, there is often the need to visibly know the boundaries of certain regions. For example, the actual geometry of a tumor as compared to the tissue around it. Second, color adds realism to a veterinary model. This enhances communication with the patient, the family, and other veterinary professionals. Veterinary clinicians are accustomed to viewing a specific region of interest in a 3D viewer on their screen. In those viewers, a realistic color texture is applied for the above two reasons. Having the model in your hand look like what you are seeing on the screen is very important.
We print our veterinary models in UV-cured resins depending on the specific need.
Yes. Our material is treated in such a way that it feels somewhat like bone and can even be machined, sawed, drilled, etc. similar to bone using actual medical tools.
It is common to want a veterinary model that has the form of the region of interest with the added requirement of being able to see inside the model. For this purpose, we have a patent-pending method of creating slices of the model with an external hinge which allows the user to go to a specified depth to see the interaction of soft tissue, bone, vascular, etc.
We know the need for a veterinary care model is often tied to an upcoming surgery. You typically have the model in your hands within 3 days.
Yes, we do. You can learn more about veterinary face shields here.Do you have a question we didn‘t answer? Don’t hesitate to contact us at 1-385-206-8700 or [email protected].
Worldwide Delivery
WhiteClouds has delivered models around the world.
History of Veterinary Models
Wilhelm Conrad Roentgen, professor at Germany’s Wuerzburg University, discovered X-rays in 1895. This was revolutionary, allowing us to peer into the body without first making cuts. His process used a cathode-ray tube and when high voltage was applied, the tube would produce a fluorescent glow. He found that his new ray could pass through the human tissue but not human bones or metal objects.
In 1896, natural radioactivity was discovered by Henri Becquerel, a French scientist. His process used uranium compounds to expose photographic film. In 1898, the Curies, Marie and Pierre, started looking for other radioactive elements and discovered another radioactive element in pitchblende and named it “polonium”. Later that year the Curies discovered another radioactive element which they named radium. Both of these, polonium and radium were more radioactive that Becquerel’s Uranium.
During the 1920’s through 1940’s, many companies starting using advances in these materials and processes and a new industry was formed called industrial radiography. In 1972, British engineer Godgrey Hounsfield invented CT (Computed Tomography) and more commonly known as CAT scanning (Computed Axial Tomography). This process allowed for many multiple x-rays to be shot through the body at different angles then a computer would calculate and triangulate the image. Originally, this equipment allowed scanning of only the head and later in 1976, new systems allowed for scanning of the entire body.
Also in the 1970’s, computers were getting faster and faster, now allowing for quicker processing. This led to superconductors making magnetic fields powerful enough to create Magnetic Resonance Imaging technology (MRI). MRI’s are two-dimensional representations of the patient. MRI’s use no radiation to accomplish the scan. MRI’s are best at showing details in soft tissue. The first MRI technologies started being used in veterinary medicine in the early 1980’s. Because of the newness, large size, and high expense, MRI’s were not widely available for veterinary medicine. Some were made mobile, using specially-built trailers and were pulled through the country by semi-trucks visiting veterinary schools and specialty clinics.
Today, with MRI systems much smaller than in the past, more and more veterinary hospitals are using these systems. The next technology will be the use of 3D Printed models being produced from the layers of data produced from these CAT Scans and MRI’s.