MakerBot
Printing with Raft and Supports
On some 3D printing projects, you may choose or it may be necessary to print with a raft and supports. A raft is a grid of material the MakerBot builds. The project is printed on top of this material. Rafts can help prints that have trouble sticking to the build plate and may be especially helpful for tall, thin prints and even prints that are hard to remove from the plate. One disadvantage to rafts is you have to remove them from the object which is sometimes difficult.
Support material is a thin webbing of plastic that helps prints with extreme overhangs. As a general rule, if you have an overhang that extends out at greater than 45 degrees, then you need a support. Support material, like the raft, will have to be removed from the project when it is finished printing.
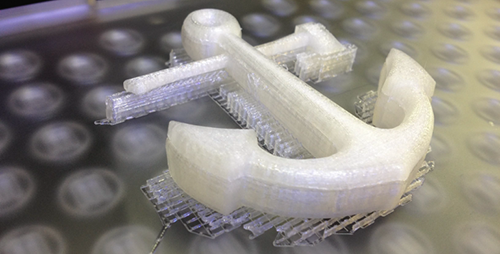
In this example, we are turning a simple logo into a 3D object. The object is an anchor with an axe through the top. As you can see, the axe extends out from the anchor at a 90 degree angle and will require supports. We’ll use supports and a raft on this build.
After the object is open in MakerWare and you’re ready to build it, click Make It. A window will open with some options. Choose whether you want to Make It Now or Export to a File, set the Quality and other options. At this point, you will need to check the boxes next to Raft and Support. You’re now ready to build your object.
MakerWare will determine the size of the raft and where supports are needed. The MakerBot 3D printer will first lay down a thin layer of plastic grid to begin building the raft. It will build the supports, layer by layer, as it builds the project. You can see the raft and supports in our anchor project.
Once the object is finished, remove the raft, support, and object from the build plate. Then carefully break or cut the raft and supports from the object. We’ve found that small, sharp scissors, a hobby knife, and sandpaper are useful tools when removing raft and supports.