
Planning a Custom 3D Moon Topography Display
A custom 3D Moon topography display turns lunar elevation data into a physical surface that can be viewed across a room and examined at close range. Defining the geographic extent, relief emphasis, labels, display format, and viewing distance at the outset helps the finished model communicate the intended terrain clearly.
Discuss a Moon Topography Display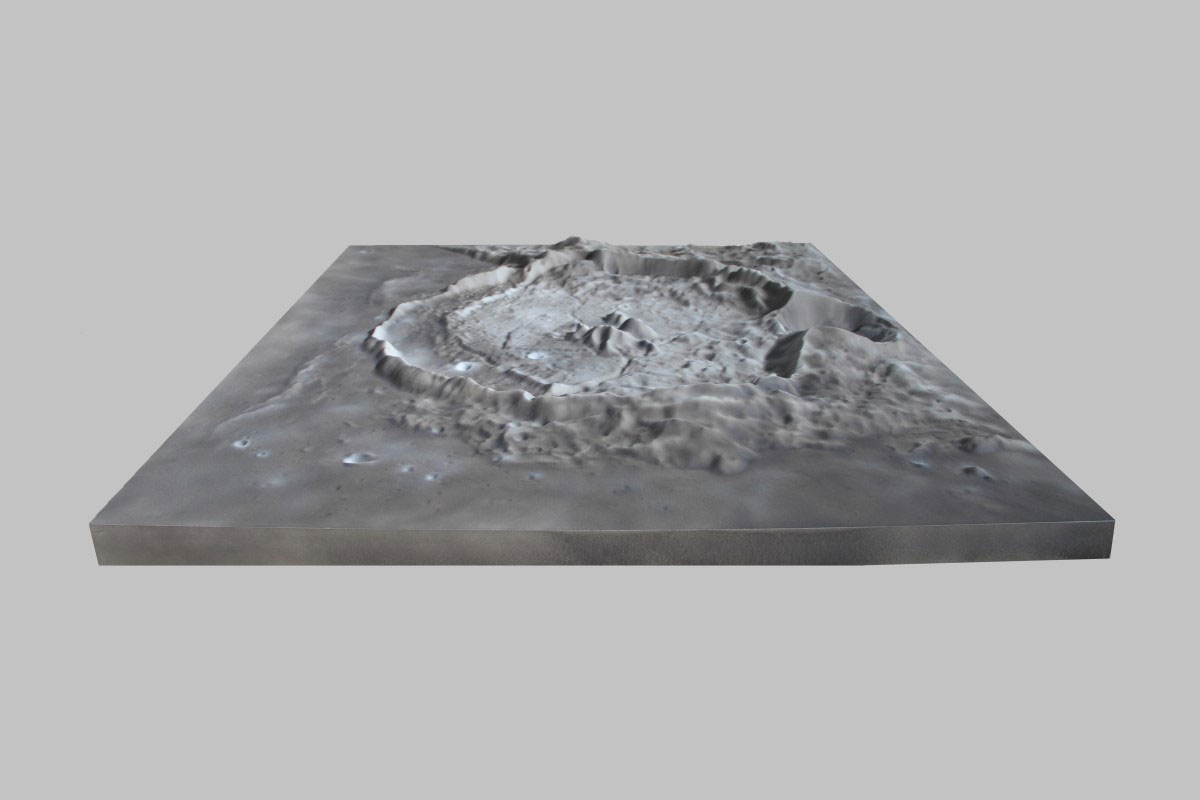
Choose the part of the Moon the model needs to show
Begin by defining the geographic extent. A broad lunar overview supports orientation and comparison, while a selected region can devote more of the available surface to a crater, basin, ridge, landing area, or other bounded terrain. The requested extent should be identified with coordinates, a marked reference image, or a clearly named region so the physical model and the source data describe the same area.
Also define how that area should be presented. A buyer may need a globe-like view, a relief panel, or a bounded terrain section rather than a generic image of the Moon. The presentation geometry affects what can be shown near the edges and how visitors will understand direction, scale, and location.
Plan the terrain for the finished display scale
A useful relief display balances geographic fidelity with the amount of terrain detail people can actually perceive at the intended size and distance.
Horizontal extent
The same model width can represent a large lunar region or a tightly framed site. A narrower extent generally gives individual terrain features more room to read.
Relief emphasis
Natural elevation differences may be subtle when reduced to display scale. Discuss whether relief should follow the data directly or be adjusted so important terrain remains legible.
Viewing distance
A model viewed from across an exhibit needs a strong overall terrain pattern. A close-study display can support finer surface variation and more detailed labels.
Edge treatment
For a regional model, decide how the selected area ends and whether its perimeter should be rectangular, follow a mapped boundary, or fit another exhibit component.
See how elevation data becomes raised lunar terrain
NASA elevation data can serve as the terrain source for a lunar relief display, as in the Moon topography references shown on this page. The physical surface makes crater rims, slopes, depressions, and surrounding terrain visible through form rather than relying only on a flat shaded map.
These images are useful references for the visual effect of raised relief. A new display should still begin with its own geographic extent, data source, size, orientation, and communication goals.
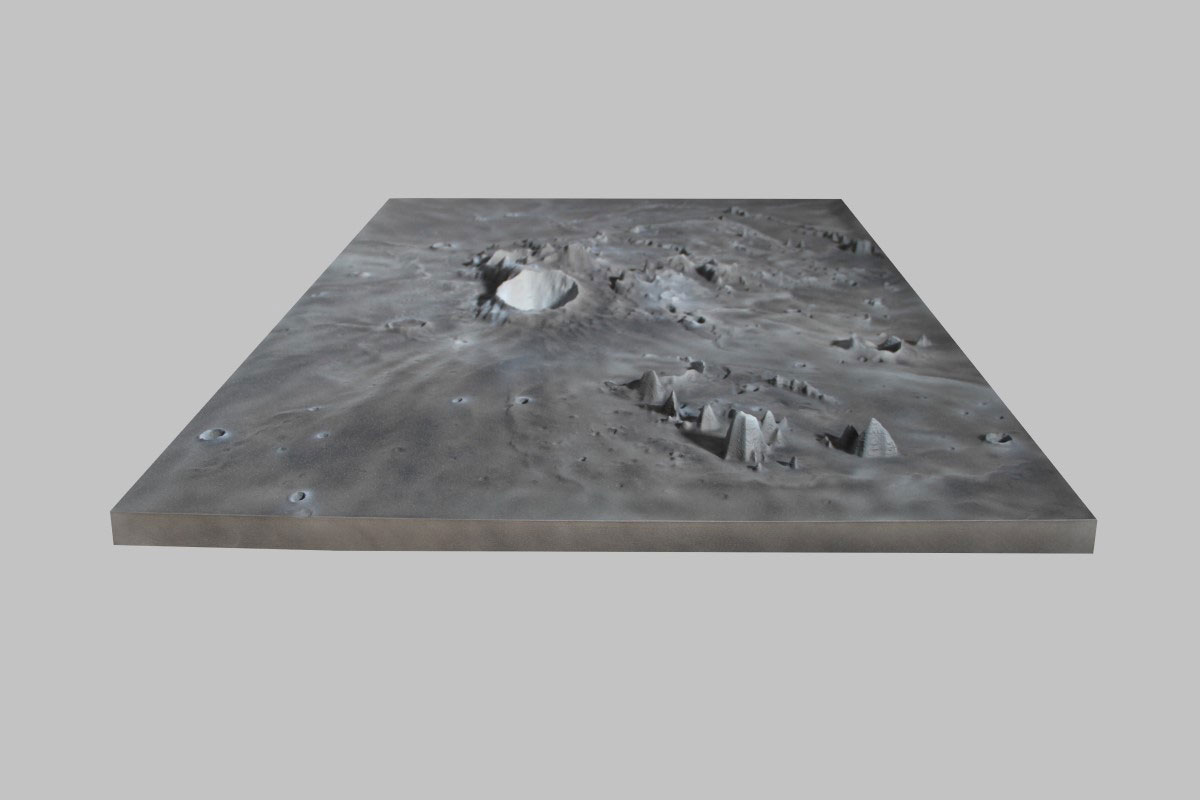
Fit the model to the way people will encounter it
A wall-mounted relief can work as a graphic focal point or a labeled reference. A tabletop or pedestal presentation allows closer inspection and may support viewing from more than one side. An exhibit-integrated model may need to align with surrounding graphics, cases, controls, lighting, or an existing footprint.
Provide the maximum display width, height, and depth, along with the normal viewing direction and approximate viewing distance. Include information about wall construction, pedestal dimensions, case clearances, access paths, and any planned enclosure when those conditions are already known. These constraints help establish a practical format without assuming a mounting or support system before the site is understood.
Decide what the model should explain beyond terrain
Labels and exhibit features should support the physical relief instead of competing with it.
Labels and markers
Identify the exact craters, regions, coordinates, routes, or points of interest that need labels. Note whether names belong on the model, on a key, or in adjacent graphics.
Color and graphics
Specify whether the appearance should be monochrome, data-driven, realistic, branded, or coordinated with an exhibit palette. Supply any required color or graphic standards.
Lighting
Lighting may be considered when it has a defined interpretive or display purpose. Describe the desired effect, operating conditions, available power, and control expectations.
Interactive features
If visitors need to select locations, trigger information, or connect the terrain to digital content, describe that interaction and the surrounding exhibit system early in planning.
What to provide for an initial project discussion
A useful starting package connects the terrain request to the physical display conditions.
- The full Moon, selected region, or exact coordinate bounds to represent
- Preferred terrain or elevation dataset, if one has already been selected
- Marked reference images and the required orientation
- Maximum display width, height, depth, and available footprint
- Wall-mounted, tabletop, pedestal, enclosed, or exhibit-integrated format
- Normal viewing distance and important viewing sides
- Required labels, markers, legends, colors, and graphic files
- Any lighting or interactive objective and available power information
- Indoor environment, access constraints, destination, and required date
Request pricing for a custom 3D Moon topography display
Send the lunar extent, source data or marked reference, preferred dimensions, display format, viewing distance, label and graphic requirements, destination, and required date. Include any known mounting, enclosure, lighting, interaction, access, or installation conditions that should be considered in the scope.