
Planning a Giant Endoscopy Display Prop
A giant endoscopy prop needs to enlarge a compact medical instrument without losing the relationship between its control body, flexible insertion tube, connector, buttons, and labels. The display should be treated as a nonfunctional educational or promotional replica unless a separate functional requirement is explicitly scoped.
Discuss a Medical Display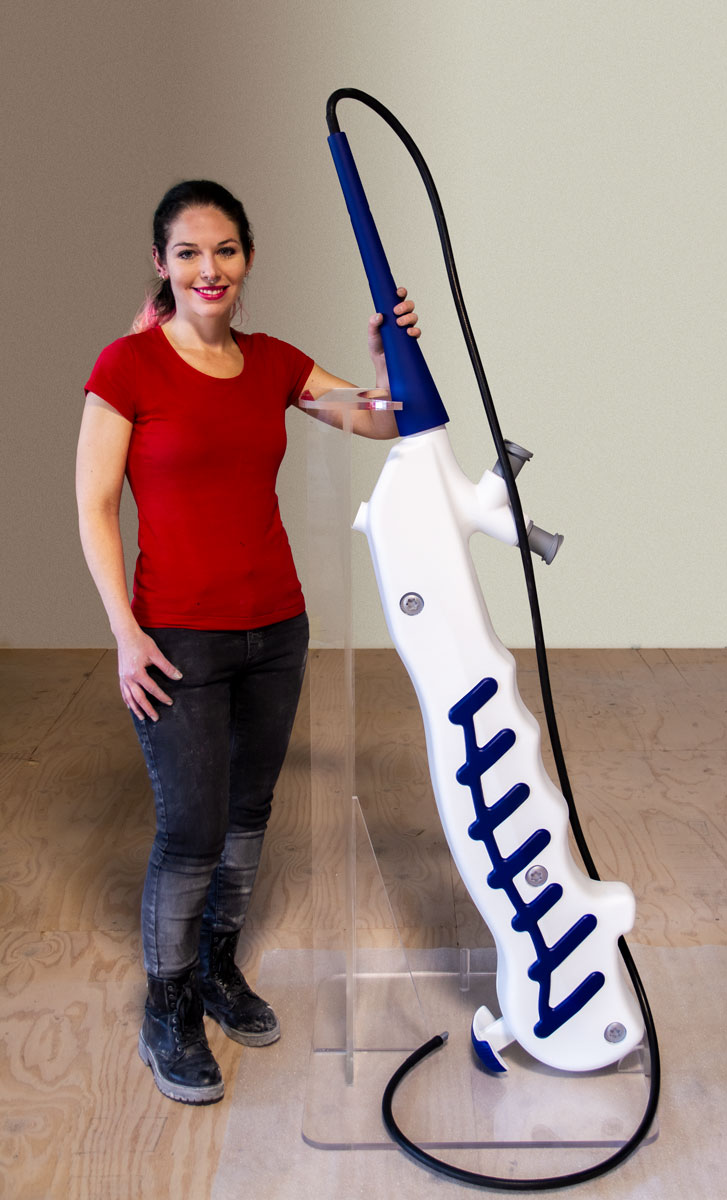
Identify the exact endoscope configuration
Endoscopy equipment varies in control layout, connector shape, tube length, tip design, and labeling. Start from the precise device or model that the display should represent. A physical sample, CAD file, or matched views are more reliable than a single marketing photograph, especially where one side of the control body hides buttons or ports.
List the details that matter to the audience. A product-launch display may prioritize external controls and brand markings, while a teaching aid may need a specific tip, connector, or labeled pathway to remain clear. Enlarging everything equally can bury the most useful features.
At trade show distance, the control body and overall tube path may matter more than tiny printed legends. For close teaching use, button groups, directional marks, and tip geometry may need greater fidelity. Mark the audience line, presenter position, and camera angle on an elevation before setting the final enlargement factor.
If a presenter will point to or handle any part of the display, describe that use precisely. Also state whether the replica is stationary, transported between events, mounted to a wall, or integrated into a larger exhibit. Any lighting, removable section, cutaway, or working demonstration should be identified as a separate requirement.
Give the tube and control body separate jobs
The long curved element needs an intentional route rather than being treated as leftover length.
Control body
Set the grip, buttons, switches, ports, and label areas from accurate views and identify the side that faces the audience.
Insertion tube
Define its apparent diameter, curve, length, and endpoint, along with the supports or background needed to keep the path readable.
Connector
Decide whether the connector is part of the main vertical composition, a separate labeled element, or omitted from the display brief.
Stand and labels
A floor stand can organize the full instrument and educational callouts, but its height and footprint should not hide the device silhouette.
A full-height presentation keeps the instrument relationship visible
WhiteClouds fabricated the giant endoscopy prop shown here for Karl Storz. The upright arrangement keeps the control body near presenter height while the long tube remains visible against a light background rather than disappearing into the surrounding space.
Source material for a useful estimate
Exact product references and the intended teaching or promotional job should lead the request.
- Device model and approved reference package
- Front, back, side, connector, and tip views
- Target overall scale or control-body height
- Required buttons, labels, and color coding
- Tube length, path, and endpoint
- Stand, wall, or exhibit integration
- Presenter position, access, and transport limits
- Destination and required date
Request pricing for a giant endoscopy prop
Send the exact device reference, target scale, required controls and labels, tube route, stand or exhibit plan, audience distance, interaction requirements, access limits, destination, and deadline.